
How to install a socket. Step-by-step instruction Lighting,Useful advice
What could be easier than installing a wall outlet? In fact, this is not a difficult process, but requires a very careful relationship. Like any other electrical appliance, a socket, in case of incorrect installation, can cause short circuit or fire. Therefore, it is important to connect it correctly.
Content
Routing
Answering the question how to install a socket, it is important first to tell about the sequence of work. It depends on how much you quickly handle work. Before starting any actions, turn off the machatal automata (in front of the meter). Installation consists of the following steps:
- cabling,
- preparation of a niche for a socket,
- installing pickle
- connecting the inside of the outlet,
- fixation of decorative lining.
This scheme is valid if the socket is mounted during the repair. In the event that it was necessary to make another outlet after performing fines, the process is complemented by several more actions:
- make a shit under an electric cable
- put and stretch it to the outlet.
We will tell you how to fulfill this work with minimal efforts and destruction.
In addition, you need a specific tool for work:
- hammer and chisel or perforator,
- plugs
- passatia,
- insulating tape,
- little nails,
- putty knife.
Of course, it is easier to stick with a perforator, but if the walls are made of limestone, it is better to use the bit. The perforator will leave too deep and a wide stroke, in which it will be difficult to fix the cable, moreover, you will need more plaster or cement.
If we are talking about the walls of silicate or red brick, then the only option to break through the stroke and not split the stone - use the seams between the bricks.
You do not need to do the wooden walls. Instead, use special protective boxes. Usually the cable is pulled under the plinth and output directly under the socket. Fully hide the wires can not be on fire safety technique.
Cabling
This work is easier to perform after all draft works. To begin with, consider this option. First of all, before you lead the stroke, you must connect the electrocabylon to the counter correctly.
The process is not complicated, standard modern meters allow you to simultaneously start up to eight cables. It is advisable to connect each room separately, it will be secure from melting isolation. In case of overload, the automata is turned off faster than the fire will occur.
Another important point is the cross section of the wire. With a standard voltage of 220 V, the network constantly jumps the strength of the current from the standard 16 or or less, up to 20 or more ampere. In addition, the current strength can sharply increase at the time of the network overload (if more than 3.5 kW is consumed at the same time). Therefore, to use a wire with a cross section of less than 2.5 square meters. mm. Not recommended.
Also, it should be determined in advance at what height install sockets. From the point of view of decorative design, all visible sockets must be at one height. More often, the placement of electrical appliances in the room is thought out in advance and install sockets where they will be most imperceptible. It is important to remember that small children may chance to choose the purpose of the next game just a socket. Therefore, it is recommended to install either protection, or do not constantly used sockets at an altitude of 60-80 cm. The design of protective sockets is supplemented with a special lid, which is quite difficult to open for a child. In addition, it protects against dust and garbage.
After you have determined where to install sockets, go to the stroke. This is a small channel in which the cable will be held. Its depth and width is 1.5 diameter of the electrocable. The smaller will be shit, the smaller the cable will be needed. The only mandatory condition - the wire must be approached to the outlet below, therefore the stroke is made by 5-10 cm below the rosette level. This rule is relevant from the practical side, as it makes it easier to work with wires.
Paving the cable, it must be fixed. For this, there will be small carnations. From clogged into the wall and reflect the wire so that it does not fall out. Immediately launching the wall it is impossible, as it is necessary to check if the electricians work.
Installation of pickle
Responding to how to install a socket correctly, first of all it is necessary to talk about its foundation. Cutting there are two types:
- for stone
- for drywall.
Sometimes cutting for wood, but it is a purely marketing move, since they do not differ from the stone. It is impossible to install a rosette on the straight wall, as this is contrary to the rules of fire safety.
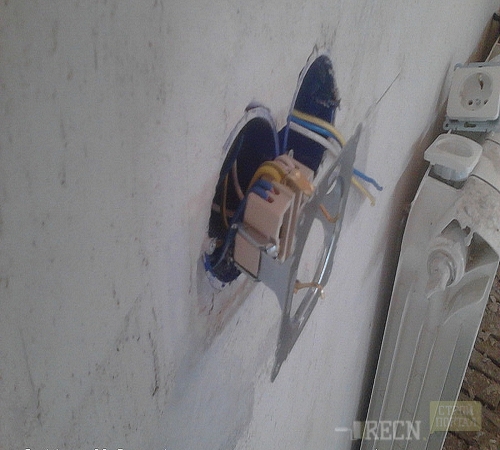
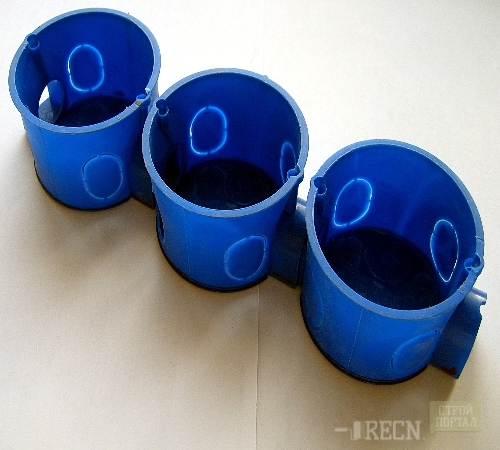
Outbreaks for drywall look like a round plastic box with metal legs on the outer sides. With the help of nappins, the paws are dragged and moved to the sides, tightly fixing the design in the wall. They work according to the "butterfly" principle, crimp the drywall not only on the sides of the cut, but also stick to the leaf itself. The diameter of the cut must be several millimeters more than the peasant.
Installing a rosette in plasterboard it is important to remember:
- shtroba is necessarily done in the bearing wall,
- the cable comes out of the shine only opposite the outlet,
- before inserting a cutter in plasterboard, you need to stretch the cable into a cutter,
- the cutter should be inserted from the first time, otherwise you have to make a new hole.
Working with stone walls is more convenient, since there are no clear requirements. General recommendations:
- the opening for the peaper is made of arbitrary sizes so that it is recessed in the wall for 1 cm,
- before fixing, the wires are breeding in the opposite,
- fixed with a cement solution,
- the solution is thrown into two navigations,
- the first portion should be consistency sour cream to fill all empties,
- next, the inner layer is closed with a more thick solution.
In both cases, no less than 10 cm wires should be exitted from the peavercraft, the residues will easily hide in the cavity cavity and will allow without problems to replace the outlet if the desire to change the design or overwrite contacts.
Mounting socket
To begin with, we will deal with the types of sockets, they happen:
- single
- double
- multichannel
- with additional elements.
This separation is influenced exclusively on the appearance, the process itself remains the same in all cases.
Any socket consists of:
- internal housing,
- clem,
- decorative lining.
The inner housing serves as a clamp for a cell, and is also equipped with a special mechanism that allows you to firmly consolidate it in the opposition. On the sides of the cell there are two screws with a wide head, when turning clockwise, they push the special legs and clamp the housing. More modern options have a separated inner case. First the retainer is attached, and part is inserted into it with terminals.
Additional fixation occurs with screws. Around the inner case there is a pad with special holes. They coincide with holes on the opposite.
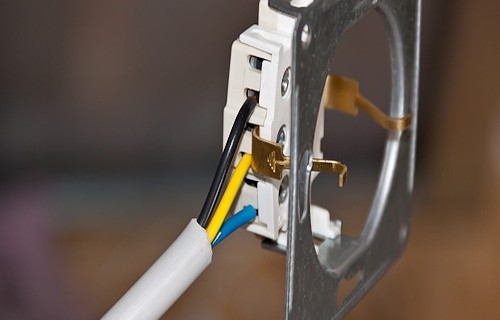
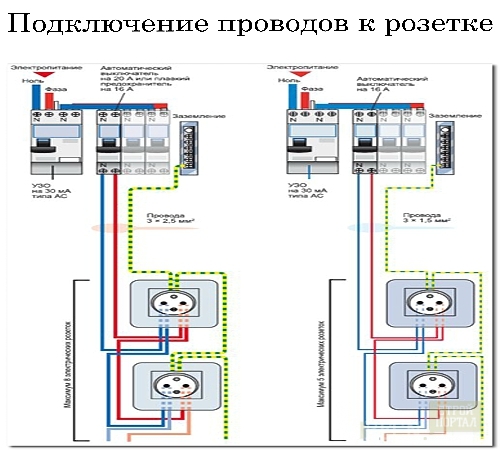
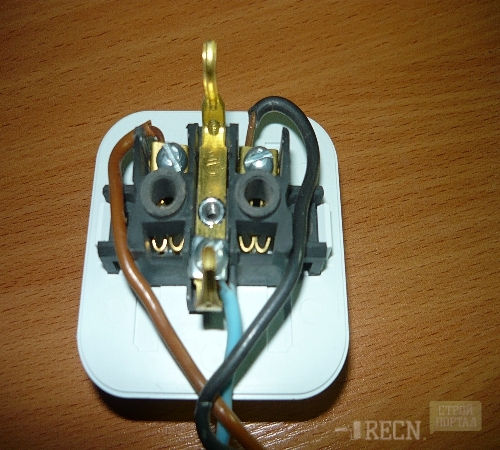
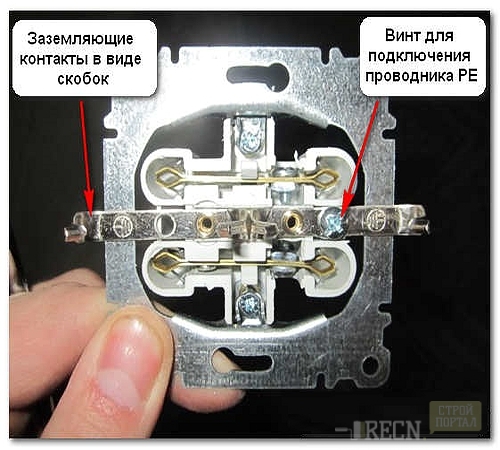
Power connection is reduced to the fact that one wire is attached to one of the clamp with a clamping bolt, and the second one is another. This is true for two-housing cables. If you want to install a rosette with grounding, you will need a three-core cable. Usually land or yellow, or brown or in a voice. Remember its color when ground the cable on the counter. On the inner case of the sockets, find the hole in the middle (on the element that connects the terminals) and plug the land to it.
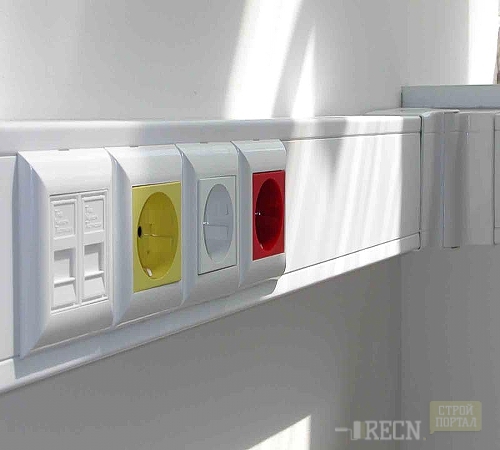
In order to set a double outlet, you need to perform the same actions. In composite sockets, long terminals binding all inlets are used, so there is no need to connect each connector separately. Decorative lining can be on 3 or more sockets. In this case, they put two or more conversion. Between themselves, the terminals are connected in parallel, from nourishing to extreme.
Therefore, the principle is also arranged and the rest of the wiring. The main cable is only before the first point. Further, individual pieces of the cable are packed, which are connected directly in the outlet (the feed cable and the continuation is twisted and fixed by the clamping bolt).
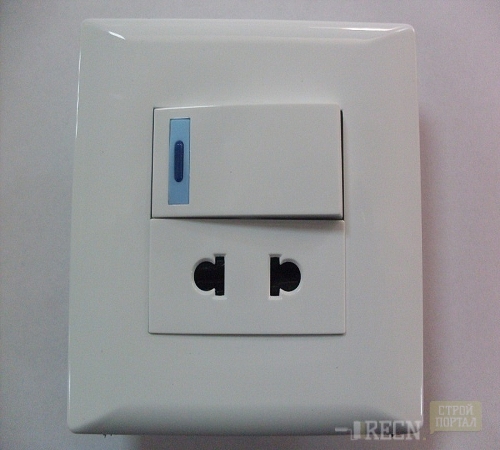
After all the fixation and power connections are made, the decorative facade is dressed. There are many varieties of such linings, one of which consists of a socket and switch. Install the socket with the switch in exactly as well as multi-storey. If the switch must turn on the lighting, the feed cable is connected first to the outlet, and the switch is powered by it. The socket is constantly on the voltage, so the current will continuously be fed to the switch. If the switch must turn on the rosette itself, the connection is made on the contrary, the power cable to the switch is powered by it. With this scheme, the switch will be a circuit breaker.
Installing a socket after finishing works
As a rule, a similar question arises if the terminals of the outlet are melted. This is due to bad contact between the metal fork and plates. Plates are cleaned from time to time, or if the quality of the inner case does not meet the standards. The easiest way will be protected from this problem, asked how much inclusions the socket or switch is calculated. This is a normal question, since manufacturers carry out appropriate tests. The work on replacing the socket is performed like this:
- disable electricity (preferably on a daisy machine),
- remove the lining
- unscrew the inner housing
- disconnect the wires
- connect a new outlet.
In the event that an old socket is needed in the replacement, then you will have to install it and only then go to the installation of the socket.
The most unpleasant situation when high-quality repairs are made, but it becomes necessary to add multiple sockets. But it is possible to do with "low blood."
- from the counter is powered by a new cable,
- shtroba is done down to the floor,
- next, the cable is started under the plinth,
- from the plinth, clearly perpendicularly rises to the location of the socket.
If the socket is needed indoors, where the walls are made from the tile, that is, the solution and this question. The height of the socket in this case is determined by the maximum long drill of the perforator.
- the cable is carried out under the plinth,
- on the spot where the outlet will be located, one or more tiles will be removed (so that the perforator wrestle is drilled and the channel is drilled to the floor,
- under the plinth drills the hole connecting the channel,
- the cable is stretched to the socket.
If you managed to remove the tile without damage, the hole is drilled in it, then we collect according to the standard scheme.
In order for the tile to not be cracked, the chisel and a cynica need. It is necessary to carefully knock out the grout, then tick up a light tile, gradually deepen the chisel under its edge, 20-30 minutes of work, and you remove the whole tile.
New comments
Add a comment
To send a comment you need authorize.




On the video guy idiot. The quality of work is bad. Brown Earth has always been, white zero, blue phase. I feel imagine with wiring, I do not envy the owners.
no, I was mistaken, blue zero, yellow-green earth is always, and all other colors indicate phases
Marina, usually in sockets located nearby lead one phase, i.e. First, the phase goes into one socket, and already from it there is a separate wire, but if you have one with white and blue at once in one rosette, and the other with pink, yellow and blue, which means each socket is on individual phase (separate wire from a shield or connective box, ...), as I wrote blue always zero) Yellow - Green is always the Earth, and the pink and white is a phase by which there is a current (this does not mean that you will not hit the current touched you To zero !!!) Wherever the three wires you are connected to the Earth, but again you need to see where the yellow wire is connected in the outlet, if you have a zero bus (to the bus with blue wires), you just have a zero, it is not grounding.
I expressed my point of view) if anyone has his thoughts - write)
and I have a double outlet. Under it, two conversion on plasterboard was installed, from one wire with two color - white and blue, and from the other conversion, the wire with three color - pink yellow and blue ... So I sit, guess what ... As I understood, I need yellow (earth) to throw two outlets, jumper. But probably I am better to call an electrician.