How to install a steel bath Plumbing
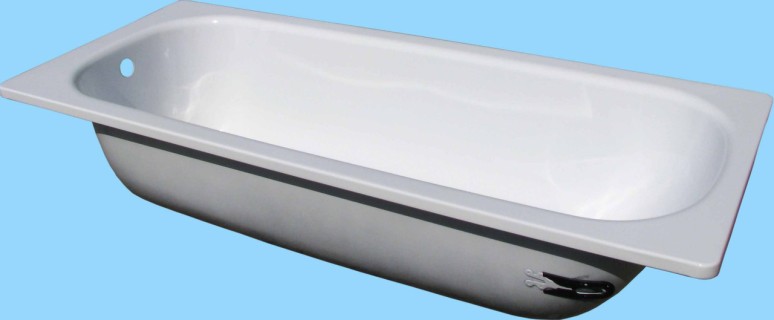
The steel bath, unlike the cast iron, has a much smaller weight, due to which its installation is greatly simplified. Nevertheless, there are a number of technical features that need to be considered. In this article you will learn all the subtleties and features of this process.
Content
Start and preparation
By itself, the installation is much easier than the installation of other types of baths. Especially those equipped with additional elements (hydromassage, built-in lighting, etc.). Installing the steel bath with your own hands - the process is simpler and more understandable newcomer. But before starting direct installation, we advise you to take into account the following:
- In comparison with acrylic baths, this is still harder. Accordingly, it will take three walls of the bathroom for installation, and not two. Only in such conditions it will not slide or wander.
- When you pick the bath, calculate it to come into contact exactly with the side walls of the room. If the length is shorter than 5 centimeters, it is better to choose another. If the size is greater, you just can not install it. Unless you have to cut part on the ends. But this is an extreme measure, to resort to which we would not recommend.
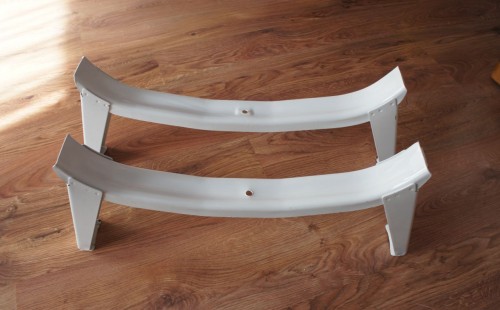
- Determine how you will mount the bath. Included, as a rule, are adjustable supports. It is better to choose those on which there are special self-adhesive lining. They will not scratch the tile during operation, unlike metal bolts.
- Watch the supports to be shorter than fastening bolts.
- If there are only baths with one type of fastener, you will have to strictly follow the attached instructions to do everything correctly.
You should also highlight a few advantages of steel bath:
- a small weight makes it possible to install it completely independently. You do not have to ask for someone else's assistance during the installation and fastening and, especially, to cause plumbers;
- the bath itself is quickly heated and more comfortable;
- its cost is much lower than analogues from other materials, which makes it available to everyone;
- enamel, which is covered by steel, is distinguished by high strength and endurance to physical exposure.
A very important step to be implemented before the installation starts - noise insulation. The fact is that when the water is gaining, the sound is quite loud and unpleasant. To reduce its level at home, you can use bitumen based materials. The rubberized material is also suitable, which passes on the outside of the bath and the water drop location.
Please note that noise insulation should be done when the surface has room temperature. In another case, the efforts may be in vain.
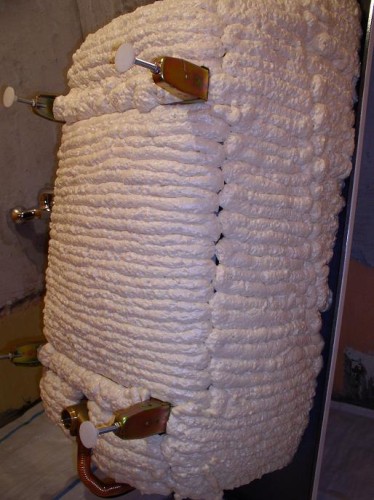
As isolation, you can use the usual mounting foam. It is enough to apply it to the outer side of the bath and attach a polyethylene layer on it. The main thing - before the subsequent work, give the material to dry completely.
How to install a steel bath right. Instruction
All the process we advise you to implement strictly on the list of actions:
- It all starts with surface preparation. So that the place is suitable for installation, it must be carefully cleansed from garbage and dust. Initially, think about whether you should replace the tile and tile at this stage. If so, then it is better to do it right away that in the future I did not have to dismantle.
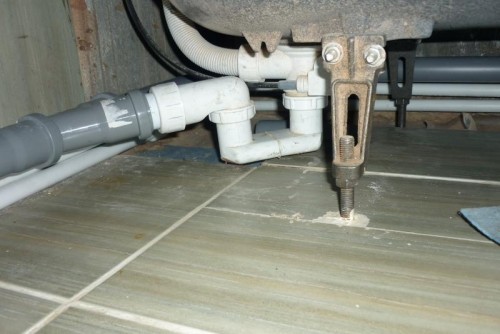
- Now it is necessary to establish the connection of the drain hole and drain drain. The process itself is quite simple, but you need to ensure that the sealing is complete, otherwise the water will leak. For this, all screws must be screwed tightly. Today, these elements are issued without defects, so there will be no problems. But sometimes it may take use the sealant. It is very important to do it before you put the bath on the legs and align.
- When put the bath, it is necessary that she had the right slope. Most importantly, it is not allowed that the drain hole is higher than the opposite edge. Water simply will not drain to the end. A small reverse tilt is possible, but not recommended. To align the angle, use the usual building level. It can be simply put on the bottom and adjust the legs. But do not forget that most manufacturers initially make a small angle of inclination towards the drain.
- Install the supports. If it is self-adhesive lining, they are attached only when the bath is turned upside down. On the reverse side of the bottom you will find points by which you need to install the legs on the steel bath.
- Now the bath can be transferred to the place where it will be installed. To better fix it initially, we recommend that we fix the steel bath, drive the wooden wedges between it and three walls. Do not worry, you will remove them when you finally lock.
- In order not to damage the edges, it is recommended to stick on them a dense construction tape, after which a mounting foam is blown between the walls and walls of the bath. After that, wait until the foam dries, and you can remove the tape and pull out the wedges.
- After that, there is an opportunity to install a wall tile or tile without any problems. This will not only give beauty to the interior of the room, but also protects the surface from possible damage.
- Now additionally check how tightly the bathroom is holding and you can study finishing works. You can also set the screen to hide any drawbacks.
How to install a steel bath on bricks
Despite the fact that the light weight of the steel bath allows it to stand firmly even on its legs, the additional strengthening will not be superfluous. Especially if you like to gain more water into it.
You can do without two additional supports under its bottom, however, it is also much more effectively to establish brick columns under the side, which will additionally hold it and fix it.
To do this, work will also divide into several stages:
- Preparation. In addition to all that was described above, you will have to make complex measurements of width, height and length. It is necessary that you know exactly where the supports will be located and avoided the need to redo them to shift. The whole design should lie tightly and not fumble. Brick also need to be chosen in such a way that he is already the side and did not look after installation.
- When you perform measurements, transfer them to the floor and wall with a pencil or chalk to designate where future supports will be installed. The masonry process itself is recommended to start with two central supports.
- After that, set the side supports. When they are installed, and cement has not yet frozen, once again check with its measurements in order to be able to correct the situation in case of an error before cement freezes.
- Now you need to just wait until the solution dry and grab. Do not install the bath for just installed supports. Brick can go due to fluid solution or tammes. Do not hurry. Usually, for complete drying, you need to wait about a day.
- Apply a polyurethane foam to the bottom and the bottom of the sides and you can install a bath to support. Do not forget that before this it is necessary to adjust the legs exactly by the same scheme that was described above.
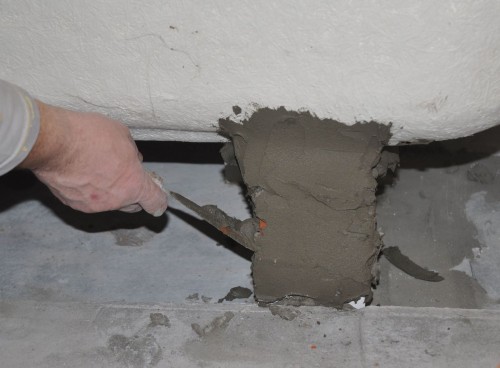
- For additional fastening between the bathroom and the walls, all compounds are recommended to strengthen cement mortar or tiled glue. From above, all this is covered with a layer of sealant.
Security - above all
Regardless of how professionally and efficiently you install the bath, you always need to take care of the ground before operating. Metal is one of the best conductors, and an ungrounded bath is a direct threat to health and life. For grounding there are special "petals" with the "Earth" wire.
Fortunately, almost all modern manufacturers initially produce their goods with these devices. You can only clean the wire and hold it between the washers. This is a couple of minutes work, but it is one of the most important and responsible stages.
If you live in an old house, the electrical wiring faults are clearly familiar to you. Yes, and in new buildings from this no one is insured. To avoid accidents, do not forget about grounding and regularly spend its inspection during operation.
And this rule is valid not only for steel baths, but also for any other, the material of which is a conductor. We wish you a light and safe installation.


