Applying decorative plaster with your own hands Construction,Building materials
Repair - a pleasant and frightening event at the same time, especially if you decide to make it on your own. In this regard, a simple man has a mass of diverse issues: the choice of materials, the necessary comparison of price and quality indicators, the technology of applying finishing and decorative means of anyone will be headed in a dead end.
Content
- What is the decorative plaster
- Required Arsenal Tools and Materials
- Consumption of decorative plaster
- Decorative Stucco Technology
- How to apply decorative textured plaster
- Technology of applying decorative Venetian plaster with their own hands
- Features of the application of structural plaster in various techniques
- How to apply decorative structural plaster with a cliff texture
- How to apply decorative structural plaster with the rain texture
- How to paint decorative plaster
- How to cover decorative lacquet plaster
- Applying decorative plaster with the "Rain" texture. Video
One of these stumbling blocks is decorative plaster. What exactly to choose? How to apply? What instruments need to work? In addition, most of the inexperienced newly minted masters believe that it is very difficult to work with this expensive material, but in fact it is not. The species of such plaster are very much, and among them there are those that will like to taste to any wallet. And we will share with you the secrets of applying decorative plaster with your own hands.
Before talking about the features of working with this material, we will explain why today, when choosing a finishing agent for walls in the room, the first thing is remembered precisely on decorative plaster. Here everything is extremely clear, and you will understand this, working with such a plaster at least once.
The material boasts high quality, ease of use and a spectacular type of finished work. Almost all decorative plaster is presented in the form of a paste, with which it is easy to control both with the help of tools and "bare" hands. In addition, the plaster can be used not only as an independent finishing agent for walls and ceilings, but also as a convenient basis for another material. When the room requires immediate and high-quality repair, preference, in the opinion of many experienced masters, you need to pay decorative plaster. Today it is one of the most sought-after materials in the field of finishing the premises.
What is the decorative plaster
In order for the choice of finishing material to be competent and carefully thought out, you need to have at least general ideas about the types of decorative plaster. The modern building materials market offers several options for this facing agent, various on the texture and specifics of application.
Structural plaster
The peculiarity of this type of material is the possibility of reproducing the pattern on the working surface due to the shallow pebbles and pebbles in its composition. The main component of the creamy plaster is the mineral base from cement and lime. Latex or potassium silicates are actuated as auxiliary materials, and water or organic compounds from solvents. It does not matter, on what basis the solvent, aqueous or alcohol, structural plaster in any case will become a remarkable design of the wall.
This material appreciated both professionals in construction work and newcomers, because of him, if desired, it is very easy to apply onto a working surface without auxiliary instruments. By the way, structural plaster in a divided form is sold, that is, it is ready to use right away, which is also very convenient.
Textured plaster
Application of decorative plaster of this species allows you to give the surface of the wall or ceiling. Spectacular smooth relief. The craftsmen consider working with this type of finishing material by real art - textured plaster is an excellent way to express your fantasy and creative potential and allows you to create a unique drawing with your own hands.
The "raisin" lies in the ingredients, on the basis of which the textured plaster is produced. Grinding limestone and special fillers are granite and marble crumb, fibers and frolish polymers - in the chemical composition of this material allows you to create original and attractive patterns on the surface of the walls and the ceiling. Moreover, the texture plaster is known for its rich palette. The texture plaster is very plastic and at the same time durable - after drying on its surface, cracks are not formed.
Venetian plaster
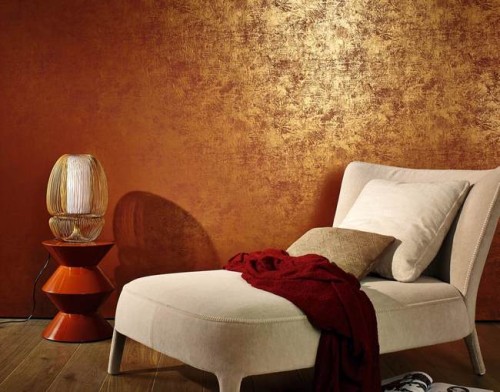
Due to this material on the wall, you can recreate the effect of the marble surface. In addition to the main component, marble flour, aqueous emulsion and fastening limestone are present in the composition of the Venetian plaster. Applying Venetian plaster on the wall or ceiling, you will immediately see how reliably it mimics the marble stone. You do not have to spend time on the preparation of the solution - this type of plaster is already sold in the form of a finished paste.
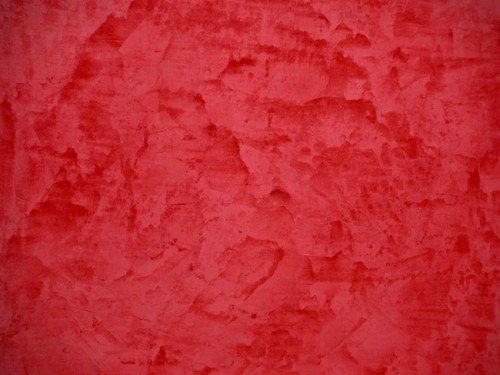
Among the undoubted positive qualities of the material, we note high water resistance, wear resistance and fire safety. In addition, the Venetian plaster does not have a specific smell inherent in other types of this finishing agent.
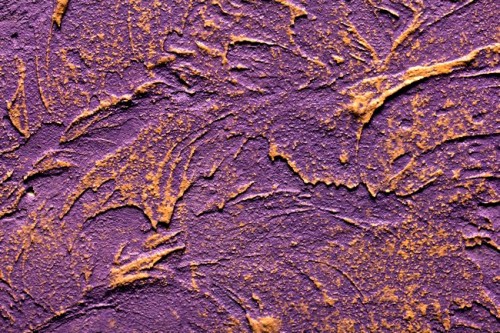
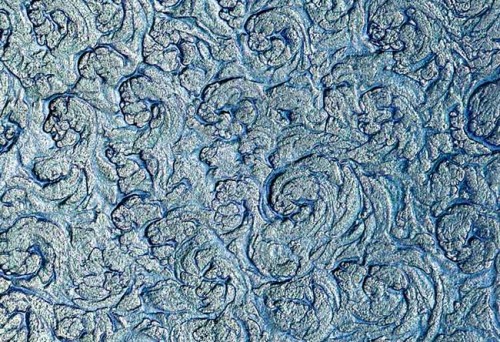
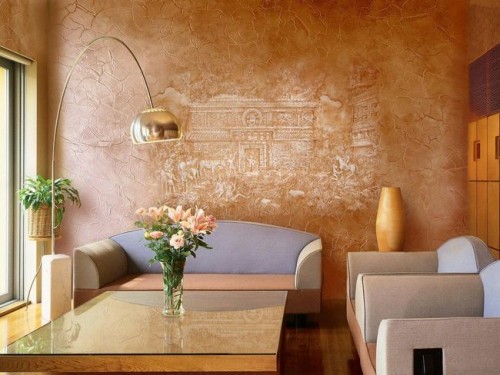
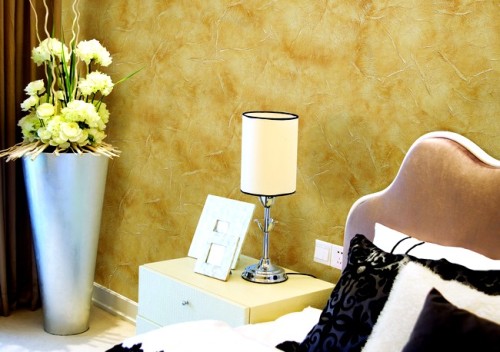
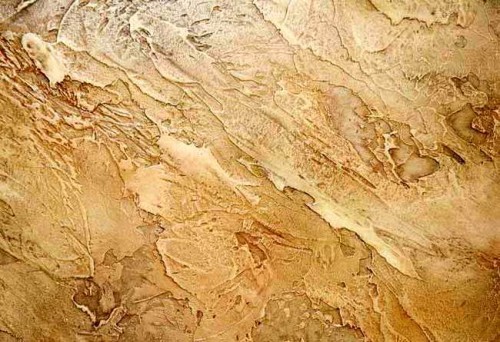
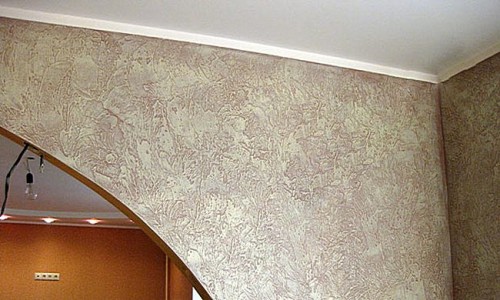
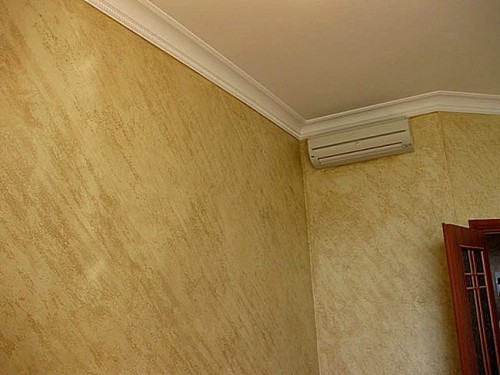
To finally be convinced of the exceptional attractiveness of the finished works, made on the basis of decorative plaster, you will help you to photo:
Required Arsenal Tools and Materials
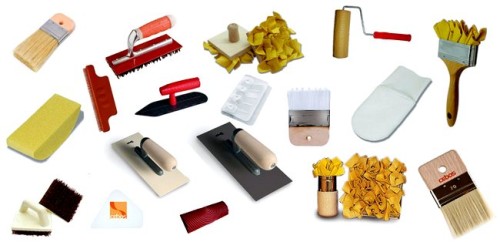
Let's learn what tools, materials and household items will be needed by the Master for finishing the surface with decorative plaster. So, that the walls and ceiling in the room are transformed beyond recognition, you should stock:
- decorative plaster;
- polymer soil;
- polyethylene film;
- paint;
- wax;
- painting ribbon;
- galvanized bucket;
- spatula;
- kielma (trowel);
- maklavitsa;
- tassel;
- roller;
- sponges and rags.
Consumption of decorative plaster
With how much facing mixture is needed for work, determined depending on the type of plaster. So, per quarter. m required from 70 to 200 g of decorative Venetian plaster, and the decorative structural plaster "Coroed" - only 2.5 - 3 g.
If independently consumption of plaster is not treated, you can resort to calculations on the online calculator. This program can be found on the sites of almost all construction companies offering their materials and services. To get the most accurate result, you need to know the type of mixture you plan to use, the surface area that is going to transform, as well as the average thickness of the plaster layer.
Decorative Stucco Technology
The eyes are afraid, and the hands do - it is this wise saying that you need to be guided, starting working with decorative plaster. Remember that everything is not so difficult, as it seems at first glance.
How to apply decorative textured plaster
- First deal with the preparatory work: Align, clean and dry the surface that subsequently cover the finishing material.
- Apply a primer and wait for it to dry completely. Now apply special paint with sand on the projected surface - this will provide a reliable adhesion of decorative textured plaster with the wall. Sand in the composition of paint creates on the working surface, the ribbed texture and the material "imprinted" into the wall is denser.
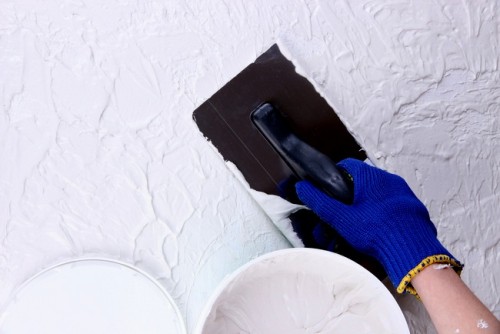
- With the help of a trowel, cover the surface of the wall or ceiling 1 - 2 layers of textured plaster, following the uniformity of the material. The more difficult the pattern that you plan to create, the more layers of plaster you need to apply. The thickness of the layer should be minimal.
- To give the working surface an unusual look, use special paint or wax that will make walls (ceiling) shiny. You need a roller or a spatula to work.
Technology of applying decorative Venetian plaster with their own hands
Since "Venetian" invented, the methods and technique of its application are extremely simplified, and you quickly adapt to work with the material, even if you are new in this matter. To feel more confident, work out work with decorative plaster on a separate piece of any sheet material. As soon as you enjoy the results of your efforts, proceed to this work.
- Make sure the work surface before starting the work is smooth, clean and dry. An uneven wall thoroughly align with stucco and wait for it to complete drying.
- Apply a special polymer primer to the surface in 2 layers.
- It was a queue of decorative plaster. You can work with steel grades, cielma or spatula - at your discretion. Keep in mind that the pattern and texture that will take facing material depends on the size and shape of the auxiliary tool. That is why the corners of the grater or spatula must be perfectly rounded and ground, without a rough surface and jar.
- It is transferred to the main work after the final drying of the primer, the layer of the layer apply a decorative coating with a cell or spatula. Each layer must be completely dry, then eliminate irregularity from their surface by stripping. The lower layer of Venetian plaster requires applies to a wide grad or a celma, and the upper coating layer is layered with a small spatula. After a quarter of an hour after applying the last layer of small "sandpaper", its surface is determined by circular motions. Remember that they work with small portions of "Venetian", as the material dries quickly. In this case, the tool is placed to the walls at an angle of 15 degrees.
- For a tinting of the mixture, start from the first primer layer, evenly distributing it throughout the working surface - this is the base that will provide the main color of the decorative plaster. After 4 - 5 hours, when the coating will dry, polish it with the sandpaper "zero", and then clean the surface from the dust formed.
- Apply the second layer of decorative material in arbitrary directions, applying the technique of chaotic small smears. The remains of the plaster on the edges of the working tool must be regularly removed, otherwise the dry surplus will spoil the overall type of surface.
- The third layer of "Venetian" will make the wall textured. The unique pattern creates the laying of smears. The characteristic gloss appears with a multiple grinding with a spatula with a row pressure almost in parallel to the surface. To dry out "Venetian", you will need a day at room temperature.
- The complete hardening of the material will happen in a week, then the surface of the wall or ceiling can be covered with protective colorless wax. The use of this tool allows you to obtain an increase in the visual effect of the optical illusion by changing and refracted by the angles of the beams of light.
Features of the application of structural plaster in various techniques
There are several options for irregularities that can be created using structural plaster for walls:
- plaster "Coroed" - reminds the wood spoiled insects;
Stucco, imitating stone; - flock stucco with silk effect;
- stucco with marble crumb;
- stucco "Rain" - imitates raindrops on glass;
- stucco "Rock".
Consider the most popular, and most importantly, the most simple in the performance of the coating for interior decoration - rain and rock.
How to apply decorative structural plaster with a cliff texture
Even a beginner master will cope with work. To create a "rocky" surface, you will need virtually any finish putty with a plaster or cement basis. According to the reviews of the most successful in this regard, they consider Sheetrock to be considered, but too soft and loose material (a good example is old) not suitable.
It is important! Decorative coating for walls indoors with high humidity (kitchen, toilet and bathroom) must have the basis of cement. In addition, the surface of the plaster is protected by a thick layer of protective lacquer on a water basis. In places where the accumulation of moisture is the largest (for example, in the bath), make a protective glass, panel or tile apron.
The order of work is as follows:
- Apply to the work wall primer, and then layer of putty - these materials will remove the spaces on the surface and will increase the quality of the coating.
- Type with ironing stratic plaster and uniformly smear it with a thin layer (2 - 3 mm) on a small surface area (approximately 0.5 square). Keep in mind, the thicker layer of the material, the rougher it will look like a wall.
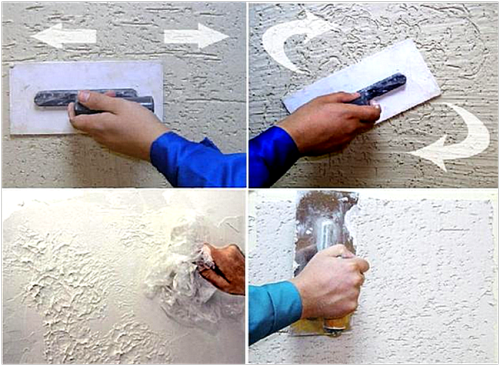
- Now you can create a structural pattern. Press the clean smoothness to the surface of the wall with fresh plaster. At the same time, slightly lift the lower edge of the tool and simultaneously slide it down a bit. If you attach the smooth to the wall close, it sticks to the mixture.
- To get a beautiful original cliff texture, make absolutely different movements, sinking small uneven areas in solution. Create a unique structure by moving the smoothing cross-cross, christmas tree, vertically and horizontally. You do not need to worry about: just smoke what you do not like and try again. Watch that the tool does not leave traces on the surface at the moment when you break it off from the wall. Do it smoothly. Also at the end of work on each site, clean the smoothness from the residual residues, which, falling, can spoil the already applied pattern.
- After graduating from the first site, go to the next, applying it to the pectoris on the previous one, otherwise get unattractive gaps.
- A fully plastered wall will dry in a day, then you can proceed to painting. Talk about it below.
How to apply decorative structural plaster with the rain texture
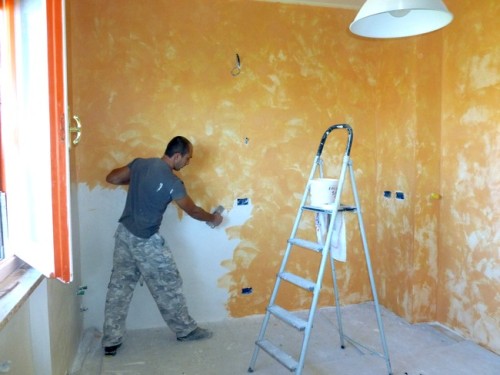
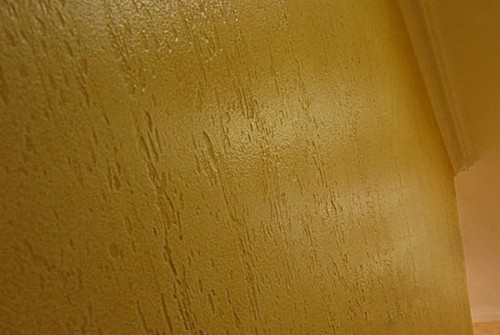
Note that to give decorative plaster texture of gentle raindrops on the glass is much more difficult than to recreate the angular and uneven surface of the rock on the wall. However, if you risen - the result will exceed all your expectations. This is what the wall looks like with the imitation of the rain in the kitchen.
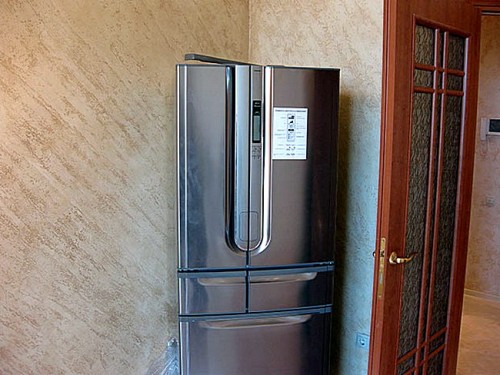
The grooves from the strengtails of heavy rain on tradition are created under the tilt, but of course you can do it as you please.
- To apply plaster at an angle, do to start marking the working wall. Draw on its surface inclined lines wide in 2.5 - 3 ironers. Please note that lines across the work surface should turn out at one angle, and you may have difficulty drawing lines on the corners.
- On each drawn strip, cover the painting tape, following the ladder to cover its lower edge.
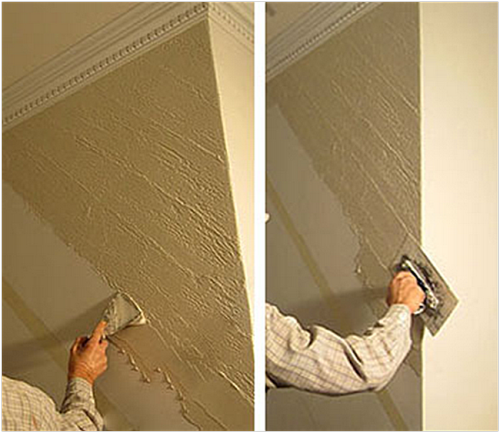
- Work starts from the top corner. Apply a 3-mm layer of plaster on a strip of a width corresponding to the size of a single smoothness, and about 1 m long.
- To create traces of droplets on the wall, slightly press the smooth to the plaster and also easily fly off the tool. Thus, treat the entire strip of solution.
- Note that first the texture will, rather, imitate the needles of the hedgehog, rather than rain. Give her similarity to the jets of raindrops will help the smoothing of the working surface in one direction. The ironing at the same time should be dry and clean. Working, slightly lift one edge of the tool so that it does not completely close with the wall surface. The weaker the pressure on the smoothness, the more irregularities on the wall. Do not forget that the character of the texture defines the thickness of the layer.
- The next strip of plaster is applied, making a small backrest on the already processed section of the wall. At the beginning of work, you were glued with a painting tape on a width, equal to about three smooths, so the third band will slightly stand on the tape. In this case, it is necessary in this case so that the layers do not slip on each other, which can permanently spoil the general view of the wall. Also, the painting tape will not allow you to deviate from the desired angle of inclination in the picture. When you handle one plot, simply take the scotch and continue to work further. As a result, you will get a smooth junction that does not need careful smoothing.
It is important! Be sure to bring work to the end within the same wall! After the interruption on the surface, the difference of the layers will be well noticeable, which, you see, it looks not very attractive.
After drying the plaster, clean the surface of the wall using the abrasive mesh or sandpaper "zero" to get rid of small irregularities. Please note that it is not always not always to achieve a homogeneous pattern over the entire wall surface. Do not cost: in the end, you simply imitate textures of natural phenomena, which symmetry is often alien. Try only to get rid of sudden drops on the working surface, which will rush in the eye at first sight on the wall.
How to paint decorative plaster
Before the primary staining, the surface of the plaster must be projected. Before applying the second and subsequent layers of paint, the primer will not need.
Painting structural plaster in monophonic color, you risk losing the beauty of the original texture on the wall. So that this does not happen, use the colors of two colors. Dry brush and blur - these methods will help make the texture of the wall even more expressive. Painting by the method of erosion will focus on the wpads of the relief, and the dry brush method will allocate irregularities.
The texture of the cliff, given the diversity of natural material, can be emphasized by any of the proposed ways, but the imitation of the rain accepts only the erosion.
Basic (background) color should be applied in several layers. For this it is quite suitable for a roller for decorative plaster with a long pile. Remember that the paint does not need to be applied too thick layer, otherwise it will hide small grooves.
It is important! Painting consumption for a wall covered with decorative plaster will be greater than for smooth walls. For the design of the base for blur paint should be waterproof, for the dry brush method, you can use any paint.
To effectively emphasize the relief with a dry brush, use bright contrasting colors, and to create an accent on the erosion - darker shades.
Dry brush method
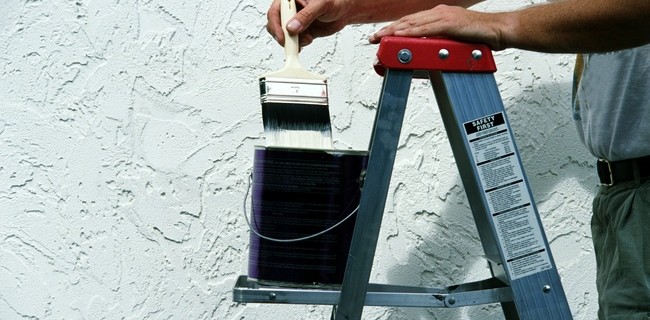
In the process of work, a wide flat brush, a painting bath and pieces of cardboard paper are used.
Pour a small amount of paint in the bath and immerse the brush into the paint. To remove the surplus paint, first wrap the brush about the edge of the bath, and then about a piece of cardboard paper.
Light arbitrary movements cover the paint work surface, moving with a brush in different directions. Keep the tool in parallel to the wall so that only slightly touch them the wall. Move your hand as if you wipe the residues of the paint. Try not to leave tracks from tassels and sharp drops of shades. If everything is done correctly, your wall will look like the one in the photo below.
Method of paint erosion
Wall coating with paint method of erosion - a more complex type of work in terms of time and effort, which is spent during the processing of the wall. The paint of the paint is applied to the paint of the same color, and a partially dried upper layer of a wet rag is erased through a certain period of time. As a result, the grooves on the wall will become darker than convex irregularities. In the photo of the wall, which was first covered with white paint, and then applied and blurred a layer of yellow paint.
It is important! The second layer in the erosion process will wash it easier to use to work in absenty paint.
How to cover decorative lacquet plaster
Application of varnish on a plastered and painted wall - the last and mandatory stage of work. Varnish forms a protective film on the working surface and gives the shine to paint on the wall.
A water-based lacquer is suitable for work (for example, Tikkurila). The remedy needs to be diluted with water in proportion 1 to 1 - after that, the lacquer is well absorbed into the pores of the structural coating. To distribute the lacquer on the wall, use a wide brush. To achieve a good result, varnish are applied in 2 - 3 layers with small time intervals (so that the previous layer is reduced). In the process of work, the brush is wiping about the edge of the painting bath - thus you can prevent the lacques on the wall. The photo shows the wall, on the structural plaster which is 2 layers of varnish Tikkurila Paneeli Assa.
A covered with varnish wall can be wiped with a damp rag without fears to damage the structural plaster.
We think you were convinced that even a person who was distant from the sphere of facing work will be able to give the room a unique view, making repairs there with the help of decorative plaster. The drawing, which happens, will be unique in its kind.
If the technology of application of the mixture is performed correctly, the plaster will look decent even a few years after repair, regardless of where it was used - in the kitchen or corridor.


