Screed on the balcony: Step-by-step instructions Construction

High-quality screed is the key to the durability of any floor covering, whether it is ordinary linoleum, laminate or natural stone. Make a tie of the floor in the apartment if desired can anyone, but as about balcony? Does this work have its own specifics, or everything happens exactly same wayas in other rooms? In this article you find All you need to know to make the floor screed on the balcony with your own hands.
Types of hardware
The screed is needed not only to align the floor before laying the finish coating. She creates Additional protection against noise, dust from a concrete slab overlap, cold. In the case of a dry tie of the floor under hERE You can hide communications and various wires. Anyway, the quality of the floor depends largely on the screed.
Three varieties of screeds are distinguished:
- Wet - the base is poured by cement-sandy solution.
- Dry - floor We fall asleep by clamzite, vermiculitis, rubble or other bulk material, after which it is covered with plywood or plasterboard.
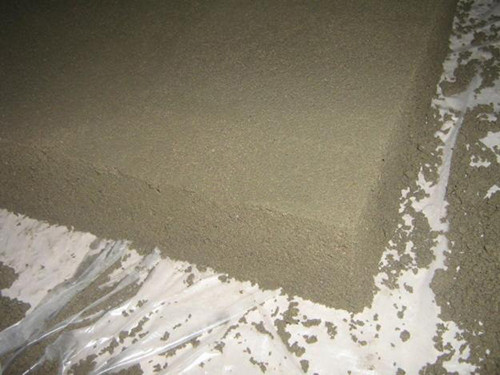
- Semi-dry - work is carried out by almost the same principle as for the wet screed, only less water is added to the cement-sandy solution. Because of this, it dries faster, it becomes stronger, and less dirt is formed in the process.
The choice of a screed depends on the operating conditions and the load that the base can withstand. For a balcony or loggia in an apartment on the first floor, you can equip a wet or semi-dry tie. They weigh quite a lot, but they guarantee a durable and durable coating. Dry tie can be done everywhere because it does not serious Loads for overlapping.
Preparatory work
Floor preparation is the same in all three Cases - the basis must be released and clean before further work. The balcony is a special room where the temperature and humidity differences are most noticeable. For this reason should ensure reliable floor isolation, especially if You are going to lay an expensive finish coating.
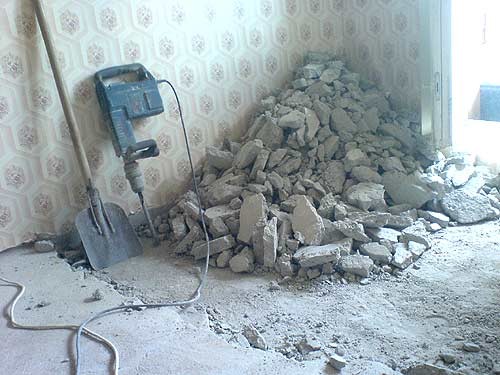
First of all, it is necessary to get rid of the old coating and get to the overlaid concrete slab. Remove all furniture, flowers and things from the balcony, remove the plinths and door shoals ( a door, respectively, have to On time to remove). While dismantling the floor is always very dusty, dirty and noisy, so it will be worthwhile to warn the neighbors about the upcoming work.
To protect against dust and dirt, prepare glasses and respirator. Depending on how old the coating lies on the floor, you may need various instruments: Lomik, nail-holder, hammer, construction knife.
IMPORTANT: Some builders poured a couple px Artarched floor covering if it is in not too deplorable but This is not entirely right. First, the useful balcony area decreases. Secondly, the coating is not so durable as it should be. It is better to work out an extra hour and completely remove the old floor.
If linoleum is lying on the balcony, it is easier to remove it easier - cut it into stripes 20 width—30 cm and remove each, hunching a spatula or scraper. With ceramic tiles have to To be faced and pretty, because without a puncher, it is not necessary here. Parquet too will not be able to remove silent. First you need to find the finishing element (usually it is at the wall under the battery or at the entrance door and take it out). After that, you can gradually disassemble the entire floor. You can also simply target wooden boards using the chisel and hammer.
Which would Coverage to you neither happened Disassemble, before work sprinkle the walls and floor with water from the spray gun to kill dust.
Painted or primed floor should be cleaned with solvents. In the process, be careful, open all windows, work in gloves and respirator.
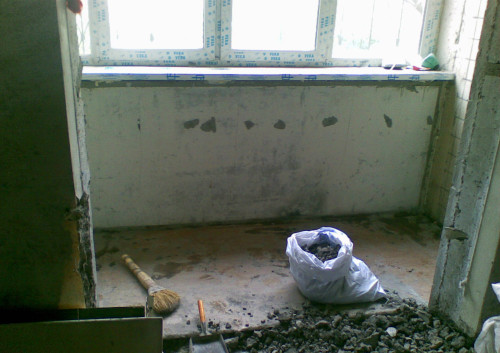
When the old floor is liquidated, carefully take care of the garbage and remove the dust with a vacuum cleaner. If you pour a cement solution on a dusty basis, it will not be able reliable Craft. After cleaning, it is recommended to cover the concrete slab primer in deep penetration. She remove Dust and provide additional isolation. More useful information about primer you will find in our article "Floor primer: Features of choice and application".
Wet screed
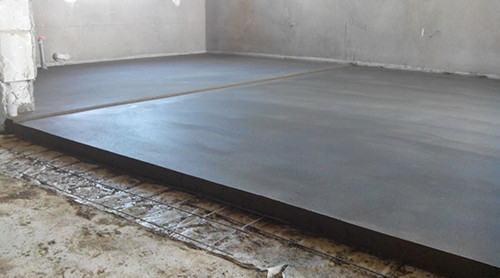
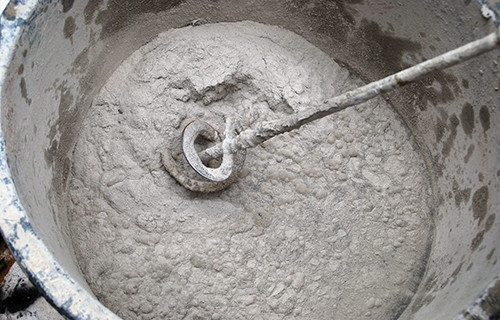
Most common Varia nT Artjazha, which is applicable for any premises, including balconies. Cement-sandy solution can be kneaded using a construction mixer (drill with a nozzle-mixer) or a conventional shovel. As capacity it is better to use the usual galvanized bucket.
Classical solution prepare according to the following recipe: 1 part cement on 1. part crushed stone and 2 parts Small river sand . First, mix all these components until uniformity, then start gradually adding water and mix. When the solution reaches a consistency of very thick sour cream, you can start the fill of the floor.
If you want to make a semi-dry tie, the water must be added a little less - exactly so much to moisten the cement and sand. The desired consistency is achieved when the solution is well sticking out in the room in hand, and when hitting the floor it is scattered. The screed fill technology described further is applicable for wet, and for semi-dry method.
How to pour the screed on the balcony:
- To paulhe studied even, it should be found at what level it is necessary to pour a solution. To do this, using a level and plumb, find and mark the zero point - the mark on the wall to which the screed will reach. Spend a line all over the perimeter of the balcony.
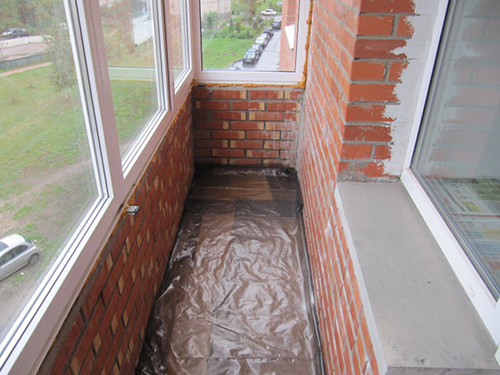
- Before pouring a cement-sand mixture, it is necessary to equip waterproofing. For this you need the usual polyethylene film 200 microme thick or the most cheap Ruberoid. Easy the base with waterproofing material, laying the strip vanosest 15 cm and putting a launch on the walls of 20 cm. Slots connect with a wide insulating tape.
- If the balcony is big, then the concrete does not crack and was able to withstand the load, the screed will be required to increase the metal fine grid. Her put on top of waterproofing.
- Install the rail guides on the grid. Usually they are made from wooden bars or metal profiles. The upper end of the guide should be located at the same level as the zero point. Such lighthouses are needed in order to floor All over the entire area was equally even. Check each lighthouse to the horizontal building level and attach to semi Samors. Some builders prefer to work "in the old manner" and secure the guides on a bunch of cement mortar. It's easy and fast, but then have to wait for the full pouring of the heap, and on it wait Not less than a day. It is more convenient to fasten the profiles with self-draws, and to adjust the pieces of wood or rubber washers.
First, set the side guides of 20 cm from the walls, align them, and then, if necessary, put intermediate. But usually for the balcony, a maximum of two lighthouses are enough. - Finally, when the guides are exhibited, you can start the pouring of the solution. In fact, it is better to prepare it after the completion of all preparatory work. If you work alone with a large area, do not knead a lot of solution at once - you may not have time to spend it completely to frozen. One bucket is quite enough for one reception.
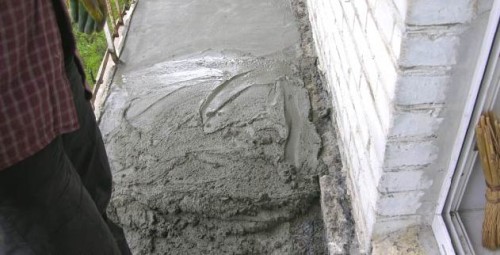
- Start pouring the solution between the guides from the wall, located in B.stroke so you do not drive yourself into the trap. Pour the solution ononboiding Install construction rule Or just a smooth board and stretch to them towards yourself without tearing off from metal profiles.
- Pour the following portion and thus Fill the entire balcony.
- Sprinkle the surface with water and cover the polyethylene film. This will prevent too rapid evaporation of moisture and cracking concrete. Film You can not close, but then wet the screed have to 2 times a day for 3 days.
- After 3. —4 days carefully remove the guides from the concrete. Leave them inside by no means can not, otherwise the floor will not be durable and das t T.calm at points of contact with profiles. Formed voids, close in cement mortar.
Useful advice: Many builders before the fill of the solution on lighthouses are missing profiles with machine oil so that they are easier to pull them easier.
It will be saved for quite a long time - from 18 to 25 days. It is possible to start finishing work only after the complete drying of the concrete. You can use such a screed on the balcony under the tile, laminate, parquet, carpet and any other coating.
Yet once we remind you that the balconies in most modern and old houses are not designed for similar loads from the concrete screed, so it is better to use apartments lightweight Quick-drying options or to equip a dry tie.
By the way About quick-drying wet tie. Recently, mixtures based on plaster and cement are very popular, only in contrast to classical solutions, materials are presented in fine-deficing form, because of which they dry factor of faster. In addition, there are a number of plasticizers and synthetic additives. They allow yet Stronger accelerate the rates of drying, reduce the thickness of the layer, thereby reducing the load on the overlap. So, the minimum string thickness on the balcony for concrete is 4 cm, and for quick-drying mixtures it can only be 2 cm.
On the video about the screed on the balcony, it is shown in detail how to work if the balcony is not yet glazed And has no walls, that is, in the construction process of the house:
Dry screed on the balcony
If you want to "do with low blood", that is, to avoid a large amount of debris and reduce the time of work, you can make a dry tie of the floor on the balcony or loggia. In truth, this is the optimal cooking nT DLi am an urban apartment. "Wet" classic screed has a greater pressure on the slab slab, so her It is not always realistic to make the buildings of the old building. In the case of a dry hazard, there is no danger to the neighbors, because the maximum lungs Materials: crushed stone, ceramzit, foam, vermiculitis, plywood, drywall and wood.
How to make a screed on the balcony:
- As in the case of a wet and semi-dry tie, it is necessary to pave waterproofing. How to do it, we wrote in detail in the previous chapter.
- This time, too, you will need to mark the zero point.
- Close with zero mark Install wooden lags and screw them to semi anchor bolts. Installation of lag produced across balcony.
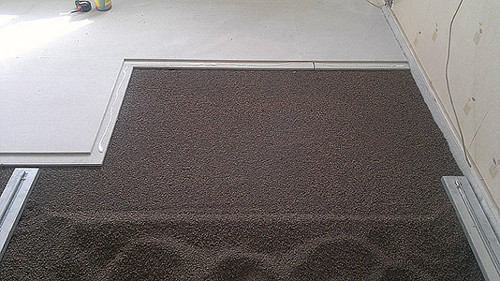
- On top of the waterproofing between lags, pour clairzite, vermiculite or any other bulk thermal insulation material. Cheaper all use clay sand. In order for the surface to be more stable, choose the fractions of different sizes - then they will fill all empties. The thickness of the bulk layer should be at least 5 cm so that the screed can withstand the load and does not "swam".
- On top of the ceramisite, put the sheets of waterproof drywall or plywood and attach them to wooden bars. As the gaskets are plugged under the sheets under the sheets so that no emptiness remains. Move from the opposite wall to the output. To enhance the attachment, it is recommended to use the weather-resistant glue.
Useful advice: just purchased Faneru better leave in the room where repair will be repaired, on 2 —3 days so that it acclimatizes. Then paulstudies more even and not deformed during operation.
In more detail how to make the floor tie on the balcony, look at video instructions:
The advantage of a dry screed is that on hERE You can come and produce finishing finish straightaway same after installation. In the case of cement-sandy mortar to you have to Wait a few weeks before continuing repairs.
Make a screed on the balcony with your own hands is quite simple, if you follow the instructions and choose high-quality building materials. Plus, work on the balcony can become excellent training for subsequent repairs in the rest of the apartment. Having learned to make floors on your own, you can create additional protection against noise, make an apartment more warm and cozy.


