
Wall Facing Technology Plasterboard Walls
Alignment of walls in an apartment or house is one of the main tasks during the repair. Their appearance is often far from flawless, and even such a familiar way as plastering is not able to create a perfectly smooth surface.
Content
The decoration of the walls of plasterboard became very popular. With it, not only disguise the flaws of the surface, but also hide the communications systems, insulate the room and create additional sound insulation. In addition, this building material is used if you wish to give an apartment unusual, individual view, different from the standard "square box". The procedure for aligning walls by plasterboard is not particularly difficult and performing this task forces to any person.
Facing the walls of plasterboard - the advantages of the material
The use of drywall when cladding the walls solves the following tasks:
- disguise the irregularities and the creation of the surface, ideal for subsequent decoration;
- improving sound insulation;
- wall insulation;
- creating a communication disguise space;
- designer decoration of the walls of the apartment - the creation of niches, protrusions, scenery of openings, etc.
Methods of attachment of plasterboard
There are two ways to fasten the plasterboard:
- frameless method - cladding is carried out using glue or putty;
- frame method - a metal profile is used.
Frameless wall cladding plasterboard
The frameless way of fastening plasterboard saves living space and is characterized by simplicity of installation. It is used if there are small irregularities on the wall with which the usual putty can cope with.
The main advantages of the frameless method:
- easy and fast installation;
- the smaller cost of cladding the walls of plasterboard compared to the framework method;
- saving space.
Materials and tools
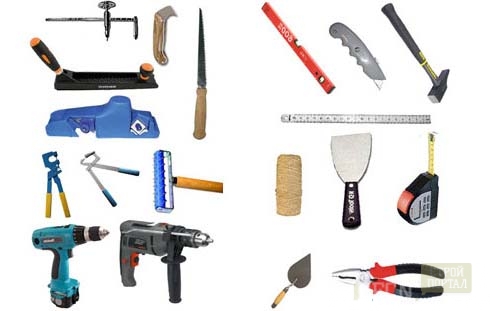
Facing the walls by the frameless method involves the presence of the following building materials and tools:
- Plasterboard (GLC) - sheets made of construction gypsum lined on both sides by cardboard. Their length varies from 1200 to 3000 mm. The width and thickness of standard sheets is 1200 and 12.5 mm, respectively.

- Glue plaster mounting. One of the most popular is the mixture of Perlfix, which is manufactured by Knauf. With deviations from a plane up to 4 mm, a putty is used, such as a fogenfuller.

- Marking tools: plumb, level, pencil or marker.
- Knife for cutting drywall.
- Rubber cizyanka.
- Putty knife.
- Edge plans.

Surface preparation
Facing the walls of plasterboard without a frame requires certain preparatory work on the preparation of the surface:
- cleansing walls from the residues of building materials, sprinkling areas of old plaster, oils and other substances that can worsen adhesive contact;
- removal from the surface of the dirt and dust;
- coating walls of strengthening primer;
- surface markup.

For pasting plasterboard, the surface of concrete, bricks, plaster, cement plaster, etc. suitable. But it is not mounted on paint, whitewash and raw limestone plaster.
When the wall markup, the edges and the middle of the sheets are denoted by the vertical line. As a result, every 600 mm on the surface will be drawn. But this is the optimal option - often make the markup only for the first sheet and "dance" from it.
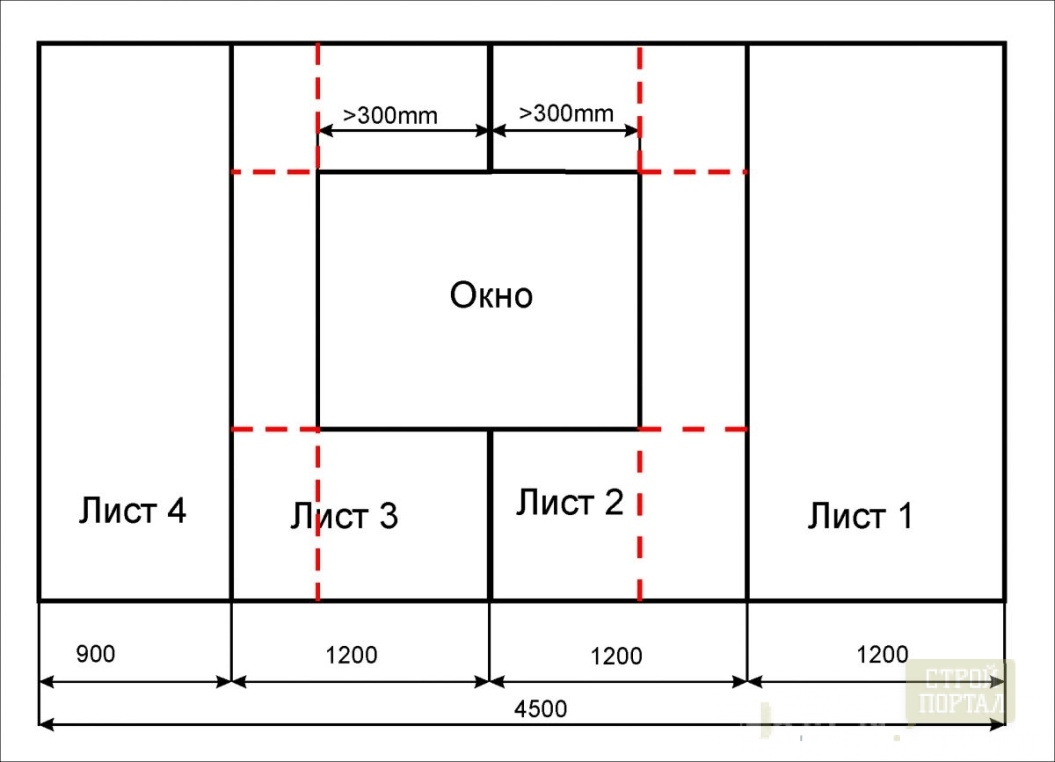
Preparation of plasterboard
The technology of cladding of walls by plasterboard implies the wamp of the surface of the walls only by solid sheets. That is why the maximum height of the wall should not be more than 3 meters - such a standard length in GLC. But in practice, many masters ignore this rule and install sheets and smaller sizes. This is done in a consistent or checker order, but it is better to use the last option - with a solid horizontal seam there is a crack.

The desired length of the sheets of plasterboard is clipped with a gap between the ceiling and floor - 5-10 mm. It is necessary for ventilation and subsequent, close to sealants and insulating material. To ensure the gap prepares the lining from cropping drywall or wood.
Cutting sheet is carried out on a flat surface:
- A knife is cutting a layer of cardboard.
- The seat of the navigation falls on the edge of the table and the gypsum core is premunted.
- Cardboard is cut on the back of the sheet.
- The resulting rode is processed by the edge of the plane.

Holes under the conclusions are also cut in advance with special cutters.
Wall cladding plasterboard on glue - Mounting methods
First of all, glue is preparing. The mixture is diluted with water in the proportion specified in the instructions on the package and is mixed using a mixer to a state of thick sour cream. The resulting composition quickly dries, so you should not prepare a large portion. For one sheet, the half-water of the adhesive solution is usually enough.
Depending on the irregularities of the surface, the lining of the walls of the plasterboard with their own hands it is carried out in several ways:
Method 1 - sticker sheets directly on the wall:

- With the help of a level, the irregularities of the prepared and marked sections of the wall are calculated.
- On the perimeter and the middle of the sheet on the wall with pile ("blooming"), with a uniform distance of 20 cm glue is applied. In this case, the identified walls of the wall are taken into account - more than mixture is consumed onto the depression, and the bulge is less.

- The sheet is attached to the wall on the lining and aligns on the markup.
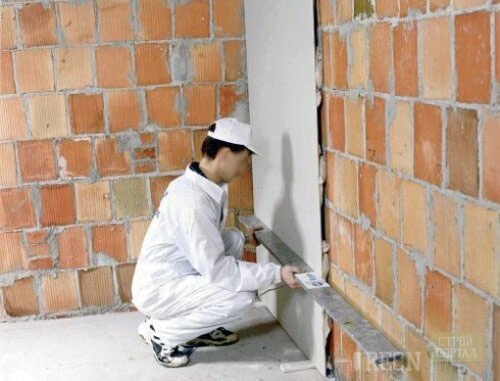
- With the help of the level and rubber Cyan, the plasterboard is exhibited vertically and horizontally. In order not to spoil the sheet, it is closed through a wooden bar or a small piece of plywood.
This module is the easiest, but it is suitable for the surface with a drop of no more than 30 mm.
Method 2 - Sticker Using Lighthouses:
- 8-10 cm gypsum width bands are prepared for the perimeter of the wall and center of sheets and 16 cm for the joint of the structure - 8 cm for each layer.
- Lighthouses are installed on the glue. Each strip must be set up vertically, in the same plane and correspond to the direction of the wall.
- After hardening the mixture on the beacons strips a uniform layer under the comb, glue or putty is applied and a sheet of drywall is installed.

In places location on the wall of any equipment there is an additional strip.
Sometimes small pieces of drywall are used as a lighthouse, but in this case, a greater amount of glue and sheets on the seams are not sufficiently related.

This installation method is suitable for an uneven wall, with surface drops of more than 3 cm.
Method 3 - Combined:
When using this method, the beacons are installed only from below and on top of the wall, and the middle is filled with adhesives of glue. At the same time, the installation method, the sheet is set according to the rule without much effort, since it has two points of support, which are in the same plane.
According to the technology of plasterboard stickers, the glue is applied to the sheet, but in this case, its weight will increase significantly and manipulate it much more difficult. In addition, it is very important that the composition is as stronger as possible to the base. It will stick to the sheet in any case. For the same reason, a thin layer of glue is applied to the wall of the wall around the perimeter and the center of the plasterboard, which will fill all the pores - "bloumb" will be kept much better. Most often, this method is used with a non-primed surface.
Frame method of wall cladding plasterboard
The advantages of the framework method:
- the perfect alignment of the walls;
- quick installation;
- masking Communications;
- additional heat and sound insulation;
- creating decorative elements.
Materials and tools
- plasterboard;
- sound and thermal insulation material;
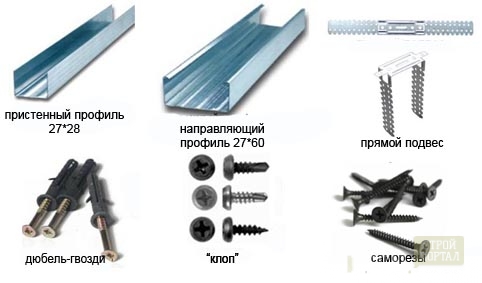
- wooden timber or two types of metal profile - rack (CD-60) and guide (UD-27);
- suspensions;
- selfless:
- TN 25 - for mounting drywall to frame;
- TN 35 - for mounting the guide profile and suspensions with plasterboard structures;
- Tex 9.5 ("bugs" or "fleece") - to collect metal parts of the frame and various components;
- dowels - for mounting to the wall.
- screwdriver, drill;
- scissors or hacksaw for metal;
- marking tools - plumb, level, pencil or marker.
Preparation of walls
- Surface stripping - when using the framework of special preparation of the plane is not required. But the cladding of wooden walls is plasterboard implies mandatory processing by antiseptic. This is necessary to prevent the processes of rotting and the appearance of mold. The workpiece of the working surface is made only in the case of too large irregularities that interfere with the fastening of the profile or with such wall defects, as the damage to the fungus or the presence of leaks.
- Marking:
- taking into account communications, insulation and irregularities of the surface, the distance from the wall to the plane of the future design is determined;
- with the help of a plumb and level, the location of the guide profiles on the floor and the ceiling is noted;
- it is planned for vertical racks with a step of 40-60 cm and suspensions for them - 2-4 pieces. on the height of the room.
Mounting frame design
- Installation of floor and ceiling guides (accordingly prepared marking) by self-drawing at a distance of 30-40 cm.
- Fastening to the wall of direct suspension for the rack profile.
- Installation of vertical racks - connection of them with carrier profiles and fasteners.
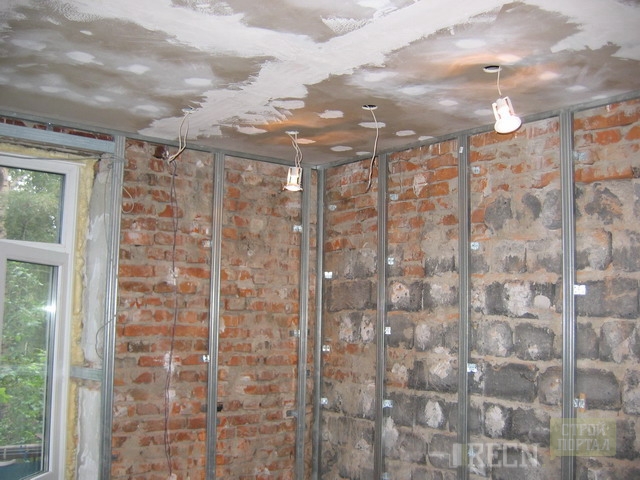
- Fastening between racks of sound insulation material.

- Installation and isolation of communications.
- The painting of the frame of the plasterboard sheets with the help of self-samples in a step of 30-40 cm, the tip of the screw is slightly pressed into the surface, but not more than 1 mm.

Fracking of walls of plasterboard, video:
After the installation on the installation of drywall, any of the proposed methods, the seams between the sheets are sampled by a painting ribbon and shit. The same procedure is carried out in places of fasteners of sheets.

Handling the walls of the walls with plasterboard, the price of which is quite affordable, will cost much cheaper than when hiring professional builders. Especially since the installation of the design is simple enough and will not take much time.


