Installing the door to the bathroom Doors
The bathroom is characterized by increased humidity and temperature differences. This fact is taken into account when installing various structures. This is fully related to the doors that, during operation, should maintain their appearance and initial characteristics. How to properly install the door to the bathroom, and will be discussed in our article.
Content
Criteria for choosing a product
Buying the door to the bathroom is made after repairs in the room. The main criterion when choosing a design is a resistance to the negative impact of a wet environment. In addition, the doors should:
- have appropriate dimensions;
- manufactured from a suitable material;
- enjoy a stylish appearance.
Size definition
It is believed that the dimensions of the standard door are as follows: height - 2 m, width - 0.6-0.7 m. But now it is possible to meet structures with various sizes. Therefore, to determine the exact dimensions of the new door, you should perform preliminary measurements of the opening and take into account the dimensions of the door frame.
For the correct calculation, you need to immediately dismantle the old door frame. The thickness of the doorway is equal to the thickness of the wall. After measuring, the opening should be taken into account on each side to 2-3 cm on the creation of a gap between the box and the web and up to 1.5 cm between the wall and the box.
The height produces a similar calculation. The only difference lies in the fact that it is necessary to take into account the height of the threshold (of course, if it is), which is usually within 1.5-2 cm.
As for the door box, in most cases it is sold separately. Box elements can be configured under the optimal dimensions.
Material of manufacture
For the production of doors in the bathroom, various materials are used:
- MDF (or chipboard);
- wood;
- plastic;
- glass.
The canvases made from MDF and chipboard are the most common. This is explained by the low cost of materials and variety of models. The disadvantage of such products is that they should additionally cover moisture-resistant varnish.
Classic products include the doors from a solid wooden array. Such designs should also be processed by an antiseptic. But they will complement the design of the bathroom with more noble features.
Plastic doors are the perfect option for rooms with high humidity. They are not deformed and characterized by magnificent heat and sound insulation qualities. They differ in variety of both form and color shades. The disadvantage of plastic doors is insufficient aesthetics.
Glass door to the bathroom - the best option for this room. This design has all the necessary properties characteristic of wet room. The glass door is not scary either moisture nor the temperature differences. It has magnificent noise absorbing and thermal insulation qualities, excellent appearance. The only "minus" of glass canvas is a high price.
Application device
Sometimes you have to face the fact that the doorway is less than or more doorway than provided by calculations. In this case, an expansion is carried out or a narrowing of the opening.
Expansion of the doorway
Of course, you can resort to cutting the door. But in this way we can spoil her appearance. Yes, and the service life will be significantly reduced.
The cutting of the door is possible only in the case when the steel strip is located above the opening. Its removal can lead to a weakening of the structure.
If the wall consists of another material, the expansion of the opening is carried out with the help of a grinder or perforator.
Narrowing doorway
To reduce the size of the opening, experts recommend to take advantage plasterboard. The process itself consists of the following actions:
- examined the opening;
- removal of plaster with an extreme part of a wall that adjoins the impact (rather width of 30 cm);
- fastening galvanized profiles to the floor and the ceiling of the opening;
- mounting the frame at the edge edge and its middle part;
- cutting drywall billets and screw them to the frame;
- plasterboard should be located in the same plane with a lined wall.
Build door box
Purchase the door to the bathroom (in the photo) is recommended complete with the door frame assembled. In this case, for the implementation of installation work, you will need to screw the screws in certain places and install the canvas.
If the door frame is bought in a disassembled form (this happens quite often), it will have to be engaged in its assembly. Typically, the door frame consists of two racks, top jumper and threshold. Sometimes there is no threshold.
Depending on the presence of a threshold, an assembly of the boxes will be assembled:
- if there is a threshold, then on each side of the box racks, the gap of 3 mm to the height of the door canvas is added;
- in the absence of a threshold for the gap on top of the racks, 3 mm is added, and below - 10 mm.
When determining the magnitude of the upper jumper and the threshold should be considered:
- width of the door of the door;
- gaps between door and box racks;
- the thickness of the threshold itself and jumper.
Also takes into account the fact that the upper jumper and the threshold will trim. Therefore, on both sides, you should create a landing sample. The protruding part in which the closing door will be dried, cuts off on both sides. Moreover, cutting is performed by an amount equal to the maximum thickness of each rack.
After cooking blanks, all the elements of the door frame are connected. For this, they use self-strains with a length of 55 mm. If an installation of a tree or MDF occurs, the holes whose diameter is 2-3 mm is less drilled in them. Otherwise, wood can crack. To give maximum stiffness, each place connecting the box is fixed by 2-3 screws.
Preparation of the canvas
This procedure is to carry out:
- rugs loops;
- mounting latches;
- installation of handles.
Loops are used to connect the cloth with the door frame. To install them, the following actions should be made:
- the door frame stacked on the floor;
- the door can be placed in it with pre-installed loops;
- the door leaf is located in such a way that the gap with the box is the same on all sides;
- with the help of a marker, the location of the loops is transferred to the box;
- the canvas removes out the box and put on the side;
- with the help of a mill (or chisel) there is a seating for loops;
- the loops connect the box and canvas with the help of self-tapping screws.
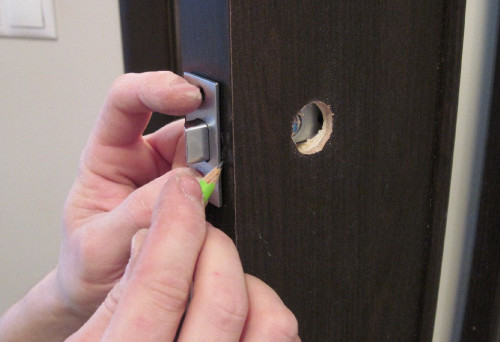
Setting the latch suggests:
- drilling hole with the end part of the door;
- its depth must match the sizes of the latch;
- the chisel is made under the lining;
- the latch is fastened with two small self-tapping screws.
To install the handle, it is necessary to produce such operations:
- holes of the corresponding sizes from both sides of the canvas are drilled;
- the square of one of the handles is attached with a small self-tapping screw;
- the square is connected to the knob latch connector and attached to the canvas;
- the second part of the handle is similar to the proper square.
Installation of doors
Naturally, fixing the canvas to the door box is better to exercise after pre-editing the box. Direct installation of doors in the bathroom includes the following steps:
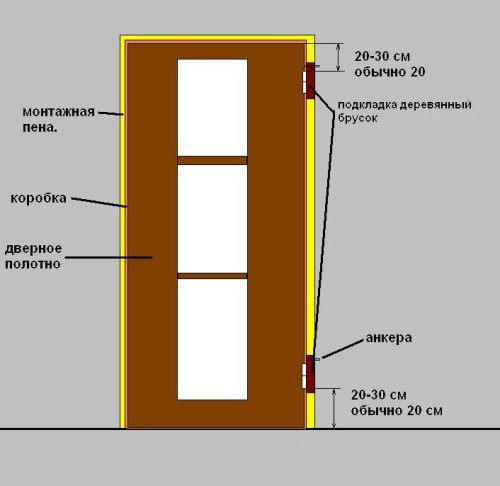
- on the one hand, the opening at the top and below the rails are hampering, which will perform a reference function;
- reiki must perform above the level of racks by 10-15 cm;
- the door frame is placed in the opening and fixed with plastic or wooden wedges;
- the correctness of the horizontal and vertical arrangement of the structure is checked;
- the distributed box is drilled in places of attachment and the drill make a mark on the wall of the opening;
- the box is removed from the opening;
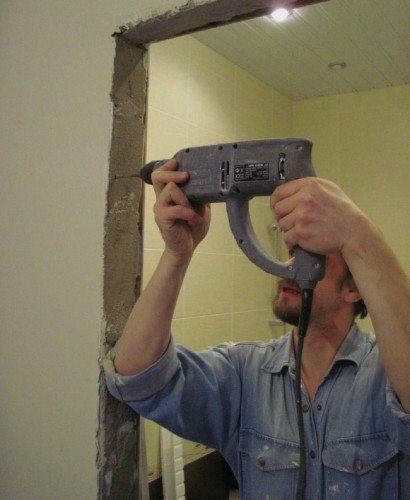
- in the walls of the opening, holes are made and dowels are inserted;
- the door frame is mounted at the same place in the opening;
- 4-5 struts at different levels are inserted between the box racks;
- the slot between the opening and the box is closed by mounting foam.
After a complete drying of the foam (usually it goes about a day), the canvas are hosted on the door frame. To ensure good ventilation at the bottom of the door, a small gap is left.
Features of the installation of sliding design
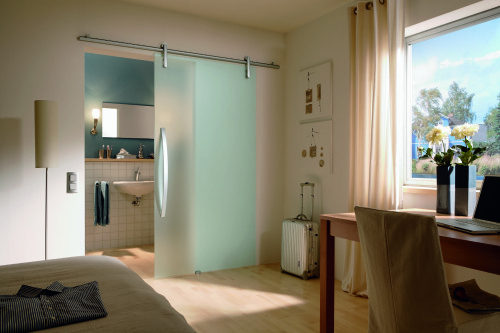
In many apartments, the bathroom takes a small area. After installing the doors with the opening path, it will be even smaller. It is possible to solve this problem by mounting sliding doors.
When choosing a sliding door to the bathroom draw attention to the method of their attachment. If the guide is located on the floor, then in this case:
- it makes it difficult to pass into the room (the guide constantly needs to be repaid);
- the design is quickly clogged (it will significantly reduce its service life).
For these reasons, it is better to acquire a sliding door, the fastening of which is made at the top. The design process itself can occur in one of three ways:
- By fixing to the ceiling. This option is allowed, if the room is "low" ceiling.
- With direct installation in an aperture. The guides are mounted to the top of the opening, and the sliding door leaves in a niche located in the wall. This type of installation is different high complexity.
- By attachment to the wall above the upper slope. It is the most common one. Fixing rails occurs with metal corners.
Installation of sliding doors provides the following:
- rail fixed to the wall;
- the door leaf is fixed to the guide rollers;
- adjusting the vertical position of the web and gaps occurs with the adjusting screw;
- to prevent movement of fabric in the front direction using dot delimiters, which are inserted into a groove in the bottom of the door.
A few tips
During installation, consider the following:
- When using webs made from natural wood or MDF, must seal the opening further. For these purposes, used diffusion strip, which has a self-adhesive base. Placed the tape on the box and on the perimeter of the opening. Before using the belt surface is cleaned from dust and coated with primer.
- If possible, you need to buy a door to the bathroom, which already has a handle or embedded lock. Even in spite of the more expensive cost of such construction.
- The bathroom door is recommended to set a threshold. Its main purpose - additional protection against flooding of living rooms.
- When installing the sliding door material is taken into account its production. The groove wood (chipboard, MDF) or inserted into the hollow profile webs of plastic, which prevents premature wear of the door. When mounting glass doors without frame 2 is mounted on each side of the limiter webs.
- Do not fasten the guide the sliding door to the suspended ceiling. He could not stand the load structure.
Videos about installing the door to the bathroom:


