Installing the kitchen with your own hands: Tips and recommendations Interior items
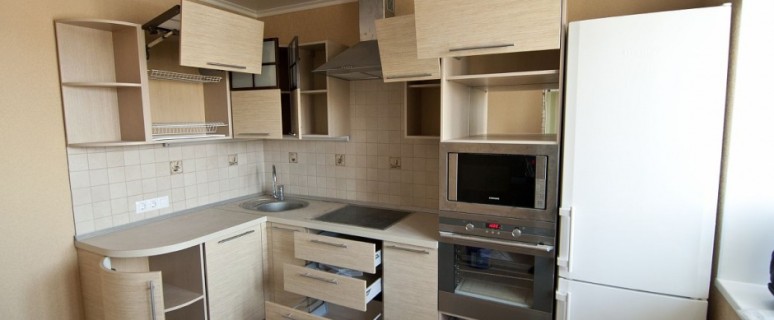
The final stage of repair in the kitchen is the installation of furniture. The kitchen set should be not only attractive, but also convenient, practical and protected from the impact of a wet environment and temperature differences. Now we are talking about how to make a quality kitchen setting with your own hands.
Content
This process consists of such main stages:
- assembling all furniture;
- installation of boxes and tumb of lower row;
- installation countertops;
- fastening washing;
- installation of wall panels;
- hanging the cabinets of the upper row;
- mounting hood;
- connecting the mixer.
Assembling furniture and installation of the lower row of the kitchen
Immediately the question arises: where to start installing the kitchen with your own hands, so that you subsequently remake anything? Naturally, it precedes assembly works Laying of all communication lines: sewage, water supply and wiring. After that, in the locations of communications in kitchen furniture, the openings of the appropriate size are made.
Next, go to the assembly headset:
- With the help of screws, the construction of cross-shaped mounts for doors to the side surface of the walls of the kitchen is made. In most cases, the screws are already made by the manufacturer.
- Rails intended for drawn furniture elements are attached to the inner side walls.
- There is an insert of wooden chops (waders) into all the holes for non-mediocre type. You can use glue. In fact, the wanking connects two holes of adjacent elements. Thanks to the waders, the maximum smooth frame is assembled, and the strength properties of furniture are improved.
- Screwing the furniture screw in the wanking. For this, the hexagon is used. Screw is closed with a plastic plug, which is identical to the head of the head.
- Adjustable legs are screwed. Furniture height is adjusted. Sometimes instead of the legs with adjustment, ordinary plastic nozzles are sold, which are called the spyers. They are screwed at the bottom of the headset.
- The side wall of one tube is covered with sheet material. Usually, the manufacturer is used for its manufacture.
- Hinged cabinets are equipped with adjustable canopies. Their mount is performed in the upper corner of the side walls.
Similarly, the side walls of drawers are assembled. After assembling 3 walls in the bottom of the box inserted out the fiberboard and the front side of the drawer is strengthened:
- in the facade of the box, screwed up screw;
- screed-eccentric is inserted into the opening of the side wall;
- the sleeve is placed in a large round hole (nest) and turns;
- the sleeve should grab the screw of the screw, which is a bit side;
- combining roller guides at the bottom of the box;
- rollers without problems should be included in the previously screwed rails.
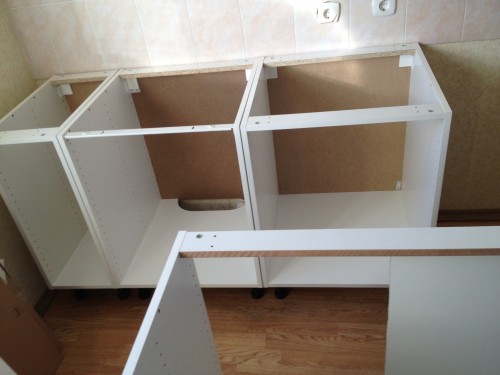
Now you can set the lower stands in your place to the wall. Naturally, doors inspire do not need. Cabinets on the floor are adjusted in height. If there is a need, the furniture are made of propuls.
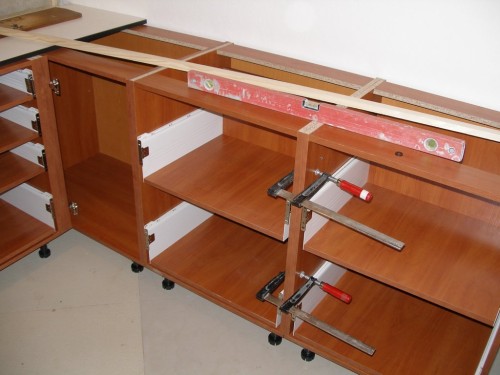
During the installation of the lower row, all cabinets are associated with each other. To do this, use self-strains of 3 cm long or intersective furniture screed. It is clear that it is better to use a screed. Self-tapping screws have too small hats, which can take out under load.
Installation of table top and sinks in the kitchen
It should be noted that wood or MDFs are used for the manufacture of tabletops. Moreover, products have certain standard dimensions. For this reason, the installation with their own hand-drawn countertops in the kitchen provides for cutting or cutting it (in the case of mounting washing in the worktop).
This stage includes performing such actions:
- after aligning the lower legs, the countertop is stacked on them;
- between the worktop and the wall should be a gap at the level of 5 mm;
- measurets are performed with a mark of places where it will be necessary to cut it;
- the sink is applied to the bottom side of the structure (it should be located so that the door of the floor cabinet closes without problems);
- using a pencil is applied to the surface of the tabletop of the sink circuit (it will be a cut line);
- according to the drawn line, there are several cross-cutting holes;
- in one of the holes, the canvas is inserted by an electrolybiz and the hole under the sink is healed;
- cropped part is processed with a file (so large irregularities are cleaned);
- the table top is finally laid on the cabinets and is fixed using fasteners;
- the size of the gaps between the worktop and the wall is necessarily observed, as well as with contacting elements of furniture;
- the end part of the countertop closes with overlays that are attached with self-drawing;
- in the hiding table top mounted washing;
- the siphon is attached, which pipes connects with sink and sewage.
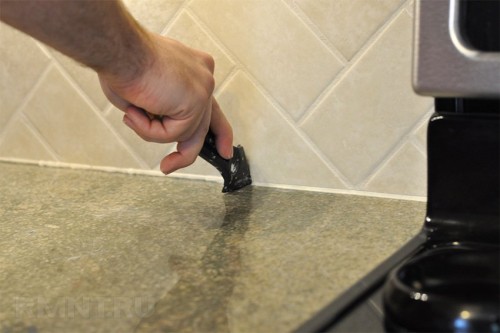
When installing with your own hands, the sinks in the kitchen, the table top of the table top can be covered with silicone sealant. Thanks to this, water will not fall on the open part of the countertop, protecting it from swelling.
Installation of wall panels of the kitchen
Often while cooking splashes fat and couple falls on the wall. To prevent this, the working area of \u200b\u200bthe kitchen (apron) must be protected. For these purposes, wall panels are quite suitable.
Installation with your own hands of the wall panel in the kitchen consists of such main stages:
- surface markup;
- frame device;
- case clamps with panels.
The markup begins with the definition and mark of places where the rails will be placed. Moreover, it should be noted that they should be perpendicular to the trimming material. Mounting step is 0.4-0.5 m. When using a frame of too thin plastic, the distance between the rails should be reduced to 0.3-0.35 m.
Creating a carcass suggests:
- accurate calculation of the required number of regions;
- their cutting;
- impregnation of rails by antiseptic;
- mounting frame around the perimeter Apron;
- fastening the rest of the rivers;
- check the correctness of the placement of rails in the vertical plane by pulling the fishing line from opposite angles.
The sheath of the crates start with the angle. To attach the panel, use the inner corner of plastic and perforated angular profile. Panel assembly is carried out from below.
The first panel is placed in the groove of the angle and using the bracket is fixed to the slats. Next, the following panels are attached - in the grooves of previous and rake. Almost always the last top panel has to cut. But you should not worry in case of uneven circumcision of the panel. It will not be seen from above, because cabinets will be hung on the panel.
At the final stage, the lower part of the panel is trimmed by a plinth, for fastening which they use self-draws.
Video about installing apron in the kitchen with your own hands:
Holding upper kitchen cabinets
This stage begins with surface markup and body assembly:
- the bottom line of the location of the cabinets is drawn on the wall (it should be at the level of 0.6-0.8 m from the table top);
- based on the size of the cabinets, the upper line is applied and places for fasteners are determined;
- in places fasteners, holes are made;
- the plank is fastened for fixing the plumbers;
- there is a mounting of hooks to the cabinet case;
- in one of the cabinets, holes are made under the exhaust elements;
- cabinets are hung on the fasteners (work starts from the corner);
- the housing adjacent to the wall is as tight and smooth as possible;
- adjusting the location of the attached structures occurs through bolts on the suspension;
- if necessary, a screed of individual elements is carried out.
After mounting the housing, the doors are hung:
- loop fixation in special recesses;
- the inner side of the housing is equipped with cruciform plates;
- doors hang on the plates;
- loops are tightened with a screwdriver;
- it is checked correctly opening / closing doors;
- if necessary, the height of the doors is adjusted by swelling screws.
Installation of exhaust
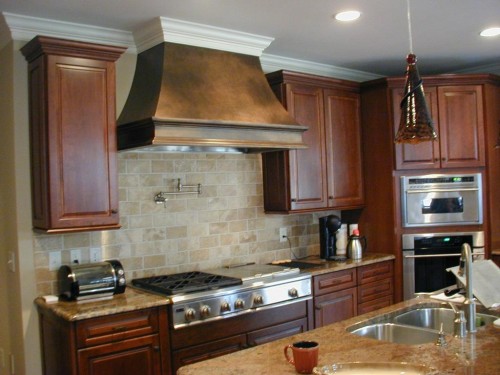
Hood is an integral attribute of modern kitchen. It should be taken into account when hanging the top row cabinets, since the extract must be placed at a distance:
- 0.6-0.7 m from the electric stove;
- 0.75-0.9 m from the gas stove.
Only when these parameters are met, the lower part of the exhaust will not melt under the influence of high temperature.
Installation with your own hand drawn in the kitchen is carried out after installing the cabinet, in which it will be mounted:
- the outlet outlet is placed in the cabinet hole;
- the equipment body is attached to the side walls of the cabinet with screws;
- the air duct is stretched, which is connected to the exhaust;
- a cable that feeds the equipment stretches to the outlet.
Typically, the products of combustion is withdrawn through a corrugated pipe. Before installation, it is recommended to stretch. This achieves maximum noiseless hood. To secure the bellows clamps are used. Joints treated with silicone sealant.
Videos about installing the hood in the kitchen with his hands:
Mounting the hood is a simple exercise, when the opening for ventilation is located near the plate. If the ventilation is located at a distance, you have to additionally pull the duct.
When installing the air adhere to the following requirements:
- the presence of a minimum amount of bends (each bend reduces the productivity of the equipment by 10%);
- assembling the check valves held in a strictly vertical position (preventing the occurrence of additional noise);
- duct length should not exceed 3 m;
- duct diameter should match the size of the hood outlet.
Connect mixer in the kitchen with his hands
It is understood that the mixer can be carried out after assembling mount sinks. But there is a possibility that it can be damaged in the process of attaching the upper cabinets. Therefore engage in setting their own hands kitchen faucet is best after the completion of work with wardrobes.
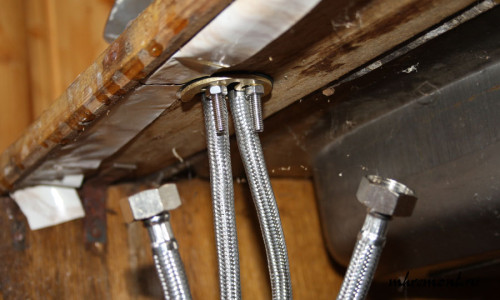
Mixer Connection includes the following stages:
- threaded elements FUM-wrapped ribbon;
- the tip of winding is not necessary, because the hose has a gasket;
- both ends of the hose spanner holes are screwed into the mixer (hose not much delayed, so can damage the lining);
- 2 screwed into the mixer-stud pin;
- in the lower part of the mixer is placed the O-ring;
- mixer is placed on the washer;
- hole in the bearing shells must be hoses and hairpin probes;
- under the sink through the hoses are supplied two rubber gasket and metal washer (they protect the body wash from premature wear and tear);
- on the pins are screwed nuts;
- hoses are fed to the tubes with hot and cold water and are joined with them.
Videos about installing the kitchen with his hands:


