Water level with your own hands Instruments

In the repair of apartments, the construction of the house, the placement of furniture and other construction work is always required to accurately comply with the horizontally level surface. Agree, crookedly laid tile, uneven walls, oblique the door to anyone will not like.
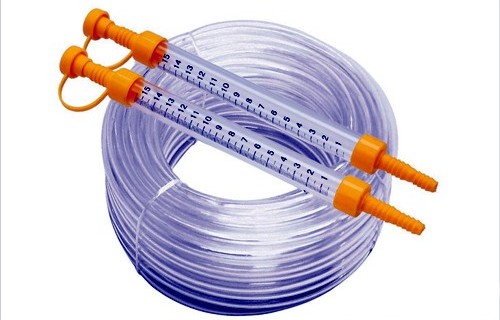
For these purposes, a special device has been created that allows you to perform work with maximum accuracy. This device is called a water level. It is a hermetic small container (for example, a flask) made of transparent material and filled with liquid, which is fixed in the same transparent case. The hydroeer is used to check the horizontal of any surface.
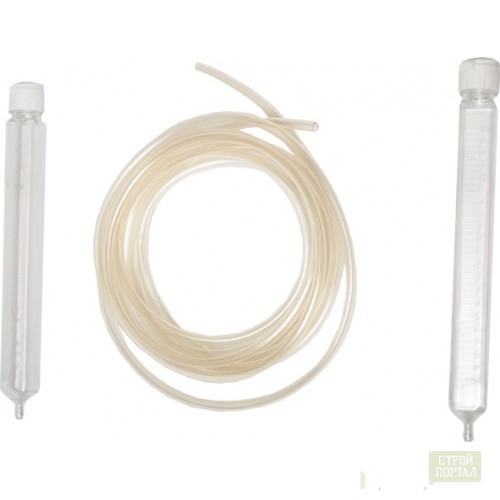
Simply put - a water level or a hydraulic level consists of:
- A long transparent cord or hose, the diameter of which is from five millimeters to one and a half centimeters.
- Two transparent flasks with marking-fission.
How to use water level
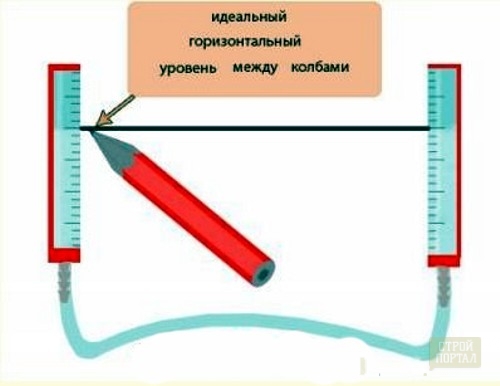
The work of the water level is based on the principle of vessels that communicate with each other. This means that the liquid in them, that is, the level of fluid, regardless of which the distance between them will be the same.
In order to start working with the level of building water, it needs to pour water. This is done as follows:
- in a hose in which there is no water, a water bottle is inserted (plastic suitable is best);
- from the opposite end, the hose needs to be carefully drawn up (release air "on itself");
- water bottle lift to the ceiling - the device must be filled with water.
Important: It is necessary to ensure that the hydroeer hose is completely filled with water, and there were no air bubbles in it. To do this, cook full (to the edges!) Bottle with water, and the tip of the hose is lowered into the bottle to the bottom. If this is not done, then the air will fall into the hose and the system will be delivered. It is impossible to use such a building tool, as it will show inaccuracies. If this still happened, and the system was filled with unevenly, it is fixable. In order to release air from the hose, you need to note half the hose and in this place literally pushing the hose in the foot, and the free both ends need to be raised up. Thus, bubbles with air themselves will come out. The action must be done several times until all the air is released from the system.
On a concrete example, we will perform the markup of the ceiling with the help of a construction level. To make marking on the ceiling, not necessarily close to it. All that is necessary is to visually celebrate the point on the ceiling at the eye level, and then around the perimeter of the entire room, mark the level. This is called the construction language - "beat off the level". Further, with the help of the roulette, the distance is selected on which the future ceiling will be indicated.
After the markup is scheduled, and it is enough to designate twice, in the corners of the wall they also determine the backlinks with the help of a folding thread. With this markup, the profile will be fixed much more convenient.
What does it look like a level to visually see on this photo:
And how to apply the level in action correctly, you can see in this photo:
Consider another example, how to use water level when installing the floor. To do this, on the wall you need to measure exactly a meter from the floor level, with a marker or pencil put a dash. Then apply our level (its correct construction term is "Waterpas") from one end to the mark, and the second end to take place in the opposite corner of the room. These actions must be performed together, and if it is impossible - then one end needs to be fastened with the help of building tape.
During marking, one of the flask remains real estate, and the second can be adjusted. It was when the water level in the first vessel coincides with the mark on the wall, you need to do another at the other end of the level - on the wall. This is the principle and placing marking.
When a larger number of points are performed, they are connected to a solid line. When the main line is carried out, the master's task is to measure the distance down and set several more points around the perimeter of the room, and then connect them to each other.
Advantages and disadvantages
The construction tool on the market is presented in several sizes, and has such a hose length:
- three meters;
- five meters;
- seven meters;
- ten meters;
- fifteen meters;
- twenty meters.
Different length of the cord allows you to make marking at different heights and in different areas of the room.
Among the advantages, builders celebrate:
- accuracy;
- ease of use;
- low weight;
- the ability to work in large areas of the room.
Among the minuses are noted as follows:
- high sensitivity to elevated air temperature;
- entering the air system;
- styling hoses;
- the inability to work in very small areas.
Depending on the manufacturer's company, the price of hydroelects varies from 30 to 300 rubles. Positive recommendations in the construction market received a water level of the bison company (master), it has a different marking, depending on the length of the hose.
How to make a water level yourself
Despite the fact that in construction stores you can buy a water level, it is easy to do on your own, especially when it is urgently needed, but the time to purchase a new one, no.
The main part in the hydroeer is a hose. As experts say, the flasks that have store models are not necessarily due to the fact that when water is poured into a low temperature system, the hose spontaneously flies from the flask. By the way, water into such vessels is also uncomfortable. Establish you, install additionally flasks or not. In any case, for the convenience of operation, the hose ends desirable to drown out so that the water is not poured.
Prepare the flexible hose and two transparent vessels in length.
In order to make an independently hose, you need to decide on its diameter. By the way, it should be elastic and do not break in bending. Water in it will move smoothly, and it will not be necessary to wait when the level is established. For hydroeer, the most optimal hose diameter is from one to one and a half centimeters.
Vnight! Over time, the hose will become muddy, which means that it will be more difficult to see in it. Therefore, it is impossible to leave the water level in the sun.
The length of the hose should be selected from what room size must be placed. But, you should know that with the insufficient length of the cord, it will be much more complicated to perform quality markup without transitions.
Next, measuring the desired length of the cord, cut off and connect it with vessels. In addition, the flasks are necessary with the help of a marker to apply the scale. It will serve as a scale of filling fluid.
Materials for the manufacture of a water level can be found at home or purchase a hose in a specialized store. By the way, the flasks can be made of ordinary medical syringes, after having removed the pistons from them.
How to use a water level in action, can be seen on this video:


