How to put the corners Useful advice,Walls
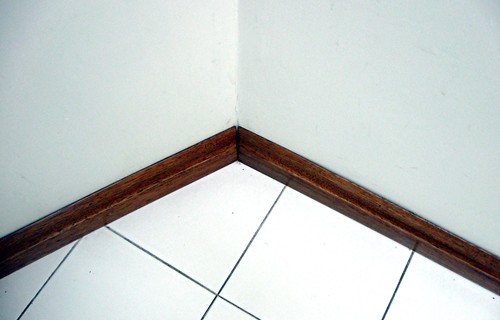
During the repair, the question of how to put the corners will certainly arise on how often the corners can spoil the appearance of even the perfectly renovated room. Directly the irregularity of the angles depends on how correctly the walls were attached, and if at the same time some inaccuracies were admitted, it is natural that it will all affect the appearance of the corners.
Content
Steptel should be with the same accuracy, both internal and external angles. It is possible to determine their irregularities, sticking to the wall forming the angle, rule. In this case, the recesses and the hubbles are noted using a pencil to add more solution to these zones. Large protrusions should be placed. If you look at the lessons on how to put corners whose video is posted on the Internet, you can learn some features of this work. We also offer to take advantage described in this article.
How to put the inner angles during surface deformation
The putty of internal angles is not a challenge. Especially if the walls have a good layer of plaster and trim plasterboard. True, the coating layer is uneven. Such uneven surfaces in the corners can be placed in three different ways.
1. The most time consuming is the putty of the angles, in front of which their plastering is pre-carried out. With this method, you can get smooth and straight corners. This is especially relevant when repairing in old rooms, where the layer of the corners in the corners is much larger than on other surfaces.
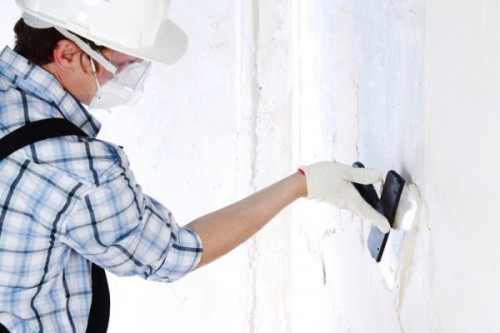
When the angles are correctly plastered, their putty will be less problematic. Putty works should be performed using a wide spatula. At the same time, the mixture must be applied to the edge of the tool.
When working on the opposite side of a wide spatula, a spacure sometimes appears, which may accidentally get on the ceiling or adjacent wall. That this does not happen, it is necessary to remove it with a narrow spatula when putting it on the opposite side of the tool. After that, a wide spatula must be attached to the corner in such a way that the mixture applied on one side to the angle, and then carefully remove the spatula from the angle. Thus, it is necessary to put an angle from top to bottom or bottom up. At first, the putty should be applied on one side of the angle, after which you need to give it to dry and apply a mixture on the other side of the angle. If the surfaces of the angles are smooth, so that the putty is distributed evenly, it should be put into the instrument more accurately.
2. The second way of putting the corners is putty, in front of which the surfaces are pre-performed. This method also allows you to align the surface of the corners. True, there are several cases when it may not come up. In particular, this method should not be used if the walls of the wall before applying plaster were poorly concreted. In addition, this method may not be suitable if the stucco brand was used as a material for the walls for the walls. Vyslifovka can be performed in different ways. If the strength of plaster is bad, then you can remove excess with a spatula. If it does not work, you should use sandpaper or grinding machine. After evaluating, putty corners are necessary as described in the previous method.
3. The third way is the alignment using the finish putty in several approaches. It should only be aware that the walls may still remain uneven. Therefore, this method should be used only if the surface is planned to paint. Depending on the curvature of surfaces, the material will have to be from three to five times.
How to put the corners of the walls (external)
For alignment of outer corners, the same methods are used as for internal angles. As for the putty of such angles, this is done a little more difficult. Apply putty on the outer angles should be immediately on both sides. You can also point one side, wait until it dries, and then apply putting on the other side of the angle.
- First, it follows the angle of the angle with the help of scissors to cut off the slope. Then attach it or level to the corner in order to determine how deformed it is. If the angle is quite smooth, then the slope must be planted immediately at the finish putty. If the angle has deformation, then it should be planted onto starting putty.
- The finished putty should be applied to the surface along the entire length of the angle with slaps. On the area of \u200b\u200bthe angle with deformation should be applied more putty.
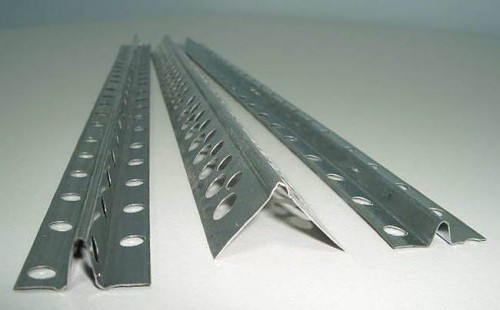
- After that, it is necessary to apply a metal corner to the treated corner. The corner should go a little in a layer of putty. After that, depending on the direction of the angle, the construction level should be set.
- Then you need to take a putty and fully fit the metal corner. You can check the correctness of the work performed using a level.
After the putty dry, it is necessary to walk well on the corner of the skin, primed deep penetration with the soil and again go through the finish putty.
How to put the internal angles of plasterboard
The main withdrawal of the drywall surface is that more and more small cracks periodically appear on it. At the same time, they are mainly arising in places of joints of individual sheets, as well as on external and internal angles. Therefore, you should know how to put such angles.
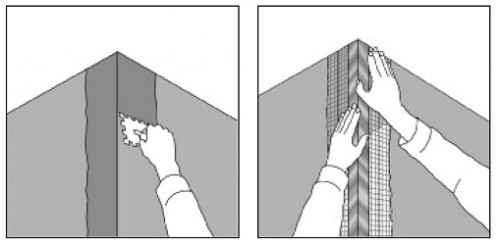
- When putting the inner corner, the same actions should be carried out as when seams are seeding. For this seam, you must first cut and clean.
- It should be filled with a small spatula with an adhesive mixture "Fugenfuller".
- After that, in the angle you need to impose a grid-sickle width of 50 millimeters. It should be done very carefully, without distortion and inflection. The superimposed grid must accurately repeat the corner form. The first layer of putty is used for sealing angles from drywall. When this layer is dry, the wall plane level should be checked and then you need to apply the main layer of putty.
- So that the surrounding angles are not spread, it is necessary that in the room at least a day held approximately the same temperature. It is not worth a hurry.
How to put plasterboard angles (external)
It is very important that the outer angles are made by docking two sheets. If, on the edges of the sheets that form an angle, there will be no recesses, the angle due to putty will visually perform from the rest of the wall plane. If in the process of mounting the frame and drywall angle turned out to be vertically deviated, it may not be so important. Such angles need to be aligned, which only increases the amount of work on their putty.
When putting the angles of plasterboard, you need to know several important nuances. In particular, it should be remembered that external angles must withstand shocks and low loads. Examples of such loads may have cases when when passing around the room, people are closed for laspers and irregularities.
- Plastic or metal corners are used to strengthen drywall. The fact is that the plasterboard itself does not tolerate mechanical loads. In addition, it should be known that before applying the putty, the outer angles must first be projected, and then put a putty on it. While the layer of putty is raw, tops the corner, which is gradually pressed. Thus, it is possible to ensure that all angles are at the same level.
- As for these plastic or metal corners, they usually have holes through which the remnants of putty are well. These residues should be removed by the spatula during the installation of the corners. If the remnants of putty from the outside are not removed, then because of a bad adhesion with a putty, after some time they will simply disappear.
- After that, you must apply the mixture. This should be done from top to bottom with the capture of each side. The first layer of putty should not be too thin. The layer thickness should be enough for after drying it without any problems could be cleaned with a spatula.
- After that, we should apply new layers of putty. Sensing the angles should be very careful that they are not damaged by the sharp side of the spatula.
When the putty layer is dry, it should be proceeded to grinding the outer angles and the entire surface of the walls. After the primer, the walls are ready for decorative finish.


