How to disassemble the mixer with your own hands Plumbing
Modern plumbing is comfortable and reliable, but she over time fails. The reason for this is poor water quality, various impurities that destroy the gaskets and the littering device. In order to restore his work, it is not necessary to invite plumbing every time every time. Let's figure it out how to disassemble the mixer and repair it.
Content
Design of single-art mixers
Plumbing devices of this type are popular thanks to their simplicity and convenience. But they sometimes sum up. In order to know how to disassemble the mixer, one-piece and replace unsuitable details, you need to know how it is arranged.
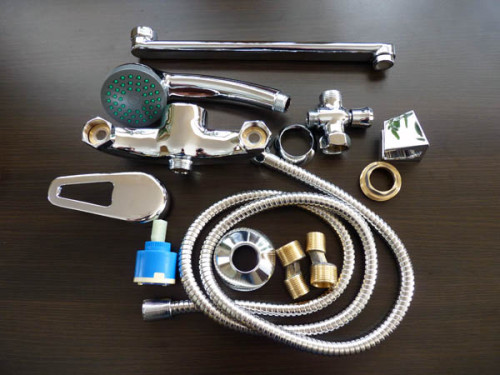
Basic design details:
- frame;
- shift handle;
- nose with aerator;
- fasteners;
- cartridge;
- gaskets for sealing (material - rubber or silicone);
- clamping nut to install the cartridge;
- flexible hoses.
Depending on the characteristics of the internal device, the mixers of this type are divided into the following types.
- Cartridges: Switching operation mode is carried out using a cylindrical insert. In the event of the destruction of internal parts, the cartridge is subject to a complete replacement (it is impossible to repair it). Extend the service life of the cartridge, if you install the cleaning filter before the mixer.
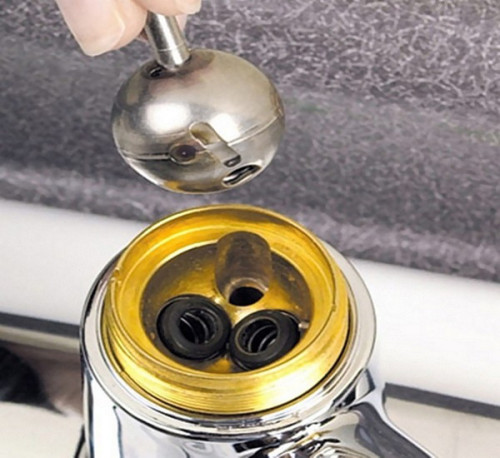
- Ball: The role of the movable part responsible for choosing the temperature and water flow power plays a steel ball with three holes. Cold and hot water poured into the holes, which is mixed in proportion, depending on the position of the ball. The turn of the ball is performed by the movement of the handle.
How to disassemble a ball mixer
Signs of cartridge faults are as follows:
- water leaks from under handles;
- poor reaction or its absence, jamming of handles when you turn on or turning off the water;
- simultaneous water supply to the shower and evil.
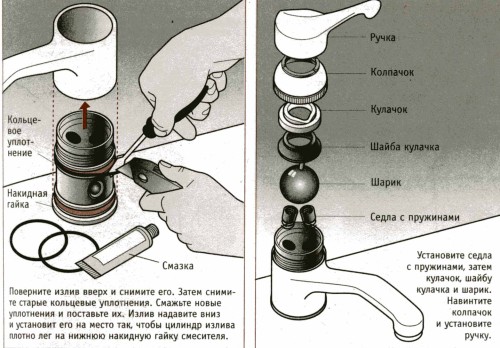
Replacing sealing gaskets in a ball mixer
The cause of the leakage of the ball mixer can be failed rubber gaskets. The replacement of them is performed in the following order.
- By revealing the screw with a hexagon, remove the handle.
- Remove the shielding item from plastic. The detail of the black color must be replaced or put in order by removing the deposits.
- Install the item in place and check the condition of the mixer. If the result is unsatisfactory - remove the ball mechanism to replace the gasket below.
- We collect the mixer in the reverse order and check the performance.
Important: During the assembly of the mixer, all seals are treated with silicone lubrication. It will prolong their service life and will contribute to tightness.
Mixer repair in the kitchen
How to disassemble the mixer in the kitchen and replace the outstanding detail? First of all, it will be necessary to get a necessary set of tools and devices from the following list:
- hex key 3 mm;
- screwdriver flat;
- passatia;
- adjustable key;
- flashlight (to work in the locker under the sink).
To your attention a step-by-step instruction of disassembling and repairing the mixer.
- We overlap the flow of cold and hot water with cranes under the sink or near the risers.
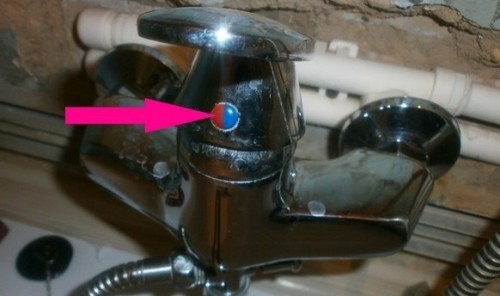
- Flat screwdriver remove a decorative plastic insert with a color designation of water temperature. Insert is on the bottom of the handle.
- Using a hex key weakened the screw located in the hole under the insert.
- Remove handle.
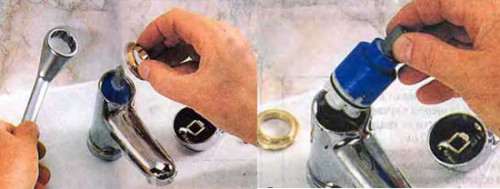
- Hand we unscrew the plastic decorative nut on the mixer body. The use tool cannot be used: the part or its chrome coating may be damaged.
- Related key unscrewing the pressure nut.
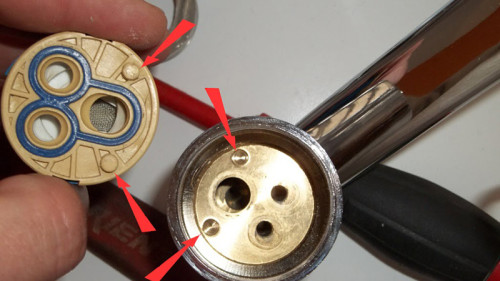
- Remove the cartridge from the housing. If necessary, we use passatts.
- We establish a new cartridge and collect the mixer in the reverse order. The presser nut must be installed so that the cartridge is tightly pressed. Otherwise, the mixer will flow.
Tip: In order not to make a mistake when buying a new cartridge, you need to compare its seatperts with a sample (old cartridge). Otherwise, the mixer will flow.
We offer to familiarize yourself with the nuances of how to disassemble the mixer in the kitchen: video with specialist comments.
How to disassemble the mixer in the bathroom and repair it
The reason for the fault of the mixer may be not only the failure of the cartridge. Wearing the gland of the "crane-shower" switch leads to water leakage. Replacement of the gland. The procedure for the next.
- The mixer handle is driven to the lower position (disabled).
- The nut of the shower hose is unscrewed, disassembling.
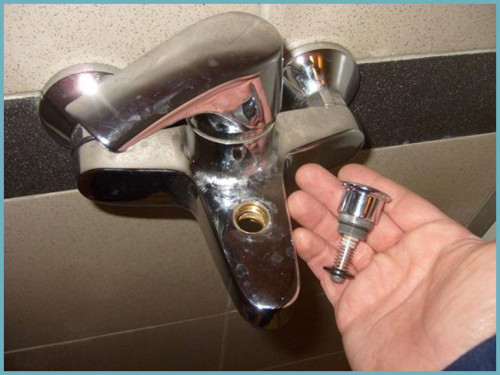
- Using pliers, the switch is removed from its nest.
- A screwdriver from the nose twisted the adapter.
- We remove the old gland, install a new one in its place.
- We collect the mixer in the reverse order.
Remove the mixer cartridge
Tip: For those who study information on how to disassemble a bathroom mixer with a shower, it is important to know what to spin and twist chrome parts should be manually. If this is not possible - a soft cloth is under the adjustable key.
Remove the plastic nut with decorative coating
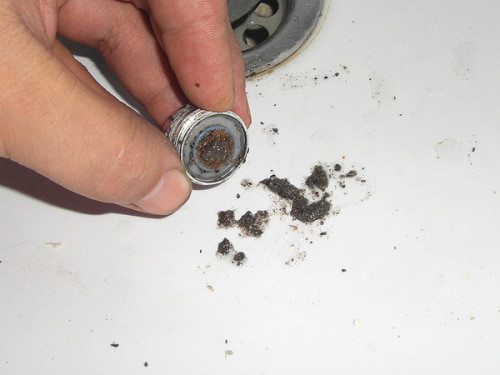
Before disassembling the mixer, one-piece in the bathroom, you need to make sure that the aerator is not clogged. A weak jet of water from the nose - a sign of such a problem. Such a problem is eliminated as follows.
Crashing aerator should be cleared
- We unscrew the nozzle-aerator from the blasting of the mixer or remove it, carefully subsided by a flat screwdriver.
- We rinse the aerator, turning it over. Large particles are eliminated with sewing or thin steel wire. To get rid of salt flying, you should hold the aerator in a 9% acetic acid solution.
- Install the item in place and check the passability to turn on water.
What if the switch "Shower-Bath" failed
During the operation of the mixer in the bathroom, the following problems occur:
- water simultaneously flows from the shower and out of the spout;
- the switch button is not fixed in the pressed position or does not return.
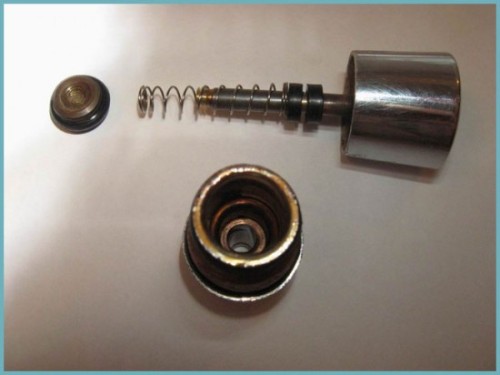
In order to eliminate the malfunction, the spool gaskets or rod spring should be replaced. Gaskets must be selected exactly in size. In the event that it is impossible, they are cut from dense rubber with a thickness of 4 mm. The upper gasket is under a decorative cap, which simplifies the task. If you need to replace the bottom - you need to dismantle the spool switch. The algorithm of actions when replacing the seal of the spool next.
- The mixer handle is given to the lower position (turn off the water).
- We dismantle the shower hose.
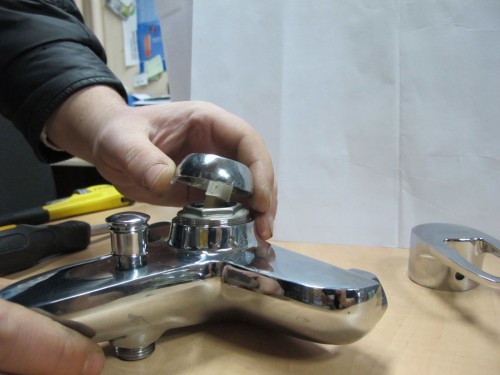
- We unscrew the decorative cap switch with hand.
- We unscrew the threaded part and remove the button of the button.
- With caution, remove the spool.
- We remove the worn rubber seals and install new ones, by treating silicone lubrication.
- We collect a mixer and check its performance.
Switch Switch Spring Replacement
If the shower switch button is not returned to the upper position, the failure of the spring is likely. The stretched spring is changed to a new one, acting in the following order.
- We dismantle the switch button by reloading a pre-decorative element.
- Remove the rod from your "nest" with a spring and remove it.
- We establish a new spring, using pliers if necessary. The new spring should be somewhat less than the diameter of the failed and necessarily with a galvanic anti-corrosion coating.
- We collect a button and install it in place.
How to disassemble the mixer: video with a detailed description of the repair process.
How to disassemble a two-fledged mixer
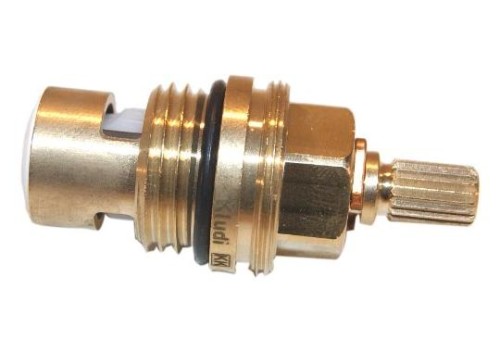
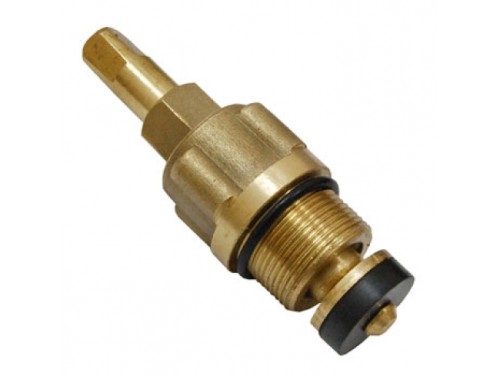
Two-mentile mixers perform the same functions as one-art. They differ in appearance and design. As shut-off mechanisms, craneboxes with ceramic discs or with elastic rubber (silicone) gaskets are used. It is these elements that fail in the process of operation. In order to replace them, you need to know the construction of the crane and be able to disassemble it.
Crane-tank with ceramic discs
There are two types of two-fledged mixers:
- "The Christmas Tree" - the main part is the tee of the corresponding form, in which the mixing of cold and hot water is mixed;
- with tight or flexible liner pipes for joining water pipes.
In order to disassemble the mixer, the following tools will be required:
- adjustable wrench:
- screwdriver flat;
- soft fabric.
Important: Before you begin to disassemble the mixer, you need to examine it for the presence of a saline. He may make disassembly. The reason for the appearance of the plaque is water flow. You can remove the flare using a special chemical agent or acetic acid. The mechanical method (using a file) is applied as a last resort and with great care so as not to damage the chromium decorative spraying.
Crane-inks with ceramic discs are not repaired and in case of failure to be replaced. The performance of the crane-trail with rubber (silicone) gasket can be restored.
Crane-tan with rubber gasket
A phased description of the mixer disassembly process.
- Water flow (cold and hot) overlap.
- A screwdriver are raised by plastic caps of red and blue color from the valve handles.
- Twisted screws, holding knobs.
- Removed handles with crane boxes.
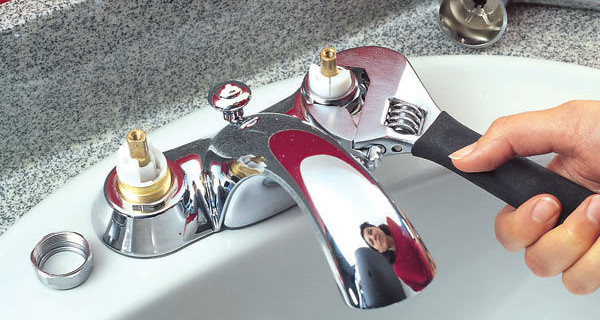
- Plug-in taps are twisted with the adjustable key. In order not to damage turnkey chromium linges fabric.
- To replace the gasket, turn out the screw from the bottom of the crane-ink. If the rust hinders it - get rid of it with a means of type WD-40.
- After installing the new gasket, the mixer is collected in the reverse order. Threaded connections before assembly required to clean.
Tip: Before you start, it is necessary to close the drain hole of the sink so that small parts do not get there.
It is important to choose the thickness of the gasket. Otherwise, water will leak or the pressure will be badly adjusted.
The information presented in the article will help independently repair the mixer and save material tools.


