
Wooden floor design Floors
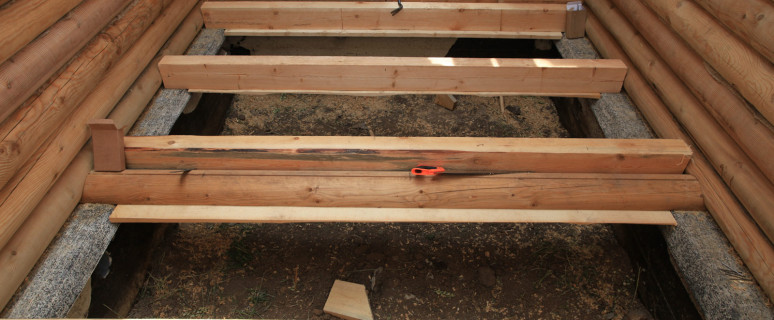
Despite the fact that today there are quite a lot of types of materials, wood still remains one of the most popular options for finishing, including for sex. The fact is that this material is environmentally friendly, digestible during processing and is sufficiently durable. It is used by a person for several millennia. Today, country houses made of wood, in which natural materials and modern technologies are successfully combined, are often built. On the specifics of assembly work on the arrangement of the wooden floor, we will further describe.
Content
Basic moments
Installation of the floor itself is very important and responsible, which requires special attention to the performance of work. Therefore, it should be thoroughly adhere to all existing technological standards and rules. Without it, it will not be possible to make the floor durable and durable. So, for example, the floor of the first floor in a wooden house is recommended to lay only on the soil. Such a floor usually consists of elements such as lags, a rough coating, a layer of waterproofing, thermal insulation, as well as floor covering. The design is mounted on brick or concrete supports. Between the floor and the soil leave a certain space of a small area, which should be kept as it should be used to serve for a long time.
There is considerable pressure on the floor in a residential building. Therefore, you need to carefully approach the selection of wood. There are some rules that will help choose high-quality floor material:
- So, wood moisture should be about 10%. This parameter is important enough, because it depends on how long the tree can keep his form.
- An array of wood must be definitely solid, without cracks and chips. Otherwise, in a short time, the flooring will require repair.
- In addition, it is important to treat the boards against ignition tools so that the floor turns out more fire-resistant.
- In order to avoid damage to various harmful microorganisms and fungi, the tree will still need to be treated with antiseptics.
In order for the design of the wooden floor to be reliable and durable, you need to choose only high-quality wood. So, pine, spruce, ash, cedar, European, oak, fir and cedar are suitable.
Floor construction on wooden beams
As mentioned above under the floor there should be some space for ventilation. The microclimate in the house and service life of the floor design in the wooden house largely depends on the quality of ventilation. In addition, to ensure the best inflow of air, it is necessary to make ventilation holes around the perimeter. In winter, a large amount of snow and other sediments can fall. In this case, you need to withdraw the ventilation pipes. In addition, it is necessary to think through the protection of wood from rodents, from the appearance of which no private house is "not insured". As protection against them, as an option, on the ventilation holes you need to install the grid, the cells of which do not exceed 7 mm.
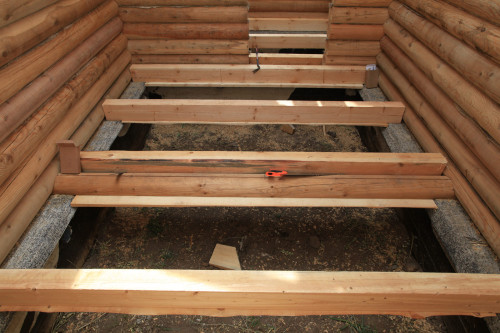
The floor is durable and durable only if the base was made quality. The order of installation work is the following. Initially, supporting beams are laid on the foundation. Boards are lined up on them. If there are no support beams, it will be necessary to at least make reference brick or concrete column column. It is necessary to correctly define places to arrange the support columns. To do this, marks are made on the beams, and then along the entire length of the space above the foundation the cord is stretched. In places where cords will intersect, the corners of the supports are located.
In addition, it will be necessary to calculate the number of columns so that between them there is a step of about 0.9-1 m. The distance between the supports depends on the dimensions of the beams and the lags laid on the poles. So, the greater the thickness of the support beam, the less step can be made between the columns. For the beams section 150 by 150 mm between the support posts, the distance should be no more than 0.7 m. Dimensions of dug holes for columns must be coincided. When support pillars are laid, you need to take into account their dimensions. Thus, the base of high pillars should be made more massive than low.
Where the columns will be installed, you need to remove about 55-60 cm of the soil and then lay the brick or concrete bases on this place. The pillars high to 20-23 cm are usually placed in 1.5-2 bricks, and the supports of greater height are mounted in 2 bricks. Cast concrete columns are more durable. The sizes of the sides of such supports usually make up 40-50 cm, which depends on their height.
Next you will need to remove the upper fertile layer of soil. This needs to be done across the area of \u200b\u200bthe underground. Next, the soil on the site should be dissolved and pouring a layer of sand and gravel. After laying each layer, it must be moistened, i.e. Water and how to catch it. The latter can be done using a conventional board, nailed to the tree or rent a vibroplite.
Wooden floor design by lags
When laying the floor to concrete, you need to prepare and align the base. If the surface is not flat, then all flaws corrected another layer of screed. After that, clean the surface from garbage, dust and covered with primer. Next, waterproofing is performed and the floor material (chipboard, OSB or Phaneur) is placed.
Consider the order of installation work:
- First of all, it is necessary to choose the size of wood for laying. So, wooden slats for flooring should be thicker than 5 cm. Thus, the floor will be durable and reliable. In addition, it will not be fed under the weight of furniture available in the room.
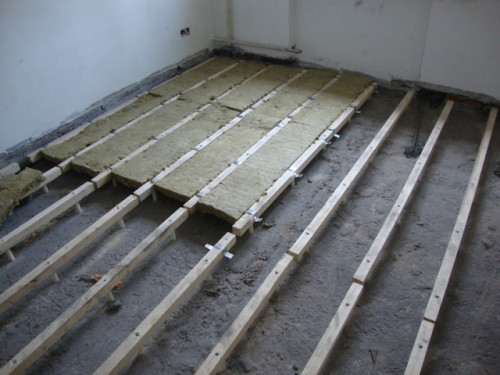
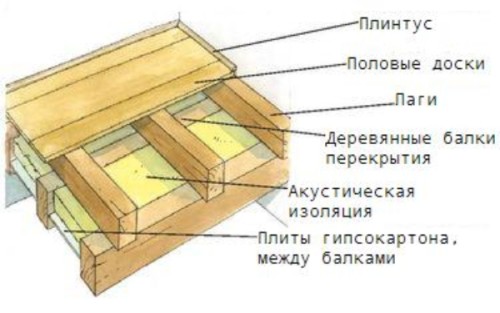
- Fixing lags are stacked on the concrete base. They are mounted directly on the concrete basis. If you wish to warm the room, you can put a layer of mineral wool on the lags. In addition, various communications can be "hide" between the bars and flooring.
- Next, check the strength of the floor base. Strengthening the floor design with a concrete screed. If this was previously earlier, it should be checked if there are no cracks, chips, chosen. If any defects are detected, the screed will require a partial or complete replacement.
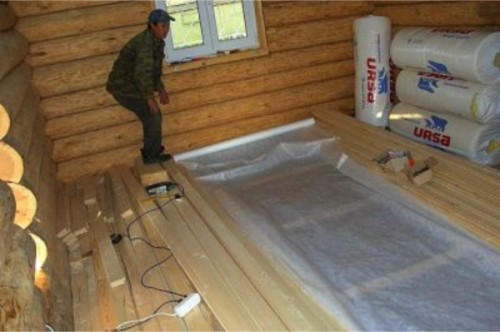
- Then you need to make waterproofing. For this, the surface is cleaned, and then the polyethylene film is placed on her 200 mm. Between the sides of the film can be copped with ordinary scotch.
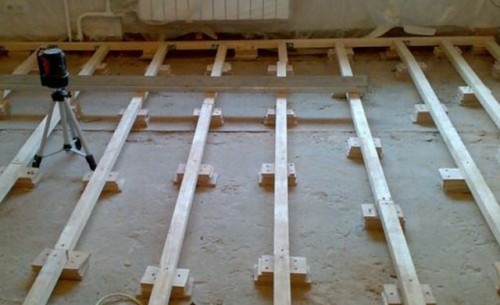
- After waterproofing, it is embarrassed by lag. Their size is 50 per 100 mm, and the step between them should be about 55 cm.
- Lags you need to align in terms of the level and attach to the base. If you allow the means, you can purchase adjustable lags that are easy to mount their own, without the help of specialists.
- The heat-insulating layer is stacked between the bars, and on top of vapor insulation materials.
- After that, you can start to retain the wooden floor itself. It should be mounted perpendicular to lagam in the direction of light from the window. From the wall to the first row there must be a gap of about 10 mm, which is needed to compensate for the expansion of wood when the temperature and humidity changes in the room. If this is not done, the floor can explode anywhere, most often in the middle.
- Then, by means of screws, bars are attached to lags. In order for the floor to look more aesthetic, the self-tapping screws should be screwed into the end at an angle of 45 degrees. After you can fix the rest of the boards. Stop the floor is best in checker.
- Next, proceed to grinding. Large drops between boards can be aligned with the electrolake. After that, take the grinding machine and make the surface perfectly smooth. Note that there is a lot of wood dust when grinding indoors. Therefore, you should drill the doors in advance, and wear personal protective equipment.
- Often, small cracks and pothy are found after grinding on the floor surface. They need to be sealed using a spacion mixture.
- After that, the putty should dry. After that, go through the surface again with shallow sandpaper. It remains in the room a wet cleaning, cover the floor with varnish or paint and install plinths.
Wooden floor design in soil
The easiest is the cold floor just lined up on a dry soil.
Order of work:
- You must first remove the soil-vegetable layer. It is important to remove the entire root system of plants so that only the soil remains.
- When it is done, the soil must be carefully tumped.
- Then the square falls asleep by sainted sand. If there is no sand, you can use slag or rubble instead.
- After that, the dumping pillow is tram. For the ramp, you can make a tool yourself. To do this, you will need a heavy sledgehammer and transverse bar. The bar is nailed as a handle to the upper surface of the sledge hammer.
- After the coupling, the pillow is covered with a new layer of fine-grained sand. For this purpose, the slag is still suitable. This layer will become the basis for mounting a frame of wooden bars. It is important that the backfilling was 2-3 times more powerful than the thickness of the boards, which are used as the basis.
- In the last layer of frustration it is necessary to immerse the lags. Their upper line should be on a par with the base plane, which is constructed. All materials before loading in the ground should be processed by antiseptics.
- The frequency of laying lag depends on the width of the floorboard. The process of the flooring device is usually completed with a flooring. Therefore, between lags, it is better to observe a step of about 55 cm.
To catch the floor, too broad boards cannot be used. The fact is that wood due to humidity will be exposed to deformation, and due to the wide size of the boards, the warping becomes more noticeable.
Warmed Paul Sort
The structural floor design is somewhat different from the one that has been described above. The bottom of the dug pit should first take the time, and then lay two layers of cement bags there as isolation. This is useful for backfilling a multilayer pillow. After that, a layer of crushed stone with a thickness of 9-10 cm is lined up. Crushed stone need to ravage and pour lime. After that, the rubberoid and fiberboard is littered from above. Next comes a layer of clay. The multi-layer insulation base left to pour concrete. When the solution freezes, you need to float the sand layer. Next lags and flooring.
New comments
Add a comment
To send a comment you need authorize.




I also want to say that I did Paul in this video!