Kitchen illumination: varieties and installation rules Lighting
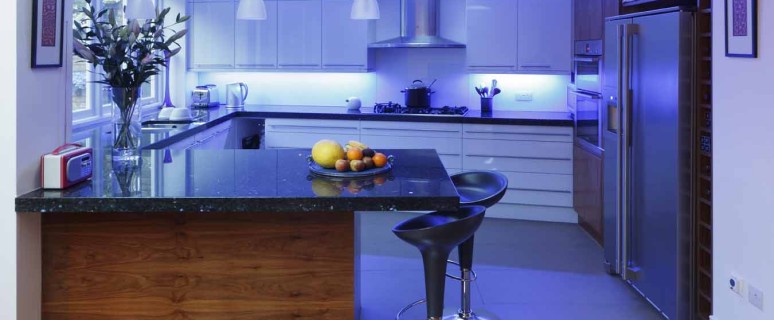
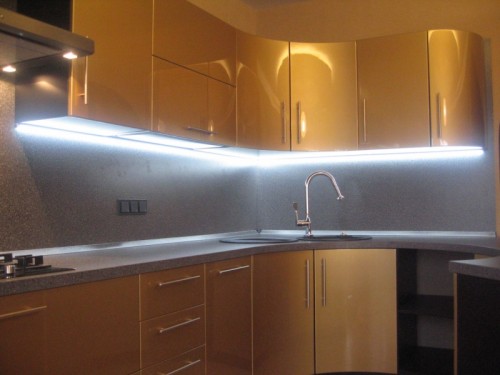
In any room, comfortable well-being is achieved due to the presence of proper lighting. This is especially true of the kitchen, where bad lighting devices will irritate its mistress when cooking delicious food. Now there are many ways to efficient room lighting. On how to make kitchen backlight, and it will be discussed in our article.
Content
Types of backlight
Modern kitchen lighting can be done with:
- luminescent lamps;
- point luminaires;
- lED tape.
Fluorescent lamps
Easy installation, acceptable cost, low energy consumption and solid operational period - all these qualities are inherent luminescent lamps. They can be used as a backlight under kitchen cabinets.
In particular, fluorescent lamps are an ideal decision for the lighting of the table top. They are attached to the bottom of the kitchen headset. The only thing that the problem can occur is the need to install an additional plank that protects the eyes from direct light streams.
Spotlights
Halogen lamps, which are an integral part of point lamps, are most suitable for human eye. They emit lighting, which according to the characteristics corresponds to the sunlight.
In order for the backlight of the kitchen area to be the most efficient, the placement of point luminaires is carried out in a step of 0.5 m throughout the table top.
Point lamps are:
- embedded;
- overhead.
Embedded lamps are only an additional element of lighting. This is explained by the fact that they will not create sufficient illumination of the working area even with the maximum amount of halogen lamps.
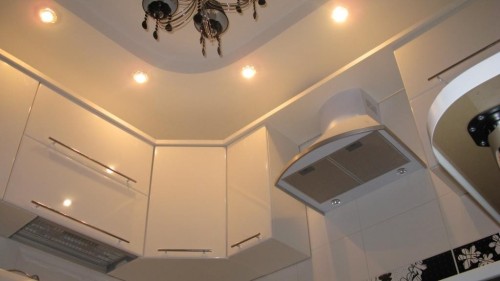
Another disadvantage of the built-in backlight of kitchen cabinets is the need for its design at the cooking stage. We will have to cut out the bottom of the cabinets. What will lead to a decrease in the useful area of \u200b\u200bthe headset. For this reason, in most cases, embedded dot luminaires are mounted on the kitchen ceiling.
More practical option are overhead lamps. Their installation is made on the bottom of the cabinets based on the illumination angle. The light emanating from the lamp should not get into the eyes.
The lack of point lighting elements is the need to lay additional electric wiring and installing an individual relay machine.
LED Strip Light
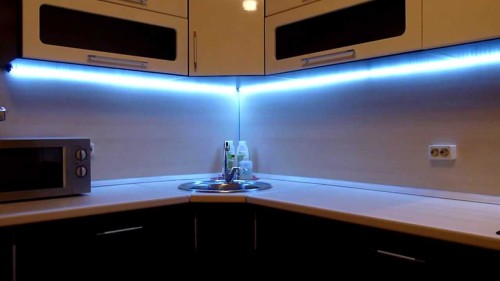
This type of kitchen headset is the most common in our day. The popularity of lighting is associated with the simplicity of installation work, the presence of a wide range of radiation and uniformity of light flows.
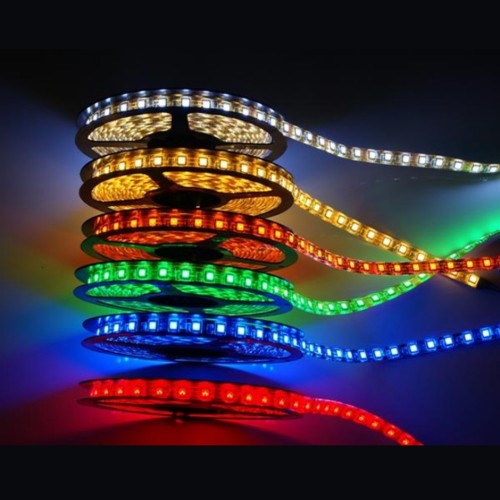
LEDs can be different colors. This makes it possible to change the backlight mode at your discretion. Thus, in addition to lighting, the LED ribbon performs another decorative function.
"Minus" of this lighting is the complementary installation of boxes that protect the tape from dirt and condensate. Controls (like point lights) are built-in and overhead. Naturally, in terms of replacing and servicing the tape, it is better to use false boxes.
Proper placement of lighting devices
Working surface
The main purpose of the backlight is a uniform feeding of light throughout the area of \u200b\u200bthe working area, where the countertop, washing and stove are located.
To illuminate the working area, take advantage of:
- lED ribbon, for reliable fixation of which two-way tape is used (if the tape is not self-adhesive);
- lED lamps, for attachment of which an aluminum LED profile is used.
Installation of lamps can be made on the wall (if there are no hinged cabinets above the tabletop). In this case, mobile flexible brackets are used to optimally adjust light flows. When the working surface is located in the central part of the kitchen, it is better to use suspended ceiling lights that gently scatter light.
When choosing a shade to illuminate the working surface, preference is better to give white color. This is explained by the fact that food when cooking should have a natural look. Such a color should be inherent in the kitchen apron with illumination.
Dinner Zone
The location by the window is the best option for the dining table. The presence of natural light will save energy consumption during the day. For lighting in the evening, you can use one or two ceiling luminaires, which are located at an altitude of 0.8-1 m from the table.
Pretty original and rational solution - placement over the table of suspended lamps, which have adjustable light streams and the height of the location. Only natural white light should come from lamps of medium power.
If you plan to use LED lamps, they will only act as additional lighting elements. In this case, a large chandelier should be hung over the dining table.
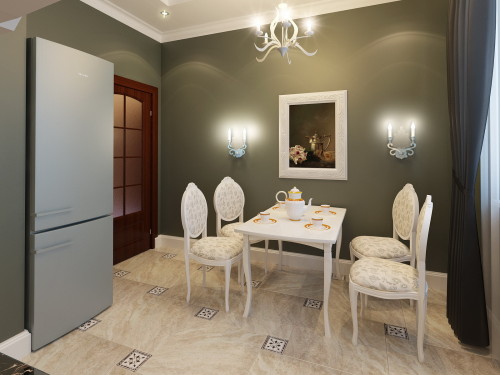
When the table is accommodated near the wall, the best light is achieved with the help of LED lamps or sconium with matte or transparent plates. They are fixed directly to the wall.
Decorative backlight
Using the backlight, you can decorate the room where much of time is carried out. LED ribbons, multicolored neon tubes or elongated fluorescent lamps decorated:
- stained glass windows and glass shelves;
- apron with 3D effect;
- lower part of the bedside tables and cabinets;
- eaves, niches, arches and doors;
- paintings and mirrors;
- glass table top;
- bar rack;
- separate elements of furniture (carved painting, columns, engraving).
In the original kitchen there will be lamps that are echoing with the themes of the room:
- bra, which in appearance looks like rounded brilliant teapots;
- suspended lighting devices in the form of forks and spoons, vegetables and fruits, inverted cups or wine bottles.
A stylish solution will be the creation of decorative floor illumination. For this purpose, only wear-resistant lamps that have thick protective glasses are used. They must withstand human weight and load from inadvertently fallen dishes.
Varieties of LED ribbons
Now the high-demand illumination from LEDs is in the greatest demand. The LED tape is a self-adhesive strip with LED bulbs. The main differences of the ribbons among themselves are in the amount and type of LEDs.
The number of LEDs in the ribbon happens:
- 30 pieces / 1 m²;
- 60 pieces / 1 m²;
- 120 pieces / 1 m²;
- 240 pieces / 1 m².
The more diodes, the brighter the lighting. This, of course, "plus". On the other hand, the maximum number of LEDs leads to an increase in electricity consumption.
By type, the LED kitchen illumination is divided into:
- SMD tape;
- RGB tape.
SMD tapes emit the light of one particular shade (white, green, blue) and there are two types:
- SMD 3028;
- SMD 5050.
The SMD 3028 LEDs consist of one crystal, SMD 5050 - from three. Naturally, the glow from SMD 5050 diodes is characterized by a greater brightness (approximately 2.5 times).
For the manufacture of RGB ribbons, 3 multi-colored crystals are used (in most cases blue, green and red), which can glow both in one color and alternately. If preference is given to white glow, then three crystals are included simultaneously. Included to modern RGB ribbons attached remote control.
It also pays attention to the water repellent properties of the tape. The moisture-resistant LED tape for the kitchen illumination has silicone protection. For the kitchen, it is necessary to purchase a tape with the level of moisture protection ІR 65. Only such material is able to withstand the effect of high temperature and steam near the plate.
Acquisition of LEDs
Before you sell the LED tape, you should decide on the type of illumination of all sections of the kitchen. The most common option in the number of LEDs is an option using 60 pieces / 1 m². If a sufficient amount of sunlight fall into the kitchen, there will be a tape with 30 LEDs per 1 m².
As for the content of crystals in the backlight, only the SMD 5050 tape is definitely suitable for the table top. The workplace is subject to maximum lighting. The SMD 3028 tape is more suitable for the lighting of shelves and decorative purposes.
After the option of highlighting the kitchen cabinets in the photo is selected, you can visit the electrotrod store. The sale of the LED tape is carried out in rolls, the length of which is 5 m. In addition to the tape, you should get a power unit, connecting elements and scotch.
Immediately checks for defects. On the ribbon should not be damage. Otherwise, it will negatively affect the high-quality functioning of the backlight. Be sure to match the voltage of the tape with the power supply.
After assembling all elements, the performance of LEDs is checked. With the right connection, the tape will light bright lights. It should be noted that the connection of the elements can be carried out both with the help of the soldering iron and using the connectors. Naturally, the soldering is much safer connectors.
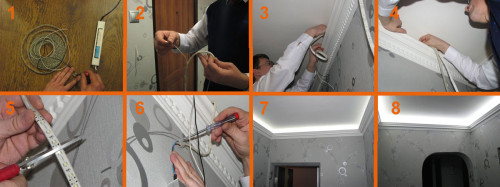
Mounting work
The device of illumination of the kitchen headset provides such actions:
- Roulette is measured by the required length of the tape. You need to add about 10% to the resulting indicator.
- With the help of the knife, the tape is clipped, and its end is broken by 10-15 mm.
- Electric cable soldered to bare contacts.
- Contacts are protected by a hood with a shrink tube.
- The outer side of the profile is covered with a scotch.
- A LED tape without protective film is placed on the inner side of the profile.
- Illumination is connected to the adapter. It serves as an energy converter from 220 V in 12 V for LEDs.
- By the output side of the adapter (designated "OUTPUT"), the tape is supplied to the input ("Input") - an electric wire with a fork.
- The surface on which the LEDs will be attached is degreasing and wipes dry.
- The LED tape is fixed with scotch or brackets on the surface with the creation of a gap between adjacent light bulbs.
- Plastic box, where protruding wires will be, mounted inside the furniture. Appropriate holes are made for cable in furniture.
- The entire cable is reduced to the power supply unit that connects to the switch.
When connecting the tape to the adapter, the polarity of cables should be taken into account. If the "+" LED tape is connected to the "-" adapter, then the backlight will not function.
Sometimes the LED tape is sold with the factory plug adapter (when you get all the bobbin with LEDs). In this case, you do not have to use the soldering iron. You just need to connect a plug with an electrical cable.
Useful advice
Creating backlight in the kitchen does not apply to hard work. It can be carried out by any person who has basic knowledge in the electrical sector.
A few more tips that will help produce high-quality installation of LED lighting in the kitchen:
- If there is a need to circumcise the tape, then this is done in certain places. In most cases, they are denoted by dashes.
- For soldering contacts applied rosin.
- Characteristics of the power supply and LED tape concerning the power of the elements must match. Otherwise, LEDs will last long.
- Connecting the power supply is performed simultaneously with the installation of dimmer and amplifiers, which are designed to adjust the brightness of the kitchen illumination.
- It is forbidden to carry out a direct connection of LEDs with an electrical network. This is fraught with the output of the backlight.
- When choosing a LED tape, preference is given to products that optimally meet the price-quality indicator. If you buy a cheap backlight, then it will not burn brightly. Dear LEDs are characterized by excessive overheating.
- The water-repellent properties of the kitchen illumination can be increased by its coating thermolam, which is designed for automotive engines.
Video about creating backlight in the kitchen:


