Installation of wiring in the apartment Lighting
Before leveling the walls and mount suspension ceilings, you need to perform electrical work in the apartment. Old electrical wiring of aluminum wires is not able to withstand load when connecting modern household appliances. Bad contacts and damaged isolation can cause fire. Wiring in the apartment can be replaced by its own subject to certain rules.
Content
Plan wiring apartment
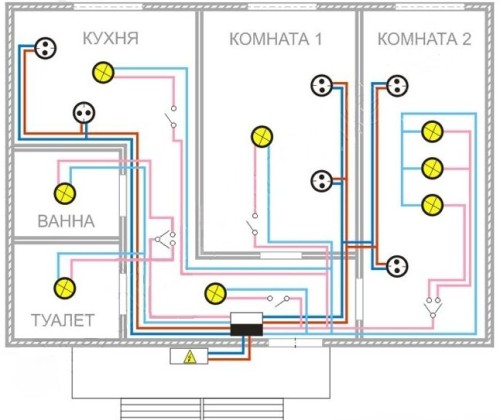
In order for all sockets and switches to be placed so that they are conveniently use, before starting work, the working circuit wiring scheme should be created. At the same time, such rules must be followed:
- the cable laying should be carried out only vertically or horizontally;
- cable twists must be performed at an angle of 90 degrees;
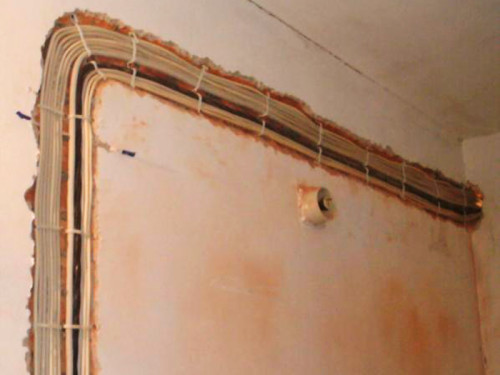
- cables should be located at a removal from no less than 150 mm;
- from window and door openings should be retreated at least 100 mm;
- mounting height of switches - within 800-900 mm from the floor level;
- the outlets are installed at an altitude of 150-200 mm from the floor, but deviations are possible (for example, to connect an air conditioner or boiler);
- outlets can be located in adjacent submersors on one wall in adjacent rooms;
- the height of the installation of switchboards is from 1500 to 1700 mm from the floor surface;
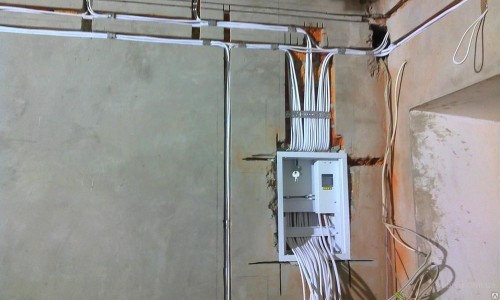
- effective protection should be provided (grounding, installation of the UDO).
The wiring diagram in the apartment must be performed on paper with "binding" of the main nodes (mounting boxes, sockets, etc.) to the nearest walls or other landmarks. After installing the scheme can be useful for repair work. It is also recommended to make photos of open wiring.
Tools and materials with which electricians are executed
To install wiring, you should have the following at your disposal:
- Cable products: For the lighting group, a cable is needed by a cross section of 1.5 mm², for a socket (power) group - 2.5 mm². For input to the apartment - 4 mm². We need cables 2 and 3-core. The amount is calculated using the wiring plan.
- Installation boxes, switches, sockets, peasants, electric boards, protection machines, voltage relays, RCD, corks (for connecting core), corrugation, plastic boxes.
- For the stroke of the walls, a strokesis or a grinder with a diamond circle is used.
- For cleaning isolation and circumcision, there will be a booths, there will be boosters for twisting - Passatii.
- NN indicator - to check the presence of voltage.
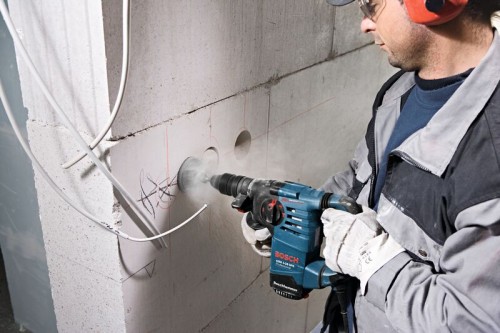
- Perforator, crown, nozzle in the form of a chisel and drill - for the device of the nest of conversion.
- Screwdrivers.
- Hammer.
- Building level.
- Marker.
- Alabaster - for the "fitting" of electrical wiring and peavering.
- Gypsum or cement dry plaster mix - for sealing the stroke.
IMPORTANT: only cables with copper monoxille in double isolation are used. Connection with aluminum and steel wires is not allowed!
Installation of wiring in the apartment: Basic Rules
Installation of electrical wiring in the apartment with your own hands can be performed subject to the following rules:
- the switch must break the phase wire;
- wire connections are carried out exclusively in the mounting (distribution) boxes;
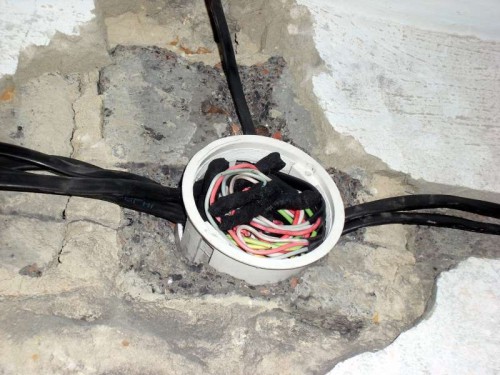
- household appliances with high power consumed are connected by separate cables with grounding wires, laid directly from the shield;
- the apartment electricity is divided into two groups: the rosette (power) is mounted by a three-in-room wire with a cross-section of 2.5 mm², and a group of lighting devices - a two-or three-core wire with 1.5 mm² veins.
Wiring in a panel house: Installation features
The wiring laying in the panel house is performed using special channels in wall and overlap stoves. Channels can be located not only vertically or horizontally, but also at an angle.
How to spend electrical wiring in this case (phased instruction).
- In order to be able to work with power tools, first of all, you should choose a place in the hallway and install the apartment electric shield. It is important to find out the location of the old wiring in advance.
- The niche is cut with a grinder, lay the introductory cable from the shield. At this stage, you will need help the electrician of the serving organization: it will connect a new cable to a common network.
- In the switchboard install an introductory machine and one outlet: while this is enough for further work. As a result, the old wiring will be disabled and the installation will be safe.
- For new postings, it is recommended to maximize existing channels. A new wiring is screwed to the "rod" (segment of wire for tightening additional wires) and slowly pulls out.
- In places setting outlets, switches and junction boxes leave a cable in the amount required for installation. For lighting devices with one bulb, a two-housing wire is used, for two light bulbs (or for ductile lighting) - three-core.
- If you need to install sockets or switches in new places, the walls are performed. For a single flat cable, enough one drank a depth of about 10 mm: the cable is laid in it and in several places "fucked" with alabaster solution.
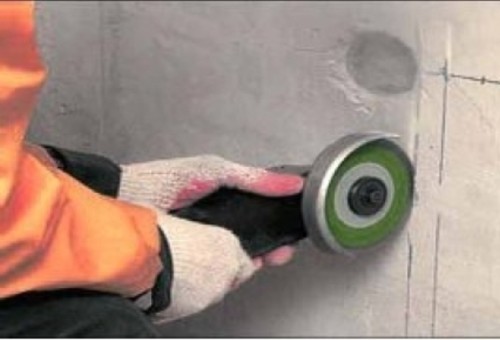
- Outmers are installed in the nests and also "fit".
- The bond compound is performed by twisting (the length of the twist must be at least 50 mm) with a mandatory subsequent soldering or with the help of adhesion and self-considerable devices. Twist isolated vinyl ribbon.
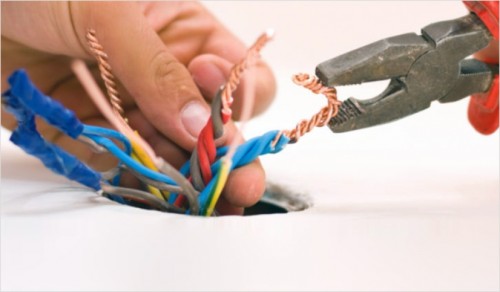
- Connect sockets, switches and lighting devices.
- Swiss the wires in the electrical panel, after which a test turning on the network is performed.
Tip: When drilling the nests for peasants, before applying the crown, it should be drilled holes on a predetermined circle. The middle part is climbed by the nozzle in the form of a chisel, after which the edges are treated with a crown. This will help to avoid premature destruction of the attack crown.
Wiring wiring in a brick house apartment
Modern installation of wiring is performed in a hidden way, which is important from the point of view of aesthetics. Work technology assumes the following sequence of actions.
- In accordance with the wallpaper on the walls, places of installation of sockets, peasants and junction boxes are noted. A marker or painting cord is applied in the direction of cable laying.
- The old wiring is turned off, the cable from the shield is paved to ensure the operation of the power tools.
- Installed and mounted electrical panel.
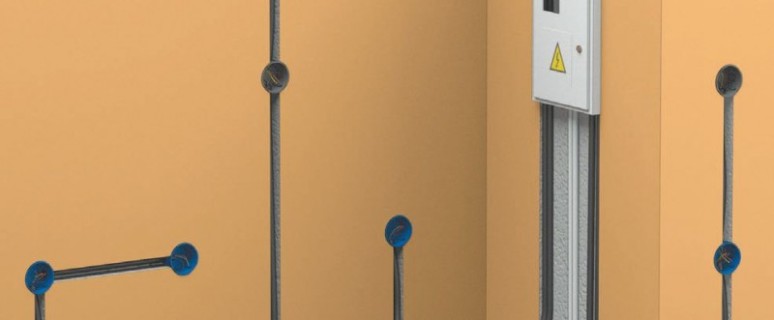
- The walls of the walls and the preparation of the sockets for switches, sockets and junction boxes is performed.
- Cable cables and are attached with the help of alabaster or plastic screeds. Fastening step - about half a meter. Near cable turns need extra fixation.
- Installed and fixed by alabaster mounting boxes and submersers.
- Isolation with cable lived in connecting places. The veins are twisted, they are disappeared or connected by self-samples.
- Installed sockets, switches, lighting devices are connected.
- The shutters are close to plastering.
- The laid wiring is connected to the automata installed in the electrical panel, the installation test is performed.
Rules for installation of apartment electrical panel
This work is performed in accordance with the rules of electrical engineering. It is necessary to prepare a fundamental scheme and attach it on the inside of the door of the electric panel. An explanatory note to the diagram should contain information about connected household appliances and other equipment. Installation is performed in the following order.
- If the electricity meter is located in the panel on the landing, the cable is connected by a common bipolar automatic protection, designed for an estimated load (for example, 32a).
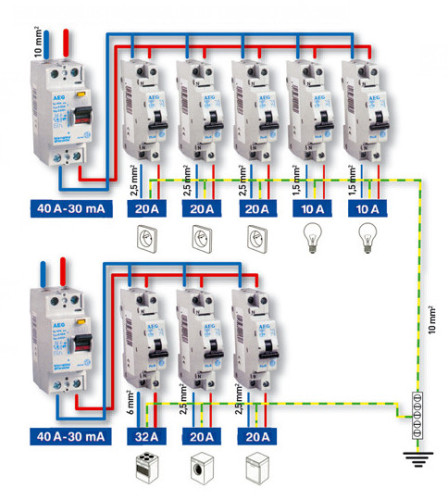
- Wires are separated by groups (socket and lighting) and are connected to two protection machines, respectively. All devices are attached to a special DIN rail.
- Installed and connects Uzo (protective shutdown device). The selection of the UDO - for the current cut-off (for example, for the children's room and bath - 1- mA) and a rated current, which must be less than the current circuit breaker.
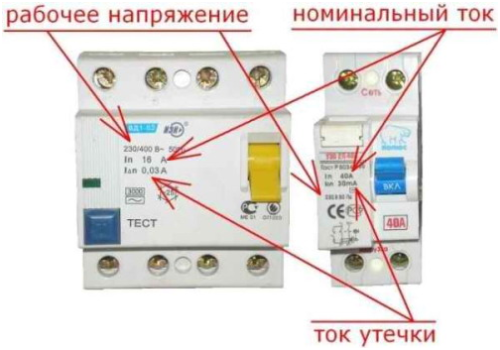
- Connect consumer cables to individual protection machines. Between the machines of one group for the supply of phase voltage, jumpers are installed.
- The zero wires after the differential automaton and the RCD are connected by a common clamping plate.
Tip: After the introductory automatic protection, it is recommended to connect voltage relays. This device will turn off the apartment electrical circuit in the case of a critical reduction in the voltage or his jump.
Compliance with these rules and recommendations will help correctly and safely replace wiring in the apartment. Additional information contains the video offered to your attention.


