Tree floor with do it yourself Floors
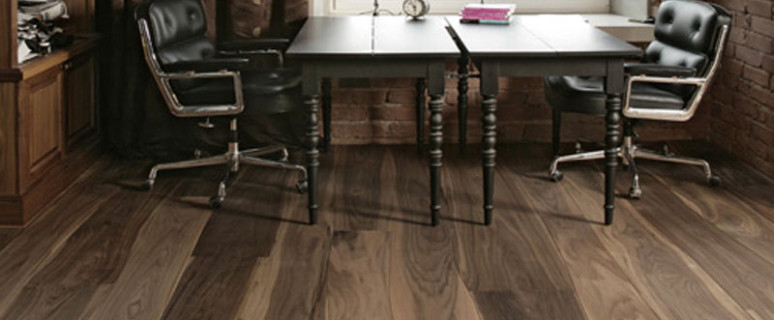
To date, wood is the most popular type of floor covering. After all, it is an environmentally friendly material with a pleasant appearance. But not every array of wood is suitable in the quality of the floor covering. Next, we will tell about the peculiarities of the choice and installation of wooden floors.
Content
Procedure for choosing a material
The first thing to be done is to choose high-quality wood from which the floor covering will be made. At the same time, factors such as climate, financial capabilities, alleged load, as well as the type of room, where the floor will be shaved.
If the building is small, then for this case it is best to choose wood of coniferous rocks. Such boards are relatively inexpensive, and they are distinguished by special resistance to wear and strength. Most often, when they paint use paint for floors of wood wear-resistant. Wood arrays of oak, alder and aspen, but they are more expensive than coniferous breeds, are still widely used.
When choosing wood, it is necessary to consider its qualitative characteristics. It is important that it was dry. If the board is raw, then it can lose the form over time. Do not use and excessively dry wood, because The likelihood of its deformation is great. Wood for the flooring is usually used cropped and tipped. It does not require additional processing.
Choosing the material, inspect its outer surface for the absence of splits, cracks and resin stains. Boards with defects should not be acquired even at a big discount. The material must be high quality and it is better to buy it with a margin. It is desirable that he was from one party. In this case, the likelihood of the fact that the boards were treated in the same conditions. As for the length of the board, it must be at least 2 meters.
Types of wood coatings
Various types of wooden coatings are used for flooring:
- For example, an array board.
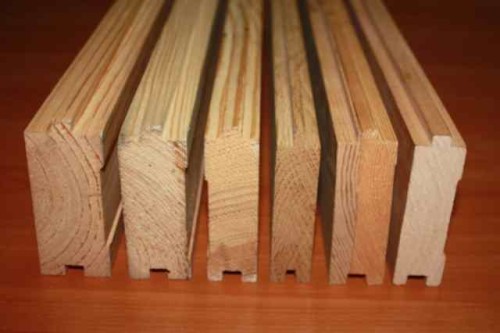
- Another option is a parquet bar with a length of 0.4-1.8 m and a thickness of 1.8-2.5 cm from an array with grooves on all parties.
- Pretty popular option - glued parquet board, dimensions and appearance of which are almost the same as a solid parquet plank. Operational qualities are also practically identical. In the process of manufacturing this material, at least three layers are glued under high pressure. The top layer, the thickness of which is 4-5 mm, is usually manufactured using valuable wood wood. The remaining two reservoirs are made of a less expensive array of wood. Due to this, glued boards are relatively inexpensive.
- Another option is parquet. It is a strip of a small size with sheets and grooves located on all sides.
Floor laying technique
There are several requirements that should be followed when laying the floor. So, lagows should be put in a strictly horizontal plane (if the tilt is not provided for by the project). One way or another, it is important that the boards are resistant. At the same time, wood is usually used as a material with a humidity of no more than 11%. When laying the floor below, the space remains, the ventilation should be provided.
It should also be considered, for what floor lags are stacked. So, for the first floor they are mounted on square columns of bricks with a side of 25 cm, i.e. It is impossible to put them on the naked soil. Moreover, for columns, it is best to take high-quality ceramic bricks interconnected by cement mortar. For painting, acrylic wood paint can be used.
For laying floor, the packer parquet is most often used, wooden planks. If the base is made of timber, then the flooring is usually made in two layers. The first as the basis laid the preparatory layer. After that, they make wooden flooring, which can be performed in one of two ways: styling on the ground or overlapping beams. Any of these techniques has advantages and disadvantages. When choosing a way of laying the flooring, not only personal preferences should be taken into account, but also the construction of the construction itself.
Before starting work, board, gaskets and lags need to be treated with substances that increase refractory. In addition, it is recommended to treat material with biopropite to protect against fungus and putrefactive bacteria.
In addition to the impregnation, it is necessary to make waterproofing. It can be performed from dense polyethylene. To combine hydro and noise insulation instead of polyethylene, it is possible to use foam. This material, among other things, will be protected from electromagnetic emissions.
Order of installation work
Preparation of the foundation
For bars can be used a variety of mounting options. Most often resort to "hidden" mount, in which the caps are deepened in the boards, after which the resulting gaps are closed with wooden corks. For fastenings in the grooves of tipped boards, you can use screws or nails. To compensate for the swelling of wood from moisture and the effects of temperature, there are about 0.9 cm between the ends and the walls. These gaps will then need to hide the plinths.
It is necessary to ensure the reliability of the lag fixation, especially when laying on the first floor to the "naked" soil. Equally important for sex from natural wood to provide high-quality insulation and waterproofing. For this purpose, the basis should be prepared.
Order of work:
- Preparation begins with the removal of the soil layer. You need to remove about 24 cm, and then this place is consistently poured a layer of rubble and fine river sand.
- Each of the reservoirs must be moisturized and carefully tumped.
- When the sand base is ready, you need to engage in the construction of several supports for supporting bars, the role of which brick columns will be performed. It is usually enough to make columns with a side of equal to two bricks and a height of 20-45 cm.
- Between themselves bricks are connected by a solution. In addition, all installed columns must be aligned in one level at the top edge. To do this, you can use a wooden level or stretched ropes.
- The columns must be located in such a way that at least two poles accounted for each laguy. For a long bar, you can put the third column in the middle.
- It is important that lags laid on the columns withstood the calculation load. This must be considered when setting distances between brick columns. When calculating it is recommended to adhere to the current construction norms and guests.
- On top of the pillars or beams are laid by a layer of waterproofing, which can be used rubberoid sheets. After that, the support bars themselves are mounted on wooden plates, which are fixed to the columns by means of anchor bolts. With the help of pads put under lags, it is necessary to make the upper face of each bar in the same plane.
- The first pair of supporting bars on opposite sides of the room is stacked. It is important to put them in one row, the flatness of which can be checked using a laser or bubble level. To do this, you can, in advance with the help of the same tool, remove the room at the perimeter on the walls of the level line and already on it when laying a lag to do alignment. It should be noted that the bubble level is less accurate and with such works. Often when it is used, it turns out not quite a sure result, which is better not allowed.
- After the installation of extreme bars in terms of the level between them, the fishing line is tensioning, which will help to establish the remaining lags. In order to put the draft flooring, the bars of a square section with a side of 50 mm are stuffed along the lower edge of the lag.
- If the lags are stacked for the floor on the first floor, then these bars should be tested along the lag, observing between them a step in 0.4-0.6 meters. For the floor above the first floor, supporting bars are usually stacked not on the poles, but on the beams. In this case, the mentioned boards are nourished to the sidewall of Lag at the bottom edge.
- For fixing bars, nails or self-tapping screws are usually used, and then the parts for draft flooring are cut from the uncircumcised board. Instead of a trimmed board, you can use suitable sheet material. Sliced \u200b\u200bparts are located between lags on previously fixed bars.
- It is necessary to insulate the floor. This requires material that transmits air and moisture, for example, minvat or basalt plates. It is desirable that he is still a soundproofer. The material selected for insulation cannot be trimmed - it should be inserted into the gaps tight.
- Between the heat insulator and the edge of the support bar, you need to leave the ventilation gap of about 2 cm. This must be taken into account when selecting the height of the heat insulator.
- Before putting the wooden floor, pair-waterproofing on the membrane. Each film strip is stacked by each other in 200 mm. The junctions should be skilled. A layer of vapor barrier is placed directly to lags.
Flooring coatings
After setting the lag, you can go directly by flooring floor from the wood array. In particular, it is necessary to cut the details for it. Moreover, it is necessary to cut them down so that the end joints passed on the middle of the support bars. Sheetworks are attached to their place with the help of self-tapping. When laying a draft layer, the bar is tightly pressed to each other, and for fixation they are nailed to the lag of a pair of nails. The fasteners are driven up so that each pair is directed to each other at a small angle. If the milled boards are mounted, then wedges and stops are used. In addition, tightening devices operating on the principle of the lever are used. Therefore, they are not enough just to press each other.
If nails use for fixation, their caps should enter the board to a depth of about 2 mm, and the resulting recesses are embarrassed. After applying paint, these places will not be noticeable. More reliable and at the same time a complex version of fixation is the fastening for long screws. To use them will have to make holes under the head of the fasteners.
In the case when the floors of the wood drinks are covered with floor paint or colorless varnish, the fasteners will be more difficult. There are only two options to make them - hidden or open mount (for special nails). In the second case, fasteners become elements of design, i.e. Part of the floor finish with wood. To do this, it is necessary that nails are located not only on the same line, but also with the same step.


