Tiled floor repair do it yourself Useful advice,Floors
Sometimes there may be a situation where it is necessary to replace the damaged tile or even a whole area of \u200b\u200bthe tiled floor. Such cases are possible, if for example, the installation of floor tiles was incorrectly performed, low-quality materials or a tile on the floor were used under the floor, which caused the destruction of individual tiles. Finally, the tile can simply wear out and lose its aesthetic look.
Content
In any case, there is nothing terrible in this. To bring the tile of tiled floor, it does not require major repairs with large investments of forces, means and patience. It is enough just to replace the new tiles that have come into disrepair, and you can do it with your own hands. However, in order not to repeat such operations in the future, due to unintentional errors, it is necessary to make it high quality.
Preparing for tile
Before proceeding to self-repair of the tiled floor, carefully examine this question from the point of view of the existing modern materials and technologies, as well as your ability to own the necessary tools and the availability of skills in various types of home repairs. As for the tool, there is an alternative to interchangeability (for example, if you do not have a stoveture, you can use a glass cutter or just a sharp nail), and the skills can be purchased having trained to suitable sections of the floor with materials from production.
Evaluation of the situation
First of all, it is necessary to assess the status of the tiled floor, your desires and opportunities in the proposed order:
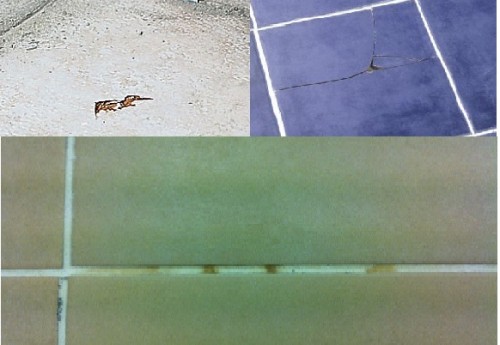
- Character of damage:
• chips and scratches on the surface of the tile or in the corners;
• tile dug;
• destruction (unattractive view or severe pollution) of intercutric seam (grouts);
• destruction (disorders of integrity) tiles;
• No damage (cosmetic replacement of seam or tile color). - Damage degree:
• small, medium or deep scratches or chip;
• Damage that may result in the dugout of neighboring tiles;
• No damage (cosmetic replacement of seam or tile color). - The magnitude of the damage site (the number of tiles of the tiles of the tiles):
• one tile;
• Several tiles;
• interlise seam (grout) near one or more tiles;
• Complete or partial cosmetic seam or tile color replacement. - Repair type:
• repair of scratches or chips of a separate tile;
• seam repair (replacement of grouts);
• Tile replacement;
• Cosmetic seam color replacement or tile;
• repair of the floor in the bathroom, in the kitchen or other room (everywhere there is its own characteristics);
• Repair of tiles on warm floors, on a wooden floor (technology may also differ). - Available resources for repair:
• There is a necessary number of replacement tiles (always try to acquire a tile with a margin for such cases);
• Insufficient number of replacement tiles (it will be necessary to clarify what the current price is on the tile and purchase, taking into account the item above, an additional amount);
• None in the presence of a replacement tile (consider the question of the designer solution to use another texture or purchase the same tile, if there is such on sale, given the required tile size);
• There is no need for a replacement tile for replacement (if it is very easy to try and the amount for replacing a small one, then you can carefully remove the tile from the sections under furniture or other places in sight, and replace it there with a suitable size).
Required tools and materials
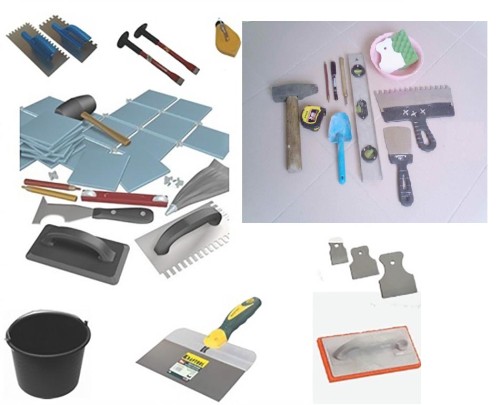
To independently repair the tiled floor, in addition to resources, did not take away and your additional efforts, prepare everything you need in advance in accordance with the following list:
- the required amount corresponding to the texture, tile;
- cement;
- water;
- capacities for the preparation of the required mixtures;
- a construction mixer or drill with a special nozzle for kneading mixture solutions (or a conventional rack to knead a small amount of compositions);
- special glue for tile or liquid nails;
- grout, soil and antiseptic;
- if necessary, paint for tile;
- if it is assumed to be sealing, silicone sealant;
- set of cross or SVP (tile alignment system);
- required metal and rubber spatulas, trowel;
- roulette, iron line, simple pencil and construction level;
- perforator;
- bulgarian or logs for cutting tiles;
- hammer;
- chisel, chisel, chisel and special nozzles on the punching punch for tile removal;
- fixtures for cutting tiles (glass cutter or tiles, grinder or jigsaw);
- the tool for removing the old grout from the interputric seams (Read more reviewed in the section of the repair of intercinecy seams);
- protective glasses and gloves.
Here is the maximum list of materials and tools for working with tiles when repairing a tiled floor. However, the list must be adjusted, taking into account the volume and type of upcoming work, as well as the available skills of circulation of various tools, the presence of the instruments themselves and the possibility of their interchangeability.
Performance of work on repairing
Repair of chips and scratches
In order to eliminate such a defect of the tile, like a chip or scratch, follow these steps:
- Prepare a solution from cement and water (use the prepared container and a mixture mixing device) for what:
• Use water only room temperature;
• The temperature in the room where the work is carried out, maintain in the range of 18-25 ° C;
• pouring into a container with water cement, stitch the mixture with a prepared device (so as not to be formed in the mixture of lumps, in no case do not pour water into the cement, and raw cement into water);
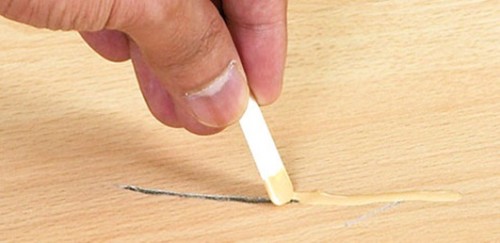
• Check the desired consistency of the mixture using a trowel or spatula (the mixture should not be dragged from the trin, and be plastic and kept on it). - Slip the solution into a crack or chip, using a small piece of soft tissue.
- Wait for the solution to dry and evaluate the result.
- If the crack or chip is not fully filled, repeat the operation.
- Remove the excess mixture from the tile surface.
- After reaching a complete filling with a fracture of a crack or chip, gently apply to a completely dry area of \u200b\u200bdamage to the corresponding color paint (try to avoid getting paints to the intact surface of the tile, otherwise the repair point will be noticeably).
Gluing a rugged tile
If the tile just dug off, but remained the whole, then return it to the required state by completing the following steps:
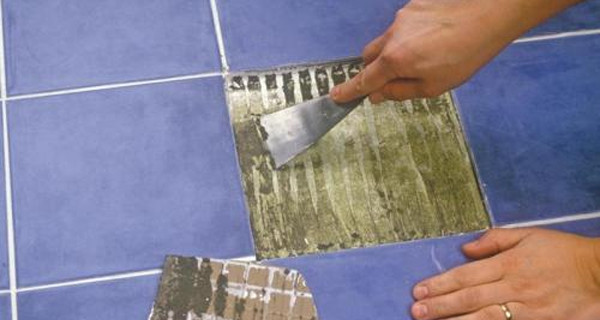
- Using the chisel and the iron spatula (or other suitable tool), free the tile from the facing on the edges of the tile from the facing and clean the seams (act neatly, trying not to damage the adjacent tiles, the technology is described in detail in the section Repair of intercinecy seams).
- Following the appropriate tool, remove the tiled tile.
- Clean the inner surface of the extracted tile from the remains of the old solution (use a spatula and a chisel, pre-dug the remains of the old solution in water).
- Make on cleaned from the old solution and grouts, repaired by the floor, the tie with a thickness of 1 mm.
- Declaring and loading the surface (you can additionally handle the surface with an antiseptic).
- Moisten the tile with water (if it is used not cement base, then leave the surface of the tile and the floor dry).
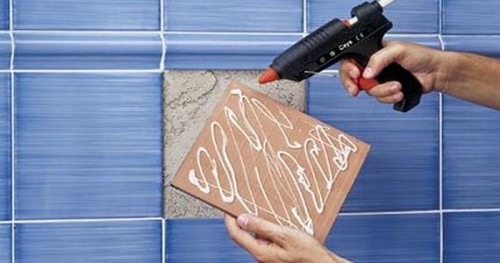
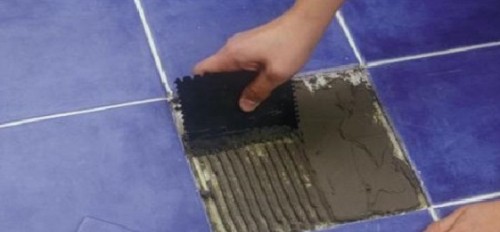
- Apply the tile glue to the inner surface of the tile on the package on the packaging (the glue layer is selected taking into account the alignment with the overall surface level of the floor) using a toothed spatula.
- Insert neatly tiles with adhesive makeup to the previous place and look good for even distribution under the glue tile.
- Check the level of the surface of the surface.
- Remove the excess glue around the perimeter of the glued tile.
- Fix the intercine gaps using cross or SVP.
- After 5 hours, remove the locking plastic crosses (or SVP) from the interputric seams.
- After the facing is completely dry (from 1 to 3 days), fill the gaps between the tiles prepared, according to the instructions on the packaging, grout (the process will be described in detail below in the section on the repair of intercinecy seams);
- If the tile changed in the bathroom or indoors where sealing sealing is necessary, then use silicone sealant for this. The sealant will protect the tile and the interc seam from the penetration of moisture that can harm them. In addition, the sealant is used to seal the slots between the cafeter and the bathroom or other plumbing.
If necessary, the liners of the adjacent sections with the tiled tile of the tiles are repeated.
Replacing the tile endaged
In many ways, the process of replacing the tile has become unusable to the new one, repeats the above-described tile above when crossing the tile. Therefore, in this part we consider only those actions that have not been described earlier. This action will remove damaged tiles. To do this correctly, use the following tips:
- You should not remove the old tile from the ends, otherwise you risk damage the neighboring.
- To safely remove the next tiles to remove the replacement, it is desirable to destroy the tile with a hammer in the central part.
- From the center of the tile to its edge, not in a hurry, small fragments, with the help of a chisel (chisel) and a hammer, continue further destruction of the tile.
- Blows on the surface of the tile. Apply the edge of the chisel or the chisel from above, and not form.
- To remove the remaining small particles and cement dust, use a vacuum cleaner.
Next, the actions to prepare the surface of the floor and the inner surface of the tile to gluhable are similar to those described earlier.
Repair or replacement of intercutric seam
The poor-quality material for grouting seams between the tiles, the violation of the application of the decomposition or preparation of the mixture, as well as the mechanical effects on the intercutter filling lead to its permission. In addition, dark spots of mold can appear in premises with high humidity on the seams.
To fix such flaws, you can partially or completely replace the old grout to the new one. To do this, follow these steps in order:
- Remove the old grout. Act very carefully and carefully not to damage the whole tile. Work with special care in the corners of the tile. The corners of the tile are very sensitive to mechanical exposure and can break. Use:
• Special tool - seam exchange (pass by seam, directing the blade directly and at an angle from both sides) or;
• any sharp tool, applying it as well as the seams (spatula, sewn, screwdriver, chisel, knife, etc.) or;
• Shabra (electric or manual);
• If the putty is very old and firmly holds between the tiles, a drill is suitable with a drill with a thickness (in diameter less than the distance between the tiles), a dremel with a special nozzle (engraver, boron machine, mini drill, etc. - group Right grinding machines), electric chisel or Bulgarian.
In addition, there are also non-mechanical ways:
• a solution of vinegar and water, in proportion 1: 2 - is used to softening the seams (applied with a soft cloth for at least 20 minutes);
• citric acid solution for removing latex or cement mixture;
• Special solvent to remove a mixture of epoxy composition (examine the instructions on its use very carefully so as not to damage the surface of the tile). - Clean the seams from dust and small particles with a vacuum cleaner.
- Process the purified interlocking space by an antiseptic agent.
- Prepare a grout mixture (knead the solution in proportions and by technology contained in the instructions for use on the grout packaging).
- Mix the seams with a small amount of water (use a sprayer or conventional painting brush).
- With the help of a rubber spatula, fill out the interlocking space.
- Remove the excess mixture from the tile surface using the same rubber spatula and sponge (or soft tissue).
- Eliminate unevenness in the seams with a sponge (soft tissue or wipes from the viscose), moistened in water.
- Wait for full grout drying.
- Evaluate the work and if necessary, then eliminate the shortcomings according to the technology described above.


