Heavy Panel Screed: Production Features Floors
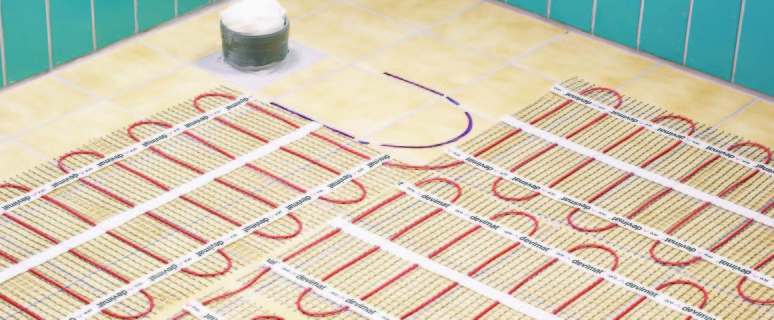
The warm floor is the heating system, which heats up the lowest part of the room. With this scenario, the floor in the house becomes warm, and it is nice to walk even in winter, during which wood or concrete surfaces have too low temperatures.
Content
To date, there is an electric, water and film heating system of floors. It is necessary to focus on the fact that such solutions all over the world have been used for a very long time, but recently the warm floors have become relevant and in Eastern Europe. In some countries, even sidewalks are insulated, so in the winter period on such roads it is impossible to detect ice or layer of snow. It is also a positive news and because in winter, much less people are injured on the roads than before.
In this material we will talk about creating a screed based on a warm floor. It should be borne in mind that this situation has a lot of subtleties that you need to know. Moreover, if we are talking about the warm field, the screed is created in several layers.
Also in this article you can learn about all the intricacies associated with the arrangement of the warm floor, as well as the difficulties that specialists are usually faced with.
Features of using a heated floor-based screed
The classic screed is a layer of concrete, with which we get smooth, durable and durable surface. Under normal conditions, the screed is created only for surface alignment, however, in the case of a warm floor, we have a slightly different situation. The thing is that under the layer of concrete, the heat source will act quite effectively. This is a much more practical option than arrangement of insulation under parquet or laminate. Also, the concrete screed is well hiding the heating system, whatever dimensions it also had, and whatever specificity has it.
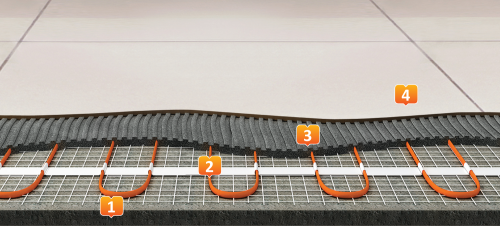
As for the heated floor layers directly, in this case we are talking about the following components:
- 1st layer. This layer lines the floor surface. Of course, any surface has small flaws that need to be removed. On the basis of the first layer, we fully align the surface, thereby creating a qualitative basis for installing floor heating. This, in turn, increases the effectiveness of the underfloor, which is very important. At the same time, it is necessary to pay attention to the fact that the screed can be very thin, but the surface of the surface must be fully provided.
- 2nd layer. In this case, we are talking about thermal insulation, which is stacked directly to the first black layer of the screed. This solution will significantly increase the efficiency of floor heating. In some cases, the layer of thermal insulation significantly increases the soundproofing of the room. Accordingly, a similar solution will significantly increase the comfort of housing, which is important.
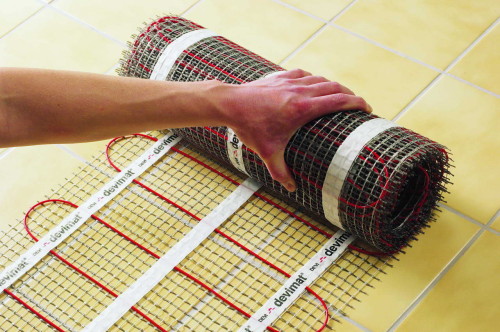
- 3rd layer. Top thermal insulation is laid cable, film or aqueous floors. Here the choice depends only on specific conditions as well as from the desire of the owners. Other elements that improve the characteristics of the surface can also be laid.
- 4th layer. This is a finish concrete screed, which becomes the final stage of the work. This layer should not be very thick, and at the same time you need to pay attention to the surface of the surface so that the heat is evenly distributed throughout the room. Obviously, uniform heating also depends on the correct arrangement of heated floor components. Accordingly, all the presented stages need to pay special attention.
You can easily find ready-made mixes that are available specifically for heating systems. For example, a good option is the M-150 grade cement, which is actively applied for more than one year. Of course, other variations of cement products can also be used, but they are quite likely to be less effective under presented conditions.
Also in this matter we will need PVA glue, which we use as a plasticizer. As for proportions, it will require 1 kg of glue to the standard cement bag.
Creating a rough screed
To prepare a high-quality concrete solution, we need to use one part of the cement and six parts of the dropout. Of course, you can replace with rubble. It should be borne in mind that the concrete should be plastic, otherwise the level of leveling will occur with great difficulties.
The thickness of the screed should be within 3-5 cm. Of course, it is possible to make a thicker layer, but there is no particular sense. As we have already spoken, the rough layer is necessary only to create a smooth surface for high-quality flooring of a warm floor. Accordingly, the only thing we need in this case is an ideal flat platform, which will evenly distribute heat all over the floor.
Heat insulation and black screed
After we created a draft screed, you should make sure that the surface is perfectly clean. No Sorink should be on the floor, otherwise the effectiveness of thermal insulation and heat source will be lower than the required level.
As for the thermal insulation, which is uniquely necessary to arrange after a draft screed, then it is often about the use of sufficiently thin materials. It can be polypropylene or a regular cork substrate. It is not necessary to think that in such a situation we will get simply chic thermal insulation, but in the winter period its presence will be felt.
The fastening of thermal insulation is often produced using a tape. It is necessary to provide complete motionability of the material, as well as the absence of at least small gaps between the heat-insulation bands.
If the electric warm floor is used, it is best to arrange a thin aluminum foil on the screed, which is often covered with a special protective layer.
Also at this stage it is necessary to establish a damping tape throughout the perimeter of the room. It is located on the wall and is necessary to prevent the negative effects of temperature drops on the warm floor. In addition, the damping tape has sound insulation properties, and also maintains heat into the home.
Installation of a warm floor
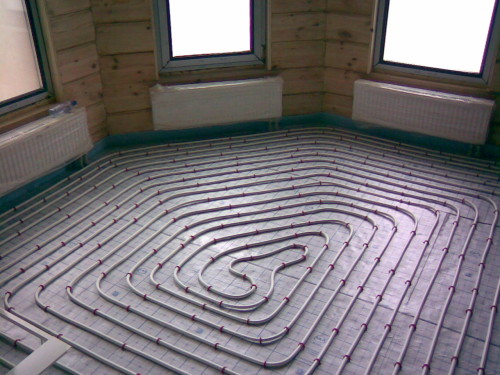
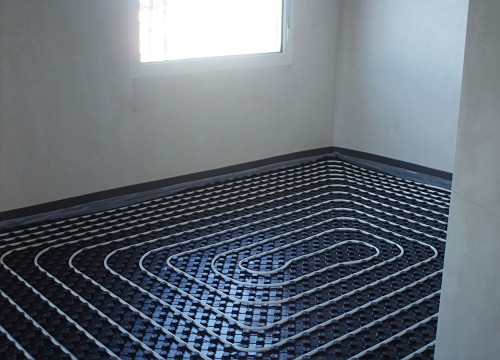
Now comes the most responsible moment of all the amount of work. Of course, we are talking directly about the installation of a warm floor. As already mentioned, warm floors are different, but most often the electric version is used at home. The water floor is often used, but there is no special difference between the principles of installation of systems. The warm floor consists of thin tubes, which are evenly located all over the perimeter of the floor at a distance of 10 to 30 cm. Much depends directly from the scale of the room. For example, if we have a small room, then for full-fledged floor heating, there are not so many resources.
To the attachment of the tubes also need to be treated with special responsibility. The thing is that at any time the elements of this system can shift, so the fastening is based on special fastening profiles. Accordingly, the profiles themselves are attached to the floor with the help of screws or dowels.
In the event that the installation of a warm floor occurs in the bathroom, it is necessary to create a ground. This is a really important point from which security may depend. Moreover, it is desirable to entrust grounding to those skilled in the art that will not only be installed, but also experience the safety of the security system. Grounding will also not hurt to equip in other rooms, where there is access to water.
Reinforcement metal mesh
Quite often, when creating warm floors, a metal grid is also used, which performs the role of reinforcement. The purpose of any reinforcement is to strengthen the design. In this case, we are talking about increasing the characteristics of the screeds created. In extreme situations from the grid, you can refuse, for example, if we have high-quality concrete. In other cases, it is better not to risk.
The grid itself can be fine, but cells must be relatively small. If several units of this product are used, their flashes should be laid so that there are no passages on the entire area of \u200b\u200bthe room. Accordingly, in such conditions, reinforcement will show itself only from the best side.
It is not necessary to use too large in size reinforcement. Some owners are trying to improve the strength of the concrete screed through the use of fittings or other large metal elements. However, in this case, we need to create a thin screed so that the heat is perfectly spread throughout the surface.
Some experts recommend using several reinforcement layers. Of course, this is a good solution in cases where concrete has no better quality. For example, reinforcement can be placed in front of pipes that are a warm floor, and after them. Such a step will not allow the screed to crack even due to severe temperature drops.
Basalt or metal fibers can be used as replacement of the metal grid. Recently, such reinforcement is still used more and mostly in small construction. Small size of fiber fibers provide excellent adhesion with concrete. Moreover, Fiber significantly increases the elasticity of the baton layer, and this, in turn, guarantees high durability of the screed. Among the strengths of the fibra can also be noted high strength and efficiency of use.
Creating a final screed
Before pouring the surface of the room with the last layer of concrete, it should be borne in mind that the heated floor system itself may have some flaws or significant malfunctions. Definitely, after creating a screed, fix them will be very difficult. Therefore, it is predefined to test the installation. If it is a warm floor based on water heating, then it should be traced that there are no leaks. Such testing is carried out for a whole day. The electrical system must also be checked for good condition.
Before you start creating a screed system, you need to turn off, since it is impossible to exclude any problems associated with the danger of high voltage. Turn on the warm floor will be possible only after the screed is completely dry.
It should also be borne in mind that during the pouring should be controlled indoor temperature. It is necessary to make a plus temperature in the room.
Creating a screed occurs by one coming. Accordingly, partial work is allowed only if we have a multi-level floor.
- This process begins with a further part of the room. The solution is evenly distributed over the entire area of \u200b\u200bthe room. You can also use metal beacons that will create a practically perfectly smooth surface.
- Uniform distribution of concrete should be carried out using the rule. This device must have impressive dimensions so that in a short time it was possible to align almost the entire area of \u200b\u200bthe room.
- Within a few days behind the tie, you need to hardly care. The thing is that the concrete can quickly dry and sweep up. It is impossible to admit this, so there is a need to periodically make the surface of the screed with water. When it becomes clear that the floor hardened, with moisture you can finish.
Next, you can safely activate the warm floor. If everything is done correctly, the system will work flawlessly. If the warm floor was included immediately after creating a screed, then with a high probability it will be unusable.
This process creates some inconvenience for the reason that in the case of even small errors it is possible to bring a warm floor to disrepair. However, no things that even a newcomer can cope with, there is no. Accordingly, it is only necessary to be attentive and responsibly refer to each stage of work.


