Technology installation of glass packs Window
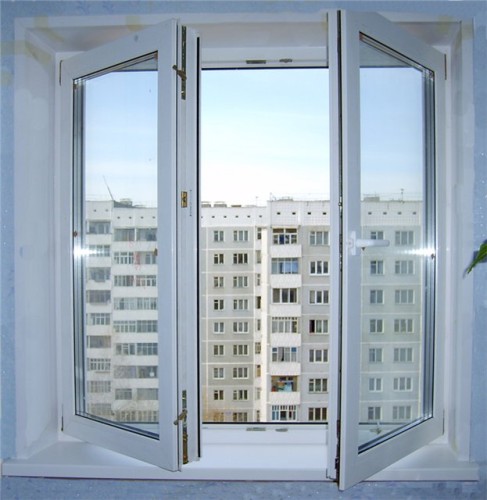
The invention of double-glazed windows has become a new phase of the development of window systems and one of the most optimal ways to make housing more comfortable. High-quality plastic windows are not only well held heat inside the house, but also prolong its operational time and improve the appearance of the building. In each city there are dozens and hundreds of firms offering installations for installation of double-glazed windows, but is it difficult to make this work independently? In this article we will tell in detail how the installation of plastic glass windows is occurring.
Content
Preparatory work
Any owner wants to save on construction or repair, but not in all cases should be given to this desire. If you have at least minimal construction experience, own the simplest tools like a perforator and water level, you want to get a new beneficial experience, which means you have every chance to perform the installation of double-glazed windows with your own hands. By and large, installation does not require specific technology or great efforts. First of all, you need to familiarize yourself with the standards set forth in GOST 23166-99 and GOST 30971-02, as well as take into account some nuances that will make a qualitative result. In this article, we will tell about the technology of installing Eurocon on GOST and share a couple of secrets, which are not mentioned in official documents.
The main advantage of plastic windows, which manufacturers do not mention, consists in simplicity of their installation. In fact, the factory setting of double-glazed windows takes into account all the necessary fasteners and enough details, so the masters remain just fixing the windows in a new place. But since at first you have to dismantle old windows, prepare window openings, and then fix new windows, the process seems time consuming and complex.
Important moment: Immediately it is worth a reservation that in the case of an independent installation of Eurocon you will encounter one problem - no manufacturer can give a guarantee on your products if you do not order its installation. That is, the performance characteristics and durability of double-glazed windows depends on the proper implementation of all stages of installation, and only official representatives of the manufacturer or a specialized firm can guarantee this, which gives a separate guarantee for their services. That is why, deciding to the independent installation of windows of glass windows, you consciously take risks and take full responsibility for the whole process.
Measures and calculations
So, if the cost of installing the glass package does not suit you and you decide to deal with your hands, first it is necessary to make measurements. Below we will tell you how to do it for openings without an exterior quarter. This means that a row of masonry goes through the opening of the outdoor part of the wall.
How to measure the window:
- Measure the space between the slopes on the inside - it will be the windows width.
- Measure the space between the windowsill and the upper end of the opening - the height of the window. Add to it the thickness of the future window sill.
- To find the width of the window, from the width of the opening, take the double size of the mounting gap. To find the height, from the height of the opening, take away the double mounted gap and the size of the undergraduate profile.
- Spend measurements in the center of the window opening and two sides to exclude the battery. In practice, perfectly smooth openings practically do not come across, so do not be afraid if there are inconsistencies in the calculations, but simply select the smallest of the results.
- Arm yourself with a plumb with high-quality axial centering and sharp tip to check the vertical evenness of the window opening. Then the construction level, check the horizontal windows. In case of deflection detection, fix the readings on paper in the form of drawing. To do this, first draw the perfect rectangle (what should be the window opening), and then indicate which way the horizontal or vertical is shifted.
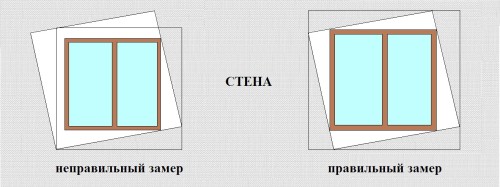
- Perform measurements of all openings separately. In this case, their width may be the most different, but everyone should be the height of everyone (from all the values \u200b\u200bto choose the smallest).
- Now you need to calculate the location of the window block. Double-glazed windows must be installed on 2/3 width of the wall from its inner side. If you are planning to warm the wall in the future, the window must be put a little further - this is a place for the mounting plane, that is, the outer plane of the glass.
- Measure outdoor salts. Usually, for this, it is only necessary to find out the length of the existing bet or to the width of the opening add about 5 cm on the bend. To find out which width should be a drop, by the distance from the mounting plane to the outer edge of the wall, add 3-4 cm on the protrusion and 5 cm on the bend. But here you should also take into account the future outdoor lining of the house - if you do external thermal insulation or, for example, close the walls with clapboard, consider the thickness of the materials used.
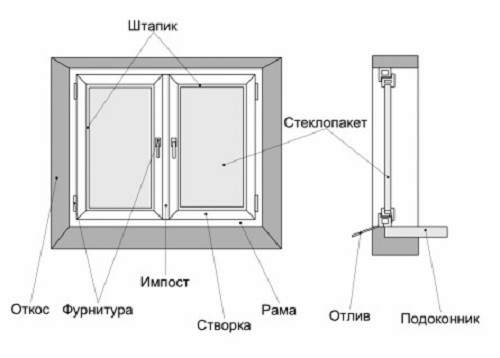
- Calculate the size of the future window sill - it should correspond to the distance from the inside of the wall to the mounting plane. Add to this digit the size of the departure and deduct the width of the future window frame (you can find it when ordering the glass unit). When calculating the departure, it should be borne in mind that the windowsill must close the battery at the bottom of only 1/3, but not completely. Otherwise, the cold air from the window will not be able to go down and warm up from the radiator, and the warm streams will not be able to rise up, and the microclimate in the room will break. This seemingly minor item can provoke the appearance of dampness, cold and general discomfort in the room. If the battery is in a deep niche in the wall, it is better to make ventilation holes in the windowsill, retreating 5-10 cm from the window.
- Sucks are better to measure after the installation of double-barakers, because until this point it is very difficult to calculate their width. The length of the slopes must correspond to the height of the window opening plus a small barrier stock.
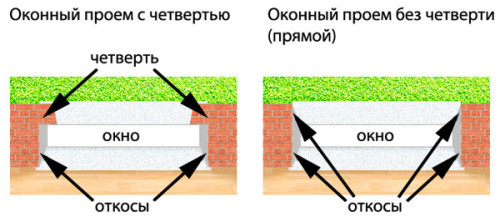
- In many brick houses, window openings have an external quarter, which must be considered when calculating. In this case, you need to measure all distances on the outside of the opening. To find the width of the window, add to the width between the quarters of 2.5-4 cm, and to find out the height, to the distance from the low tide to the top quarter, add 2.5-4 cm.
Important: Consider the thickness of the concrete screed under the windowsill and the tump. So you can order double-glazed windows with sufficient area and correctly calculate the window sills with lowers after installation.
If you are going to glazing the balcony, calculations should be made a little different. So, to find the width, find out the length of the parapet and take away from both sides of 6-7 cm for mounting the corner profile. To find out the height of the window, measure the length of the parapet to the top of the balcony and take away from the resulting value of 2.5-3 cm (for mounting gaps). Measurements of windows on the sides occur at the same scenario, only for a width should be taken from one side 6-7 cm on the angular profile, and on the other - 2.5-3 cm for the mounting space between the window and the wall.
If you are going to install double-glazed windows in a wooden house or an old brick building, it will be more convenient to beat off the slopes from all sides. This is explained by the fact that in often the size of the window opening significantly exceed the dimensions of the windows located in it, and in the intermediate space there is concrete, slags, insulation and other garbage, without which you can do and at the same time let it into the house more light.
Select window design
The price of the installation of double-barakers is made of two parts: measurements and installation itself. If you managed to end the first, then half the amount you have already saved. After all calculations, you can proceed to the choice of plastic windows. Select the manufacturer with great experience in the market, good reputation and acceptable prices, after which provide the drawing with measurements so that the specialist is adjusted and picked up the appropriate products. At this stage, you define the configuration of the future window - how many flaps will be in it, how they will open, what will be the fastening system of the glass package.
There are two Eurocon fastening schemes: through the frame in the mounting plane and with the help of support fittings, which is already attached to the window frame during production. The first method of fastening is more popular, because the installation is carried out faster, and the windows themselves weigh less, but at the same time you must first remove the glazed windows from the deaf outflows. Fastening with the help of fittings will be more convenient for installation with your own hands, because in this case you do not risk spoiling double-glazed windows and disrupt the tightness of the window design.
Installation of glass packs
When you delivered ordered windows, you can proceed to the preparation of the place. Up to this point, doing something meaningless - if you dismantle the old windows, then the wind will be blown in the empty window, moisture and garbage from the street. The only thing that can be done is waiting for delivery is to push all the furniture to the wall opposite from the window or make it out of the room, to cleanse the place in front of the window. On the floor and on the battery it is better to lay a dense construction polyethylene so that dust and garbage when dismantling old windows did not complicate your cleaning.
Preparation of profile
Start the installation follows from the preparation of the profile. Remove the glass windows and opening flaps from the window frame (method of mounting through the frame). To make it neatly, take the chisel and find the stroke, holding the double-glazed glass - a pair of light shocks, and it will slip out of the groove.
Useful advice: getting every stroke, be sure to mark it so that you do not confuse! Even in the conditions of modern production, they may differ slightly in size. If you still forgot to march the strokes, and one of them is hardly placed in the groove or not go there at all, do not score it there, but try another item. Otherwise, microscopic gaps can remain in the grooves, through which the window is depicted.
When you took out the strokes, slightly roll the frame so that the glass package himself would move away from her a little, and it could be picked up and remove it. Send the glass to the side and remove the plugs from the sash, after which you unscrew the bolts located under them. If the design has a flamp system, open the top to the top of the hook from the bottom canopy.
After all these actions, you will have only a frame with jumpers. From its inside throughout the perimeter, drill holes for anchor in the amount of 3-5 pcs. On the sides and 2-4 pcs. up and down. Use the metal drill, if you work with a plastic product (inside there is an amplifying metal insertion) or wood, if you mount a wooden structure. The diameter of the drill must correspond to the fastening anchors of 8-10 mm. If special "ears" are used for attachment, you can not disassemble the window, but simply screw these fastening screws to the frame.
Useful advice: This stage of work you will not find in any Guest - the coaching profile must be filled with the mounting foam. Even the professional glass stainless installers do not always perform this work, and meanwhile such a reception helps to eliminate the risk of cold bridges at the bottom of the window between the coaching profile and the frame. Fill out this void foam day before mounting the window so that it managed to harden. So you will significantly increase the thermal insulation characteristics of the glass package.
Dismantling of old windows
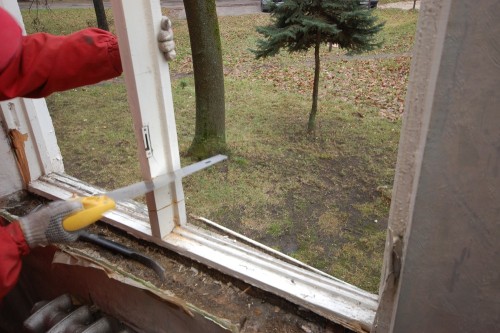
Disassemble the old windows rationally only on the day of the installation of double-glazed windows, so get ready to spend a few hours to work - you need to do everything promptly and clearly. Naturally, the weather on the street should be dry and whenever possible warm. Dismantling can be made in two ways: rude or delicately. If the old window frame is not useful to you in the future, it can be simply smashed and literally to recover from the opening. In this case, the sash is removed from the canopies either, together with fixing screws, after which they feed the frame at several points and remove the nail-cutter (lomic). If you want to put an old frame on the cottage or on the balcony, you will have to be careful and much longer.
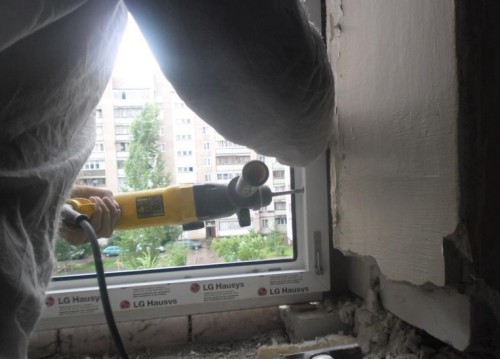
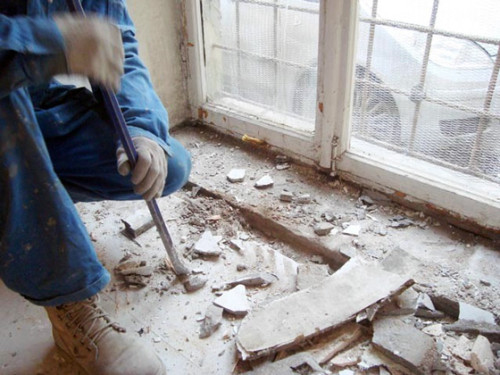
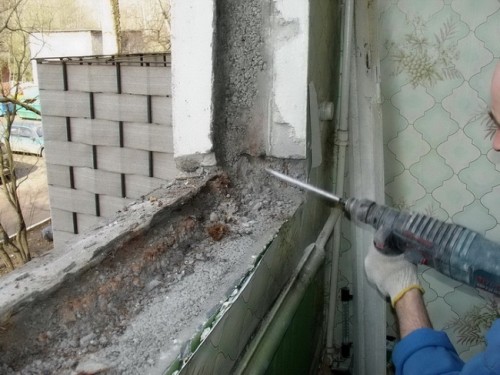
In any case, under the box, you will see the seal and thermal insulation material - they should also be removed. At the same time, with the help of a perforator with a scapular nozzle, it is necessary to fully or partially remove the slopes (it depends on how you form them). It remains only to remove the windowsill and beat off the perforator a concrete substrate under it. This work is very dusty and noisy, so it is better to prevent neighbors in advance about possible discomfort. Try to immediately put trash into the construction plastic packages, then to quickly take them out of the house and go to the "clean" stage of work.
When the window opening is released from the old construction, it must be cleaned of dirt and dust, after which it is covered with primer deep penetration. For this part of the work, many installers also forget, and the primer protects the material of the wall from the blotch, compacts it and promotes better fixation with the new window frame.
If you are working in a wooden house, then use the wood printing, and after drying it, put an extra layer of waterproofing material throughout the perimeter of the opening. If this is not done, the mounting foam will take moisture from wood and over time will lose its insulating properties. If the old house, the wooden opening is better to strengthen, inserting a window box from a solid wooden array into it.
Useful advice: For houses representing architectural value, it is unacceptable to change the size of window openings, and therefore it will not be able to insert a box of wood. In this case, it is possible to restore the enabarity of the opening by replacing the screed layer on the sides and at the bottom.
Detailed installation of double-glazed windows in the video below:
How to put double-glazed windows
Only after careful preparation you can finally go to the installation of plastic windows. This work compared to previous stages occupies quite a bit time.
Fiberglass installation technology:
- To launch the substrates from wooden bars or plastic on the lower part of the window opening (one can be ordered with eurocams). The substrates must be selected so that their upper edges are strictly horizontally in one plane, otherwise the window will be crookedly (use the construction level).
- Put the frame on the substrate. By the way, the lumps will remain under the window and will continue to protect the fastening anchor, because they can loosen and not cope with the weight of the structure.
- On the sides, lean the pegs closer to the upper part (if you drive in the center, the frame may bend) - they will hold the design vertical.
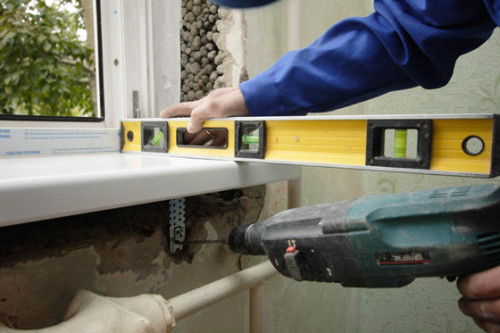
- Check the horizontal glass package with a building level.
- If the skews are detected, adjust the position of the substrate by making a good and aligning the horizontal window. In the same way, align it vertically using a plumb. Only after you see the absolute evenness of the window, you can attach it anchors.
- Drill with a drill nozzle drill in the window opening of the holes, pass through pre-drilled places in the frame. Experts recommend first to secure the lower part of the frame on both sides, and already take on the other points. Spin the anchor not to the end to be able to quickly adjust the position. First, put all the mounts, check the flatness of the window horizontally and vertically and only then tighten the anchor to the end, but not too tight, otherwise the frame may not withstand the pressure and deform.
- If you have chosen a window design with a fastening method to the reinforcement frame, with it the special "ears" must go with it - small metal plates sticking out one or both sides of the window, with holes for anchors. Put the "ears" so that they are as close as possible to the wall as far as possible, after which you drip the holes with a perforator. Otherwise, everything is the same - first attach the lower parts of the sidewall, then everything else. Do not forget to check the level and plumb to check even the next stage!
At the external edge of the window there is a removal in which it will be necessary to insert water-trapping. After its installation, fill all empties by mounting foam for better fixation. In some configurations for fastening, fastening screws (fasten to the frame).
Build window
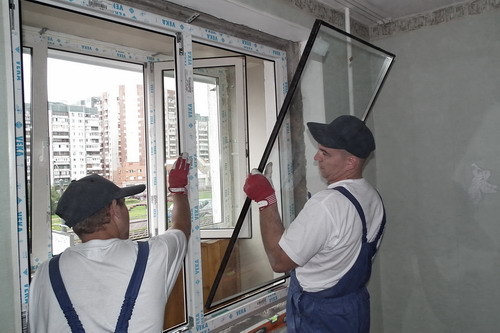
With the back assembly of the design, the marking of the stroke is very useful. Insert the double-glazed windows into the frame, the upper first, then the lower and side strokes. To latch them as it should, use the rubber hammer and do not knock too much. After complete assembly, check the operation of all swinging flaps - on positions at 45 ° and 90 °, the sash should not walk on its own, and in the closed position there should be no cracks.
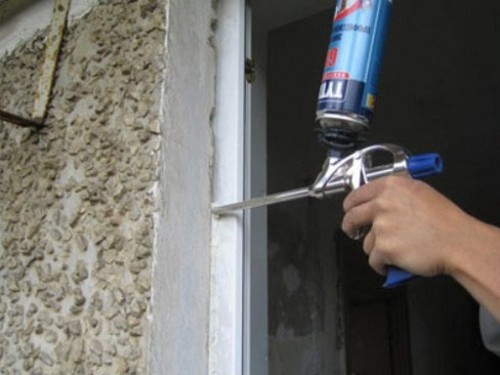
If everything is fine, you can seal emptiness between the window frame and opening. Use for this installation polyurethane foam - it is very dense, keeps warm well and serves a long time. So that in the future the windows do not stove, from the inside throughout the perimeter, in addition to Niza, make a special vapor barrier tape for double-glazed windows. From the outside of the window, glue the moisture-resistant membrane. At the lower inner edge of the window, glue the moisture-resistant self-keeper strip with a foil side (the foil should "look" into the room to reflect heat). After installing the window sill, the protective strip will not be visible. These products can be immediately ordered with windows, and do not save them better if you want to get a qualitative result and enjoy them for many years. Generate all strips inside and throw out the openings.
An important point: Polyurethane foam can only live in an excellent heat insulator only if it is necessary to protect it from the Sun and other atmospheric influences, so after installing the window, it is mandatory to take out the outer finish with the preliminary laying of at least the simplest waterproofing material. Correctly formed slopes also significantly prolong the life of the foam.
It remains only to install the windowsill. Cut him so that he carefully settled down under the frame and buried in the profile. The edges of the window sill must stick to 5-10 cm. Level Correct by pegs - there must be a small bias into the room to set the direction of cold air when carrying out. The emptiness under the windowsill should be filled with by mounting foam or cement-sandy solution, pre-screwing the screws from the inside of the frame in the center and at the edges.
Now you can get into the room and leave the windows alone for a day so that the foam is pretty grabbed. After the specified time, you can fully use the windows. The glazing of the balcony by eurobs is produced by the same principle, the only thing that may be needed in some cases is the amplification of the parapet. So, if you learned how much the installation of double-glazed windows is, and you didn't like this figure, you know how to make this work yourself.


