Laying of ceramic tiles on the floor: Tips Tile
Floor finishing when repairing an apartment or house is one of the most important stages. Successfully selected and laid outdoor coating can harmoniously fit into the interior of the room, adding it, and vice versa, laid nefple material can be ruined even perfectly renovated walls and ceiling. That is why the choice of flooring must be treated very weigly and responsibly. An ideal option can be a holistic project of the room in which the type, color, coverage texture will be determined.
Content
Recently, more and more designers and owners of premises prefer ceramic tiles when repairing the floor. A large selection of a variety of sizes of colors and tile textures made it one of the leaders among various types of floor coatings. On the advantages, disadvantages and options for laying ceramic tiles to the floor - hereinafter.
Advantages and disadvantages of ceramic floor
Like any other material, ceramic tile has its advantages and disadvantages. Among the first worth noting:
- Excellent performance. The ceramic coating is practically "unhappy" and can serve not one dozen years, while not losing its initial species. That is why this type of gender is used in places of high passability.
- Environmental purity. Unlike other types of flooring, such as linoleum or laminate, ceramic tile is absolutely harmless, as it is made of clay. When the temperature drops, it does not distinguish the substance harmful to the body.
- The possibility of correction of the draft floor. With the help of ceramic tiles, you can align small irregularities of the draft coating.
- Resistance to temperature and humidity drops. Ceramic tile perfectly transfers not only temperature rise, but also high humidity. Even in the case of a flood, this material will not lose its properties in contrast to the tree or vinyl.
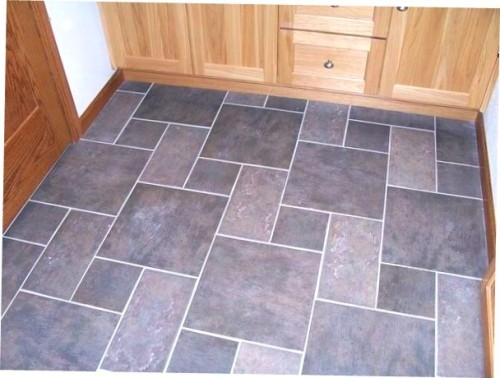
- Aesthetics and beauty. Recently, manufacturers offer tiles for every taste, from simple monochromatic models, to options with an ornament applied, and even painting. It simplifies the life of designers who have a wide selection of material to implement their ideas.
The disadvantages of the use of ceramic tiles as an outdoor coating should include the following:
- Pretty high cost. This applies both to the tile itself and to the materials for its laying.
- Natural "coldness" of material. From the ceramic coating literally "blows" cold, especially if under the floor unheated premises. Therefore, laying of ceramic tiles on a warm floor is often used.
- The complexity of laying. Unlike laminate or linoleum, the installation of the tile is the process of fairly long and requiring certain skills.
Laying ceramic tiles on the floor with their own hands. Surface preparation
The initial task when laying the sexual ceramic tile is the preparation of the surface. In various houses, the draft floor can be made of different materials: from concrete, and from wood. In some cases, the new layer of tile is placed on the old one. In various conditions, surface preparation is carried out in different ways:
- Laying tiles on concrete floor. The concrete layer must be cleaned from the construction trash and dust. To do this, you can use a vacuum cleaner with a disposable bag. Then it is necessary to inspect the floor for the presence of large irregularities. If they are, they must be aligned with a solution, after the drying of which the floor is ground.
- Laying tiles on an old layer. If a decision is made about laying the tile on top of the old, the latter is also necessary to prepare. The old tile is cleaned from garbage, a little knock the surface if it is very smooth. This will provide the best adhesion of glue with the surface and will be a key to the fact that the new tile will not "float." After ensuring the surface roughness, it is ground. If the old tile has too large irregularities, it is aligned using a leveling mixture.
- Laying ceramic tiles on wooden floor. This is the most difficult way. If the floors in the apartment are wooden, it is better to remove and pour the screed to which to lay a tile. However, in some cases it is impossible to make it. This is especially true of old houses with wooden floors. In this case, the floor is leveling up using a chipboard, then processed using alkali. After that, you can lay the tile.
Preparation of instruments
For laying tiles, a certain tool and auxiliary materials are needed:
- Spatula for applying glue to floor and tile surface. It has a gear edge for applying composure, which provides its best adhesion. It is also necessary to have a spatula for a set of a mixture of a bag in a tank for the knead.
- Mixing nozzle on a drill. It will help stir the glue solution for applying to the tile.
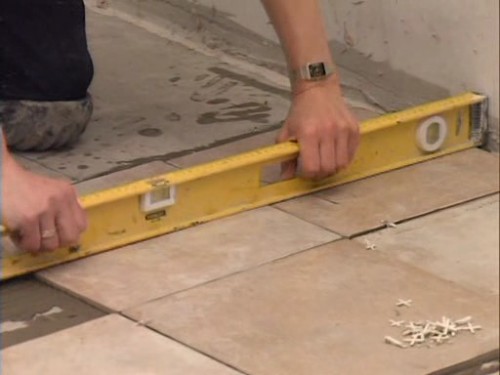
- Level. The building level is necessary to control the quality of laying. It is advisable to have several levels of different lengths so that it is more convenient to work.
- Rubber cizyanka. If there is a need to "catch up" to the tile to give it a more correct position, it is better not to do it with the help of a metal hammer, because you can damage the surface.
- Platekorez. Stovet breeding, as already understandable from the title, is necessary for the cut of the sex tile. Not all the tiles will turn out to cut the glass cutter, especially sexual, and cut it with a grinder at home - the pleasure is not pleasant. Therefore, the slab should be needed anyway.
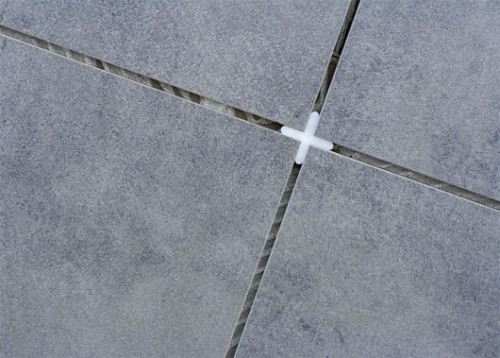
- Cross for seams. They are sold in sets of several dozen pieces, and it is thanks to them on the floor between the tiles will be even the same seam.
- Glue for tiles. It is better to use specialized mixtures such as Ceresit, etc. On the package with glue, and it is sold in bags of 25 kg, the approximate flow rate is indicated for 1 m 2 Styling. Knowing the area of \u200b\u200bthe room, you can calculate the exemplary need for procurement.
Laying ceramic tiles on the floor
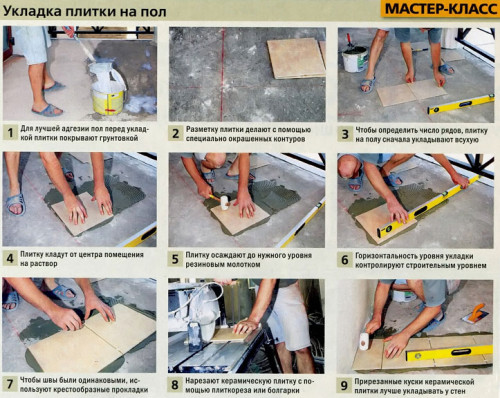
The main principle of successful laying of gender tiles is the presence of whole pieces in the visible area of \u200b\u200bthe room. Therefore, the cut tile should be as close as possible to the walls. In order to roughly estimate the laying scheme, you must decompose the tile on the floor in the desired order.
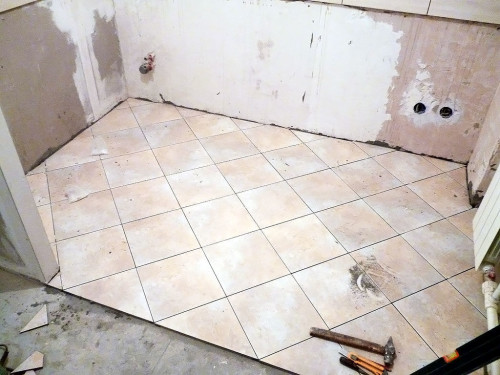
Two perpendicular lines should serve as a guideline for laying the tile. They are drawn on the floor using a special cord impregnated with blue (sometimes called cord or blue). The first line should be in the middle of the entrance to the room. The second is closer to the opposite wall to the entrance, perpendicular to the first line. The first row is stacked from their intersection. To begin with, the tile is mounted without a solution - the so-called "trial masonry".
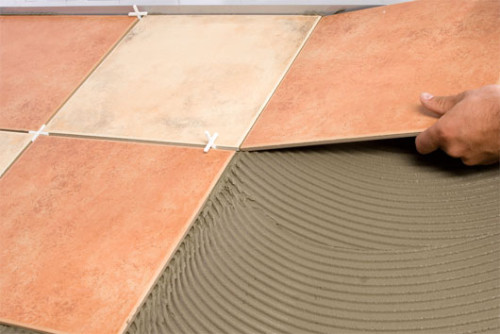
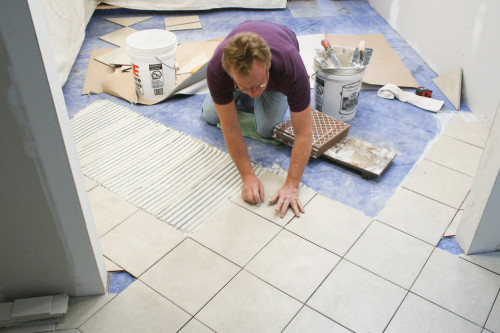
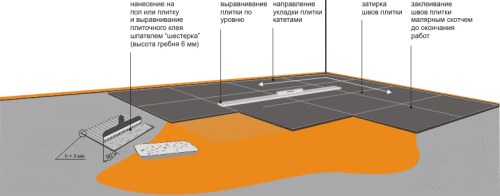
After the properties are finished, it is possible to start mounting on glue. It is prepared from a special dry mix and water. In the bucket, first poured some water, and then the mixture is added, constantly stirring the mixer. The glue must have a consistency of thick sour cream. When cooking it is necessary to remember that he dries very quickly. In any case, the dried solution cannot be reused, it is simply ejected. Therefore, if there is no confidence in our own forces or work is carried out for the first time, the glue must be prepared by small portions. After cooking glue, it is applied to the floor. The area of \u200b\u200bapplication should be sufficient to put 4-5 tiles.
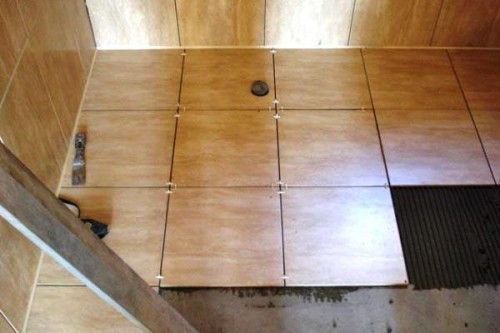
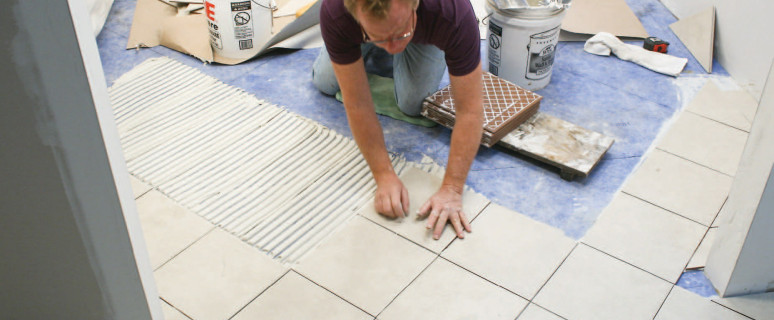
The glue is applied by a trowel and roll up with a special spatula. The glue is then applied to the tile. The tile is pressed to the installation site and levels in terms of level. Then the second tile is installed next to it and it is pressed and aligned. Now the level must be controlled not only a separate tile, but also a few so that they are all in one level. If the level does not match, the tile is neatly tapping with a rubber sledge hammer. There are crosses between them that the seams are the same thickness. The laying is carried out by rows, constantly controlling the smooth position of each of them relative to the lines.
After laying, it is necessary to remove the crosses until the solution is free, then it will be problematic. The solidification of the solution occurs within 24 hours. At this time, it is categorically forbidden to walk along the tile, so as not to disturb its position.
The extreme rows are trimmed by wall configuration. Conditions are made using stoveturis. It is especially difficult to make curly cuts in the places of jacks of tiles with a wall, for example, at the place of exit of the floor of heating. To do this, an adhesive tape is pasted on the surface of the tile on the surface of the tile, which is designed to prevent cracking. Then, with the help of a special drill with a tip of tungsten carbide on an arc, through holes are made. Then the desired piece is bought with the help of pliers.
After the solution is freezing, you can proceed to the grout of the seams. For this, a special mixture is used. Modern mixtures for grouting seams have in their composition, thanks to which it is easy to choose a grout under the color of the tile. Like glue, grout is divorced by water. It is applied on the seams between the tile using the rubber spatula. In order for the grout to be easier, the seams are better won with a damp cloth. After applying the tile must be wiped from the residues of the mixture.


