
Rack ceiling in the bathroom do it yourself Ceilings
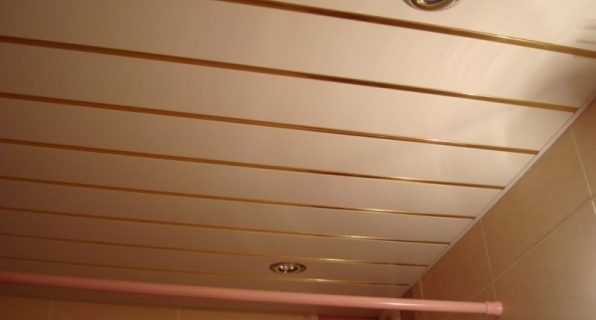
Initially, we were heard about the cutting ceilings as early as the 90s, however, these designs and today are quite popular. As it is clear from the title, the basis of these ceilings is thin rails, which for uniform laying form a flat surface. Use most often plastic aluminum and galvanized rails. Thanks to the special laying technology in a niche under these ceilings, you can hide all irregularities and other surface defects. In addition, such a suspension design is installed quite simple, so even a person who has not been engaged in such work can be installed with their own hands. Next, we will describe in detail how you can perform the installation of a roll ceiling in the bathroom with your own hands, as well as about the characteristics of such coatings.
Content
Characteristics of rush ceilings
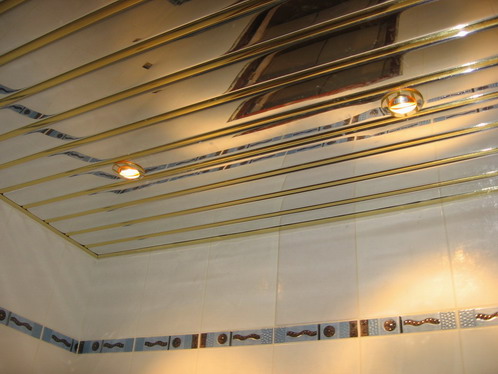
Ceiling ceilings consist of several key elements, among which - suspended frame and facing rails. Of all the existing species of the rails (galvanized, plastic, aluminum) when installing the rush ceiling in the bathroom with their own hands, plastic panels are most often used. They are suitable due to their good performance characteristics, because, as you know, the bathroom is a room where an increased humidity is always present (at the level of 60-70%). The designs of plastic weigh a little, so it is not necessary to equip a massive frame for their installation. In addition, unlike zinc panels, they are not afraid of corrosion.
In addition to plastic, the aluminum railings can be considered a good option for bathrooms. They are not afraid of corrosion and elevated humidity.
There are two types of rush ceilings:
- Closed. Such rails are mounted on a metal frame, and the spaces between them are closed with decorative inserts. The result is a one-piece design without seams and gaps.
- Open. The rails of this type are manufactured according to special technology, as a result of which the gaps are not formed during installation. Open ceilings due to the lack of decorative inserts installed at the joints of the rails, have good ventilation. This is especially important when installing a rush ceiling with your own hands in rooms with high levels of humidity.
The material from which the ceiling rails are made is small, therefore there is no need for the installation of such surfaces in the construction of a massive metal frame. And due to the fact that the planks have a small width, you can build a ceiling of any shape and size, for example, to mount bends and bulges on the surface.
Completing elements of the crotch ceiling
In order to equip the cam ceiling in the bathroom with their own hands, you need to know from which elements the suspension design consists. It is worth saying that all the structural elements of the rush ceilings are pretty durable and reliable. Such operational characteristics are available due to the fact that the rails are treated with dust and moisture-repellent coating, and the framework elements have a non-combustible basis. If there are non-standard sizes of the bathroom, the panel for cladding the ceiling can be ordered by an individual sketch.
The main component elements of such a ceiling are:
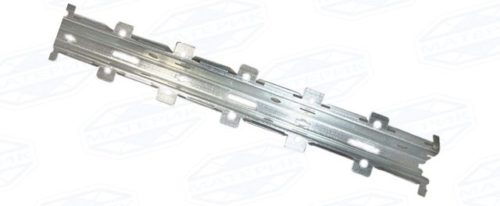
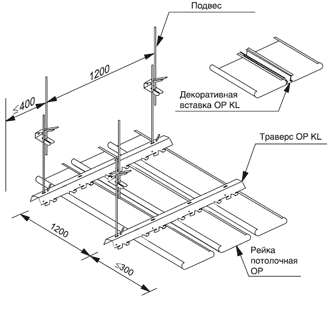
- Stinger. This is the name of the special planks, the sides of which are the grooves. They are intended for fastening protrusions of facing rails. Stingers are made of different sizes, thanks to which it is possible to choose them under various dimensions of ceiling plates. Due to the convenience of fixing with the help of stingers, the cam ceiling can, if necessary, can be disassembled and rebuilt in a short time.
- Suspension. Designed for fixing the suspension design. Prevent its displacement and deformation. They have different configurations, can be equipped with knitting knitting or springs. Thanks to its design, it allows you to adjust the height of the ceiling. In the formed niche between the ceiling and the surface of the rails in the future, electric wires are paved and the lighting is carried out.
- Profiles. Used for mounting frame. Distinguish guides and intermediate profiles. Most often they are made from aluminum.
- Reiki for frame facing. Most often there are galvanized, plastic, aluminum. May have a smooth or relief coating. The width of the panel is made from 5 to 25 cm. In length, they can reach 8-10 m.

There are some rules to choose the size of the slats for the ceiling:
- The average dimensions of the slats are racks of 4 meters long and 10 cm wide. The remaining dimensions of products are found quite rare. Therefore, if you need to buy a material of non-standard form, you should use the services of companies that carry out the cuts using a professional cutting machine.
- In order to correctly select the size of the ceiling planks and their number, you can use the special software - the calculator for counting the number of rush ceiling planks. To do this, the program sufficiently put the correct ceiling sizes in your bathroom.
Rush ceilings: Montage do it yourself
Preparatory work
Next, we will tell about how the installation of the rush ceiling is carried out with their own hands. Instructions for the implementation of preparatory work:
- First of all, we carry out the necessary calculations. Calculate the dimensions of the working surface. Determine the area of \u200b\u200bthe bathroom. Calculate the amount of material required for cladding the ceiling.
- Then make up a plan-project of the future design. Here it is necessary to designate the distance between the surface of the ceiling and a rush coating. In the resulting niche, the electrical wires are usually placed, they are laid by ventilation channels, etc. The dimensions of the niche should be calculated so that lighting devices can fit in its cavity. Usually for suspended luminaires, a distance from the ceiling to the ceiling coating is not less than 14 cm. If the dimensions are small, then the niche can be made smaller.
- Next prepare the working surface. The ceiling is cleaned of dust, dirt, residues of the previous coating. Then the surface must be thoroughly align. This will require a starting putty. If the suspension design in the ceiling is large, then the working surface is not necessarily align, since all defects will be hidden in the thickness of the niches.
- Then make markup. The initial markup point is the most even part of the surface. Next, there are smooth parallel lines. In the future, Stingers will be installed on them. Be sure to schedule not only areas where the ceiling frame will be located, then the points in which the lighting devices will be placed.
Next, go directly to the installation of the rush ceiling in the bathroom with your own hands.
Mounting frame and facing
To perform work, we need the following tools:
- Roulette.
- Scissors.
- Drill.
- Screwdriver.
- Passatia.
- Profiles.
- Ceiling rails.
- Fastening elements.
We will be erected by the ceiling lamp. It is nothing but a framework on which the basic ceiling coating is mounted. The main materials for mounting the ceiling frame are:
- wooden bar;
- metallic profile;
- plastic guides.
The choice of materials for installation depends on several factors:
- climatic conditions of the room in which the installation is made;
- form and material of the finish coating;
- the degree of irregularity of the ceiling;
- approximate estimate of repair.
For the bathroom, we will build a metallic profile crate. This type of frame is the most popular at mounting the ceiling designs in the rooms, where there is an increased level of humidity. The advantages of metal profiles are:
- low weight design with high strength;
- ease and ease of installation;
- the possibility of building multi-level ceilings and structures of various forms;
- the ability to lower the ceiling to any height;
- infertility exposure to moisture.
The disadvantages of this type of crate practically does not exist, so it has become quite high popularity among builders.
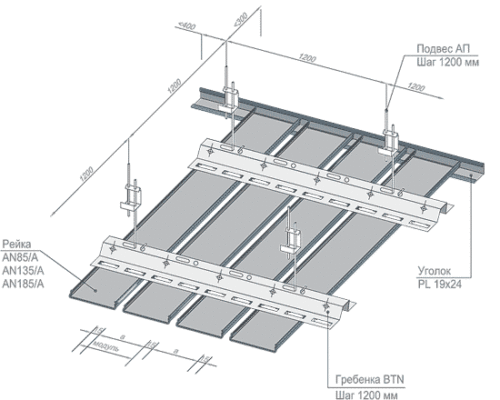
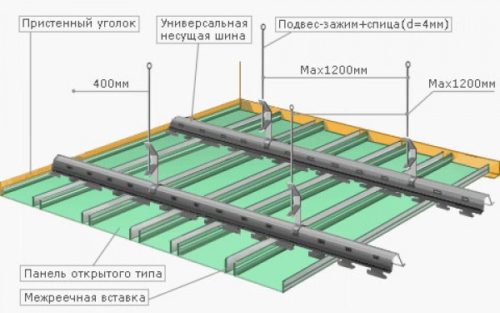
The order of work on the construction of a frame:
- Installation of crates made of metal profiles begins with a sketch on paper.
- Then we denote the label on the wall, at the height of which will be the ceiling. And with the help of the levels of the label along the perimeter of the room.
- Then install the profile UD profile on the perimeter, secure it with a dowel with a step of 0.5 meters.
- When the bypass profile is installed, we begin the construction of the internal crate using the CD profile. It is installed perpendicular to the installation of the main panels.
- The profile installation step depends on the ceiling material. If you plan to install plastic panels, then the profiles can not be installed a lot, but on the plasterboard ceiling, there must be more. For a start, we insert both end of the profile in the rubbish profile, then the main overlap of the ceiling is secured by metal suspensions, set a profile by level and secure to the suspension. The suspensions are set at the rate of 1 piece per 1 meter profile.
- If plasterboard sheets or fiberboard plates are mounted on the crate, the additional profiles perpendicular to the main one will be mounted. To do this, you can use a special fastening or trimming UD profile attached to the end of the main profiles.
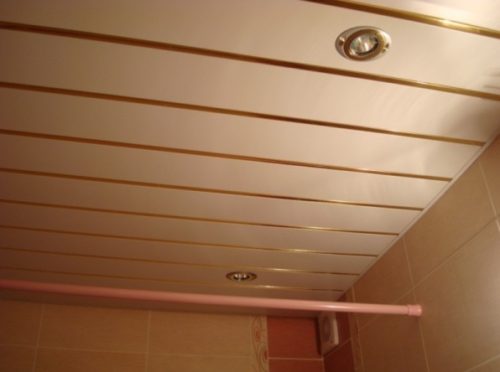
Next set the facing panels. Stacking the rails start from the wall. Then we are moving to the center of the ceiling. Reiki put the end to each other. With non-standard sizes of the bathroom, the plank is cut. There should be a 3 mm gap near the used corner. After the planks are installed, the lighting devices are mounted.
Wheel Ceiling With Your Hands: Video
You can see how the installation of the rush ceiling is performed with your own hands on the video.


